Easily mistaken as Unagi (日本鰻), Anago is another eel commonly eaten in Japan with the main difference being that Anago lives in the sea their entire lives while Unagi only returns to the sea to spawn and lives predominantly in freshwater. Almost all Anago is caught wild in the sea as their natural population levels are still extremely strong. Unagi on the other hand, is now almost exclusively farmed, with most natural populations being in an abysmal state. This was also only made possible a couple of years ago when the technology to breed Unagi artificially was developed.
Tastewise, Anago has a far stronger fishy taste compared to Unagi whilst having a much more delicate fluffy texture with a noticeably lack of fat. Unagi on the other hand has much more fat with a bolder less fishy texture. This taste difference, combined with its scarcity, makes Unagi far more expensive than Anago, sometimes up to 10 times more expensive per eel. This means that Anago provides a better deal for your money in terms of value, and was what I practiced on when learning to fillet eels before moving on to Unagi.
The low fat content of Anago also influences its preparation method. The high fat content of Unagi makes it suitable for grilling over a charcoal fire, a process that would ruin the delicate texture of Anago. Instead, Anago is typically simmer or tempura-ed, both processes with gives it a fluffy texture. It is possible to grill Anago, but it would mean that the duration of pre-steaming or pre-boiling of the Anago would need to be reduced (from 25 to 15 minutes).
The fluffiness of Anago is actually influenced by its freshness and the method used to dispatch it. Cooking Anago that isn’t fresh or not dispatched properly will result in a tough texture due to the contraction of muscles due to the onset of rigor mortis. If killed using the ikejime method, the onset of rigor mortis is delayed, which results in a fluffy flesh texture when simmered. This also explains why Anago left overnight before cooking also results in a hard texture, as the ikejime method only delays rigor mortis up to a certain point. All this actually makes Anago the optimal candidate to showcase the ikejime technique.
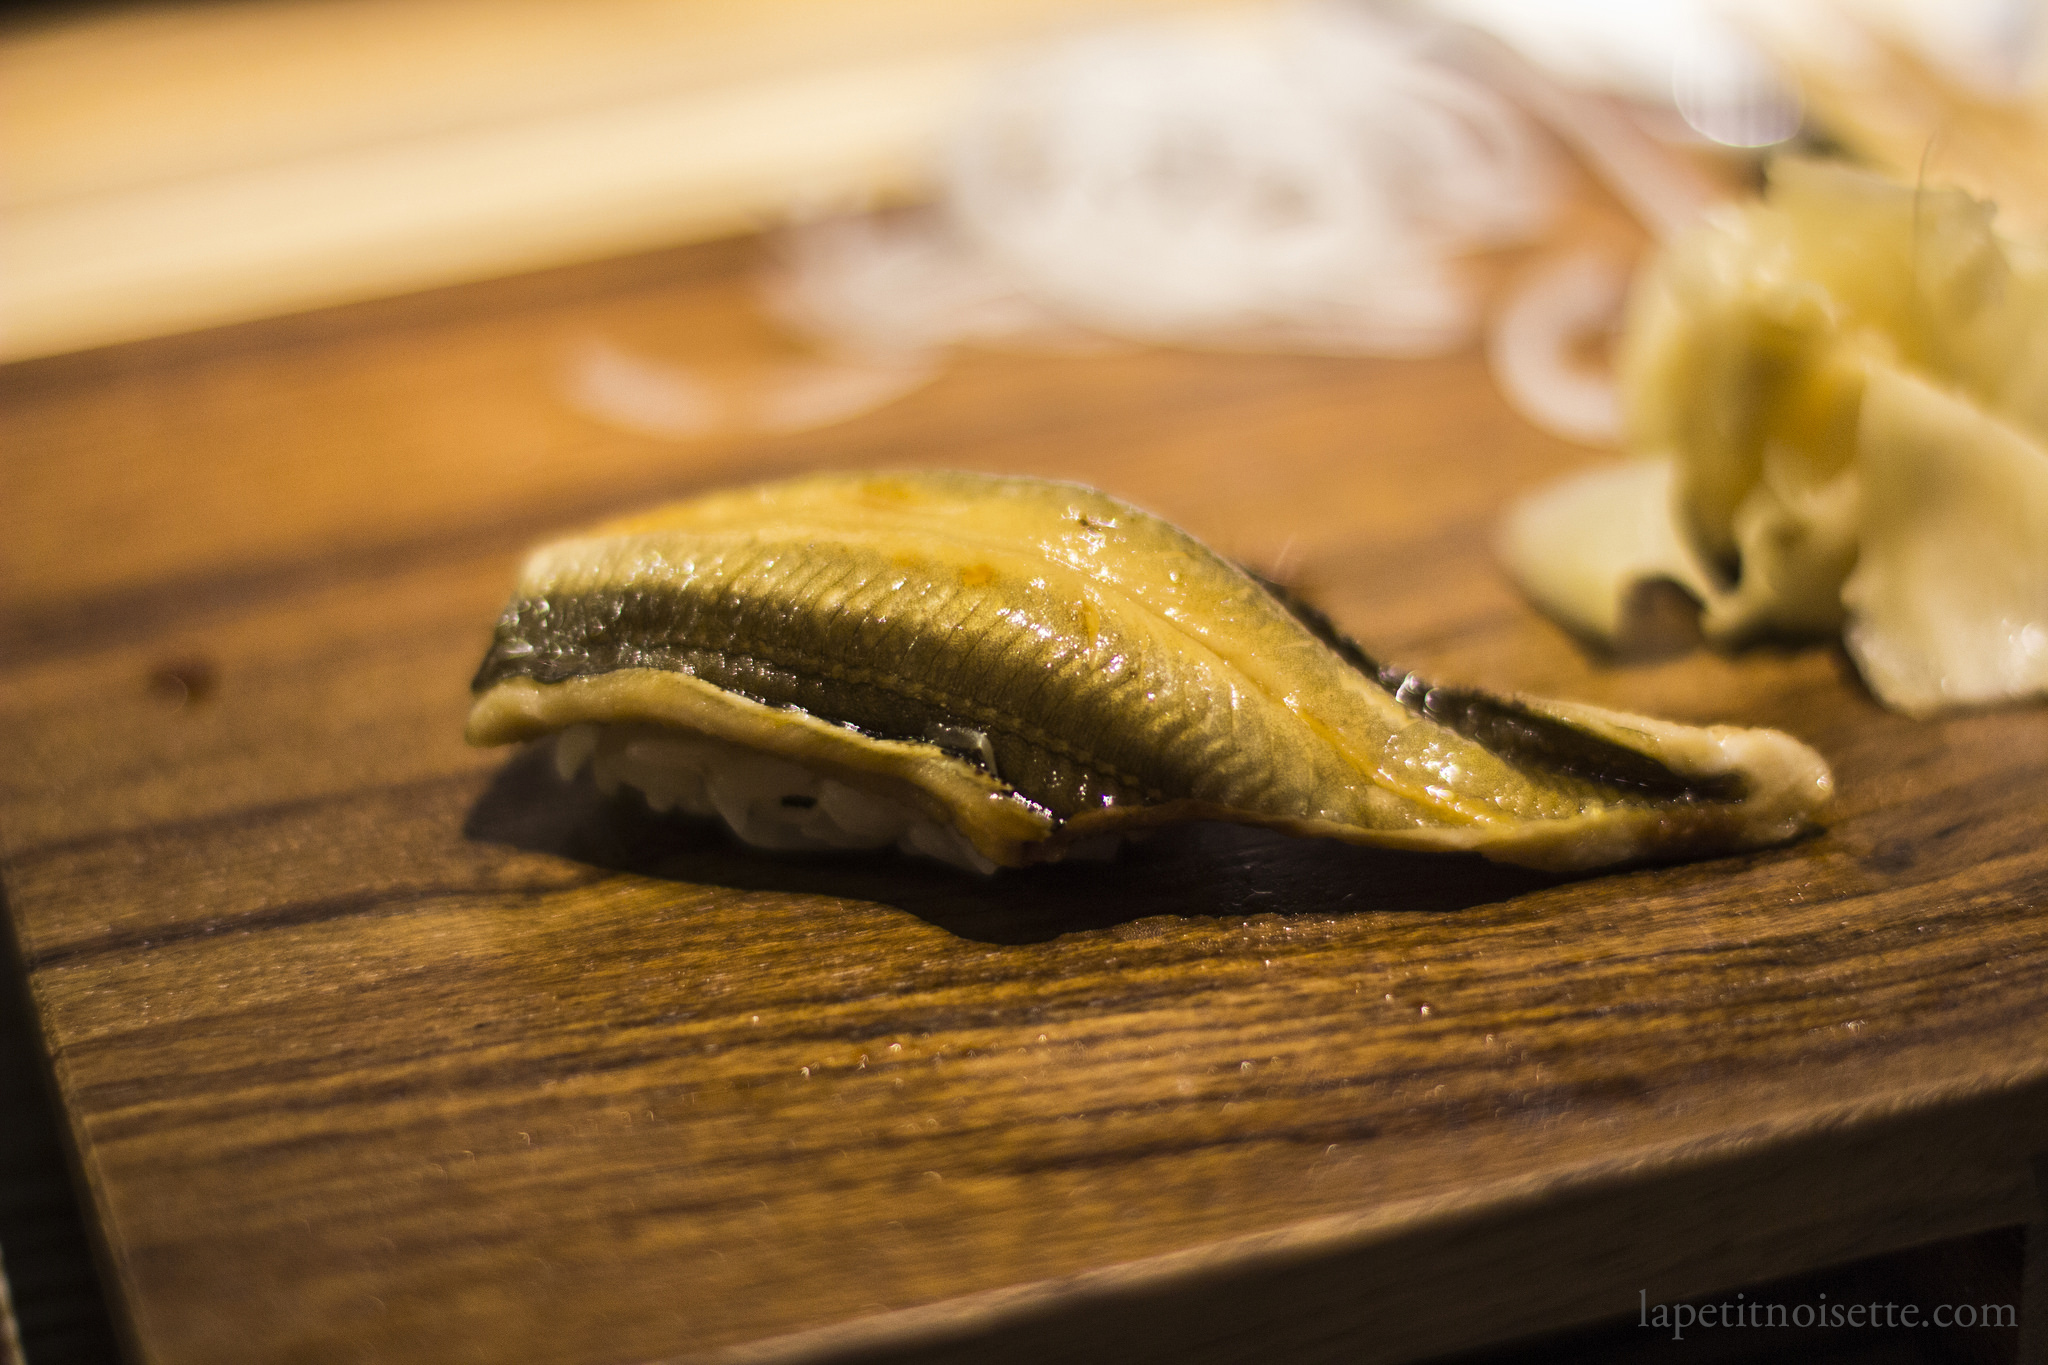
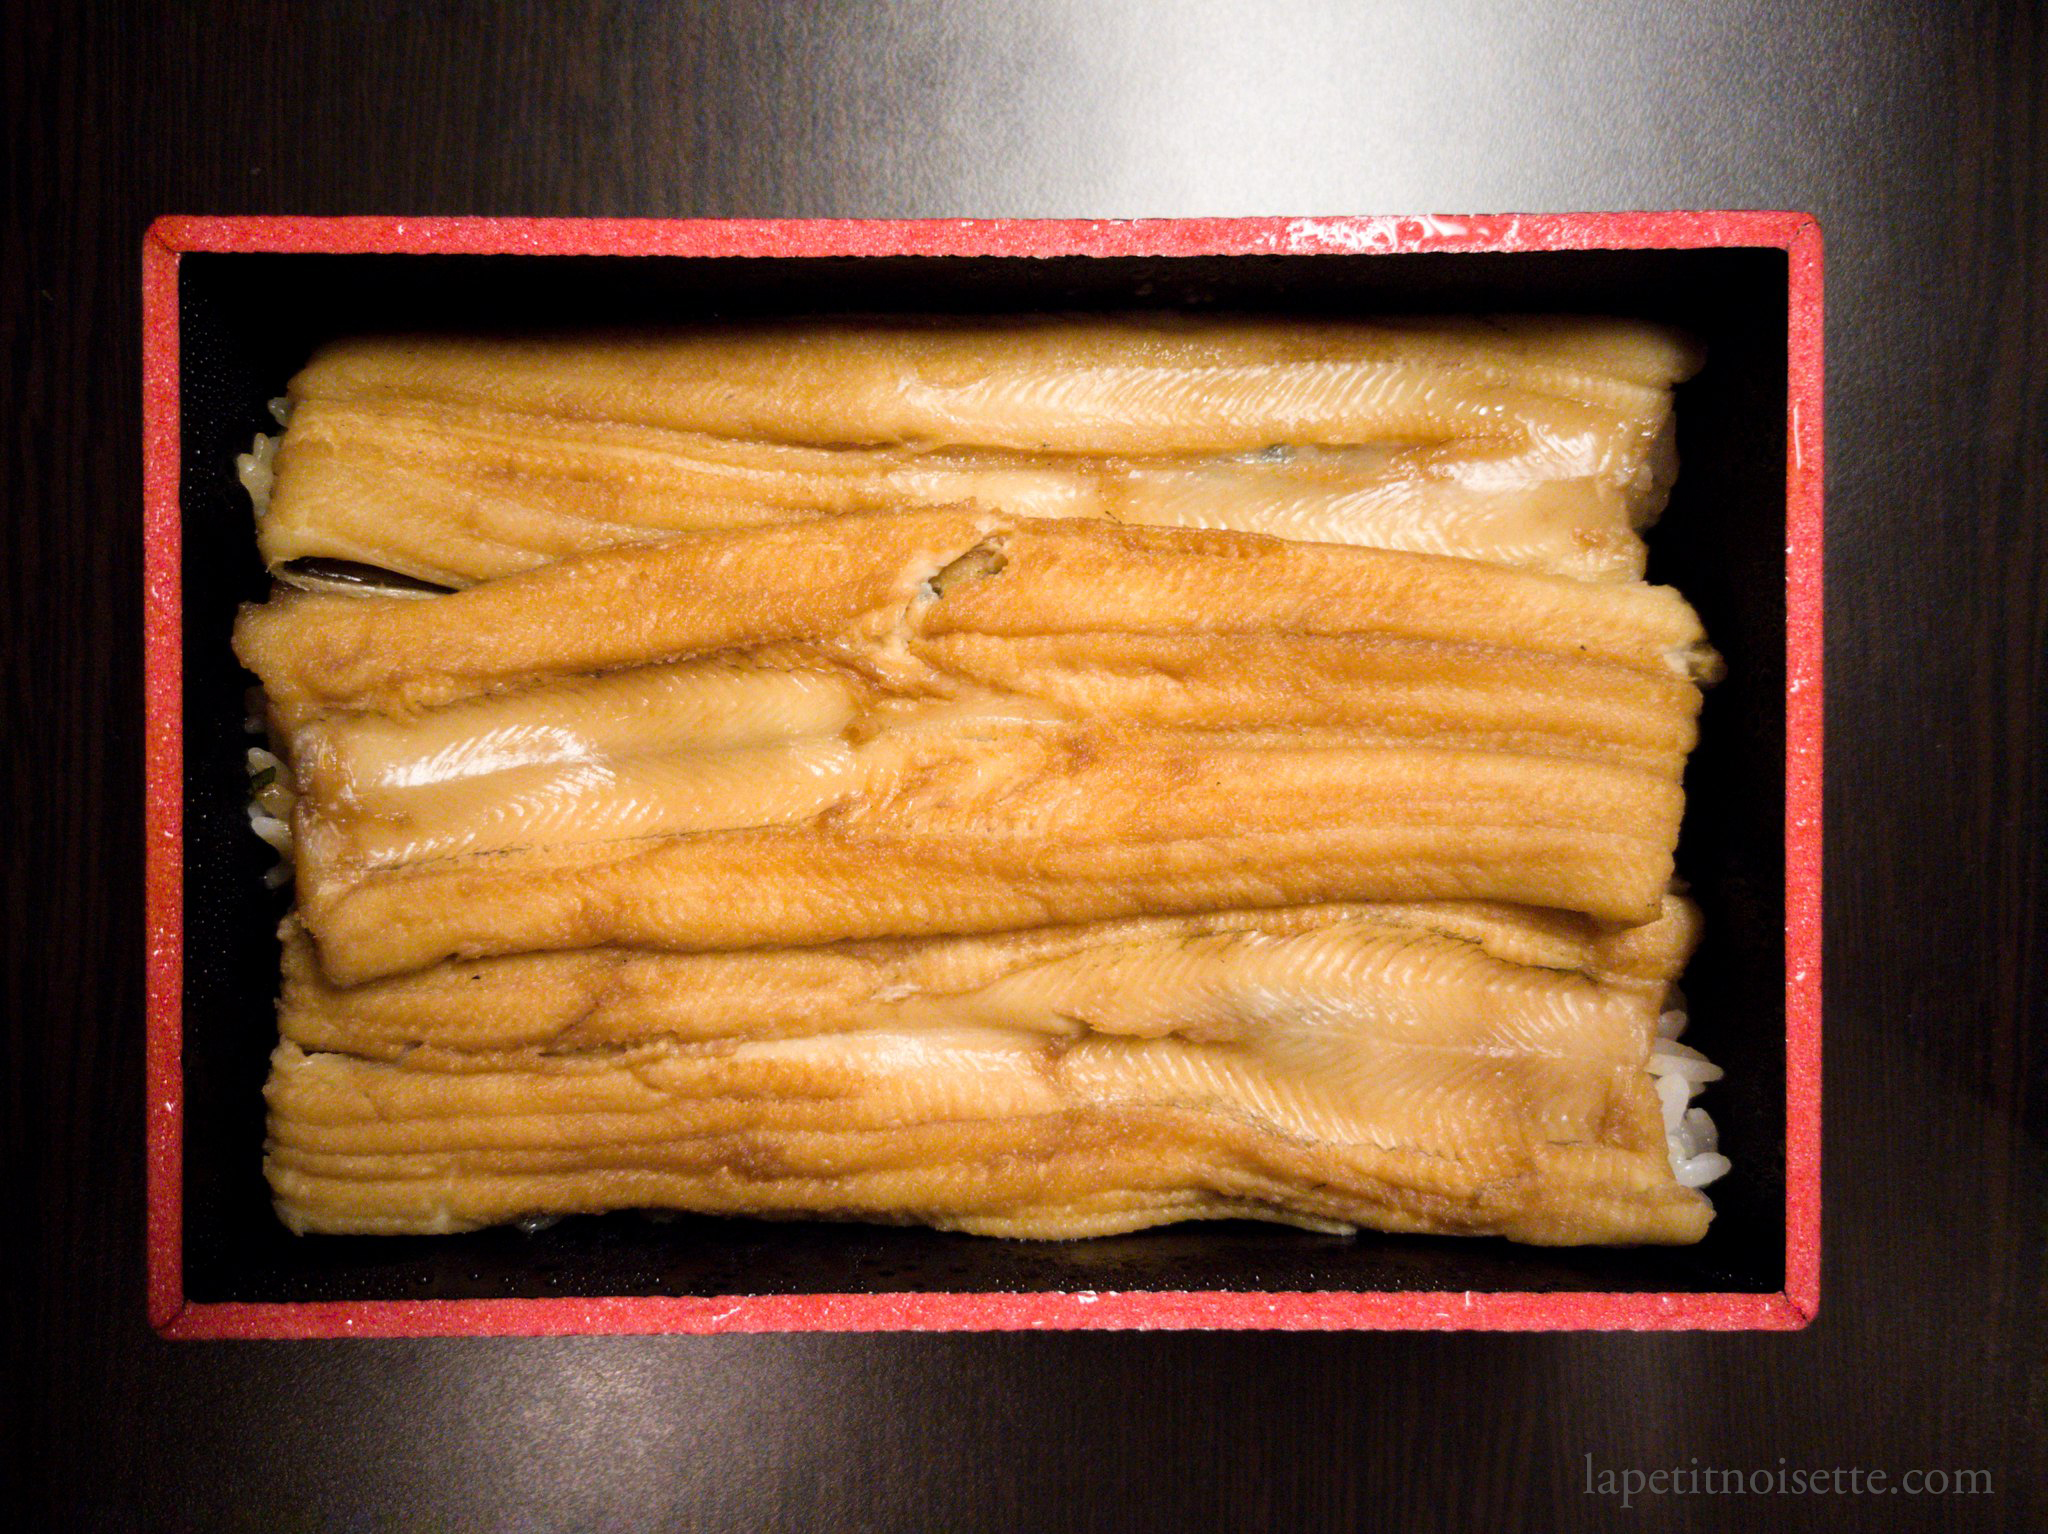
Anago is available all year around in Japan but its main season is from June to July. The most prized Anago comes from Nojima in Tokyo Bay which has the best texture after cooking. After simmering the Anago, it needs to be gently lifted out of the pot as it is delicate enough to fall apart. It is then laid out and allowed to cool down to room temperature before being served as nigiri or over a rice bowl.
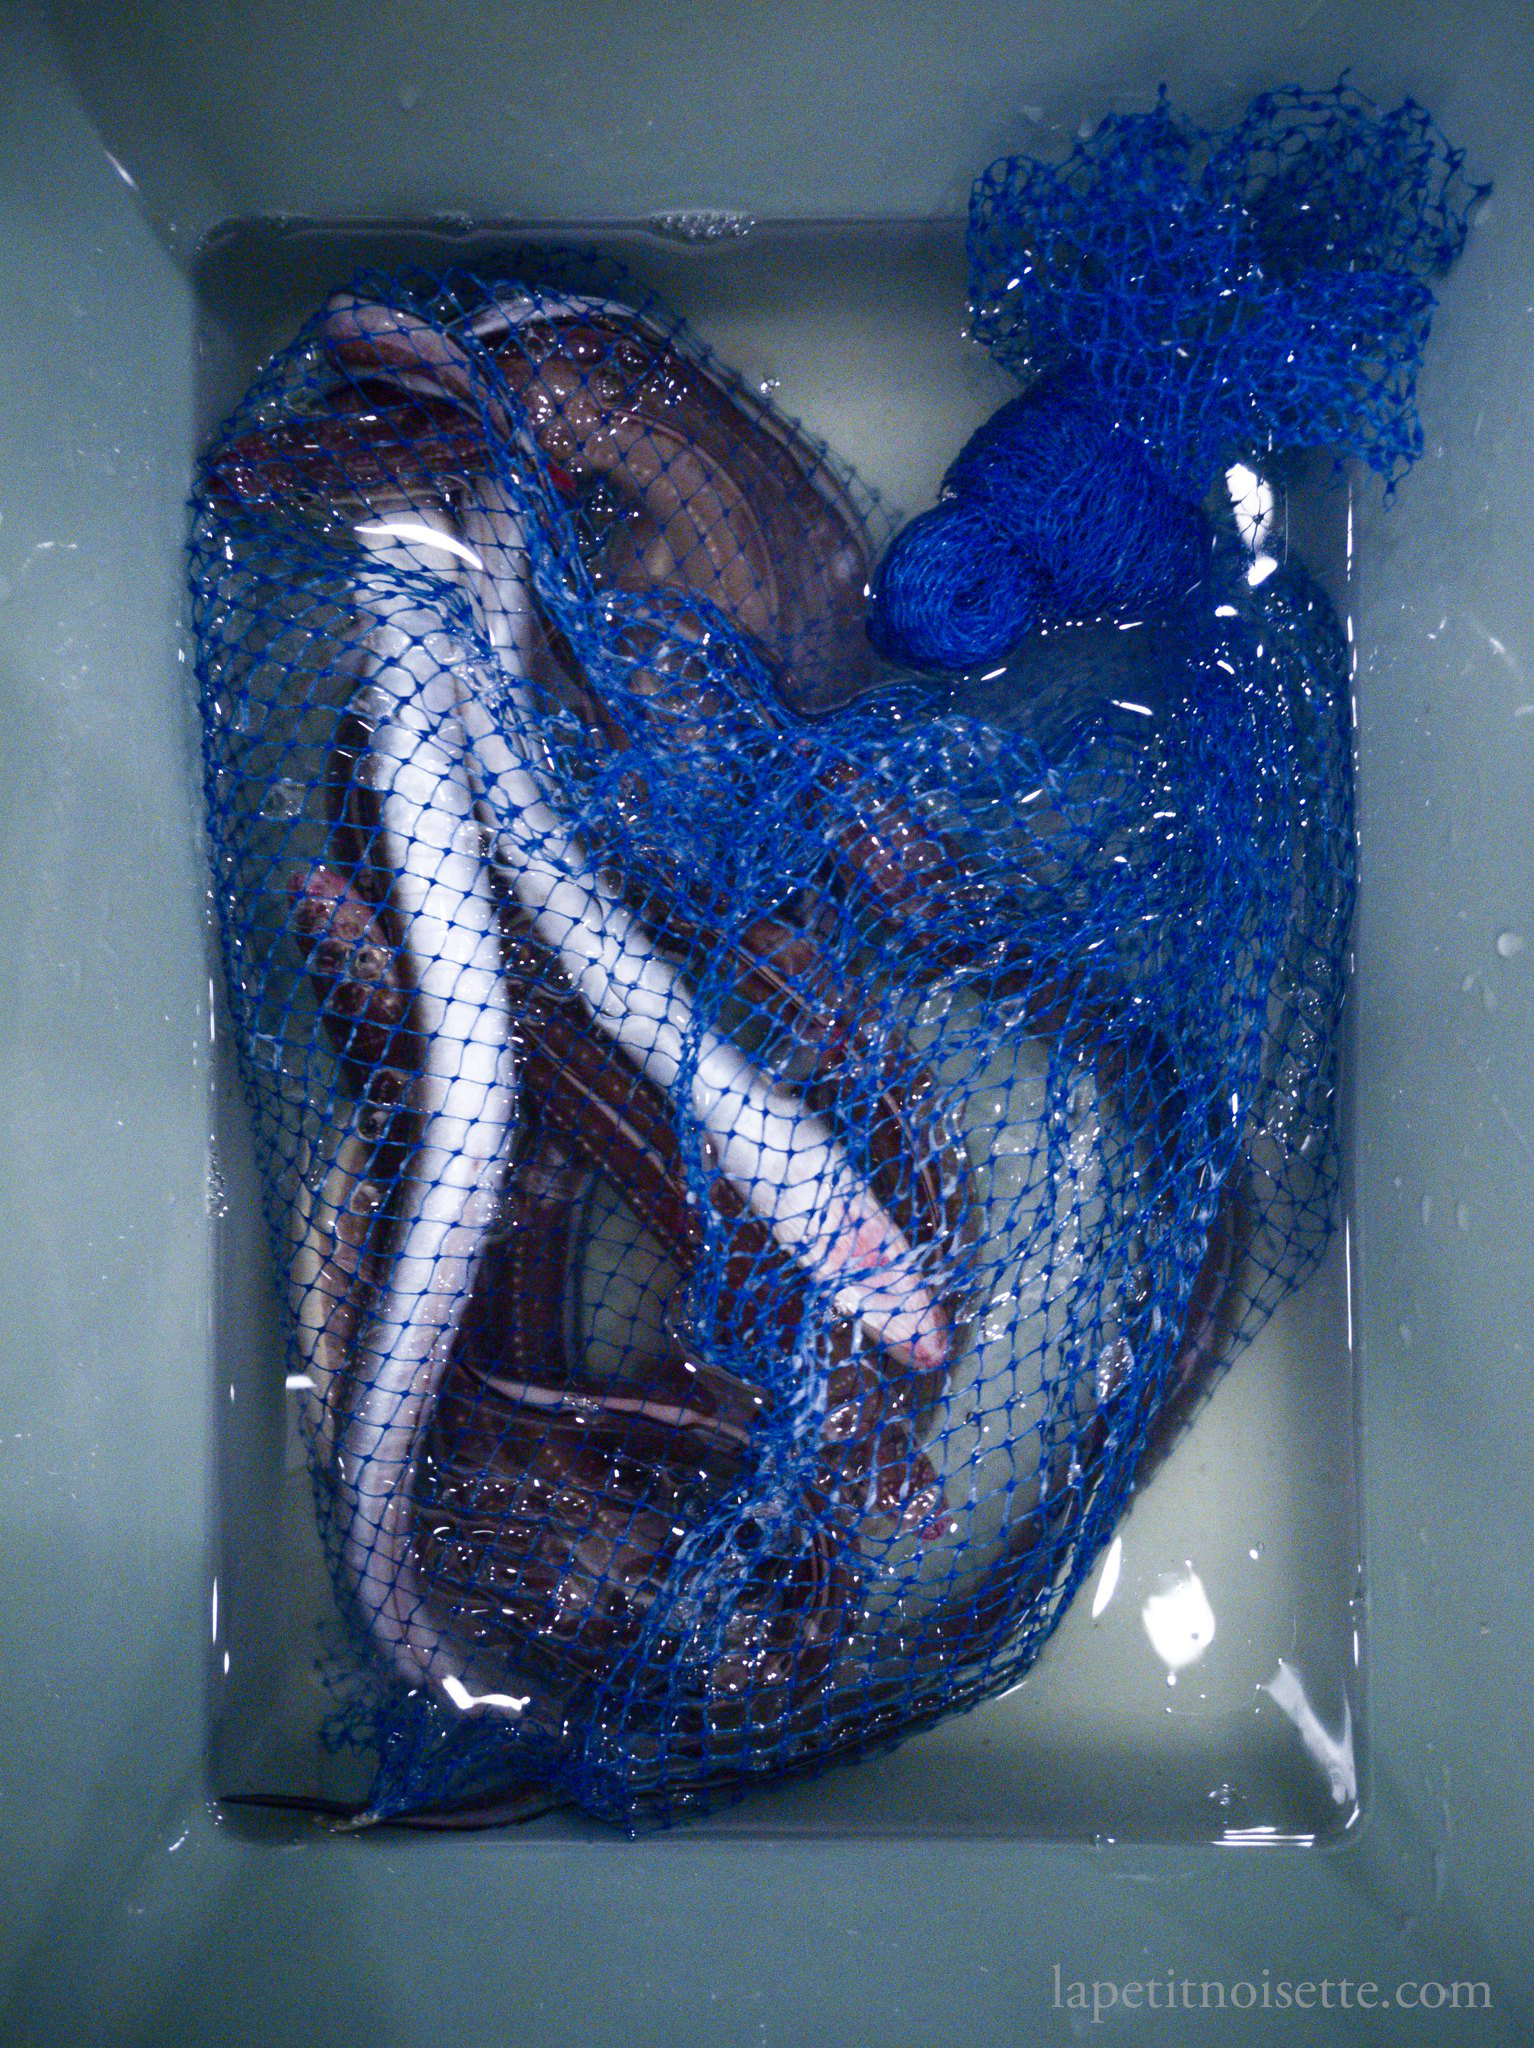
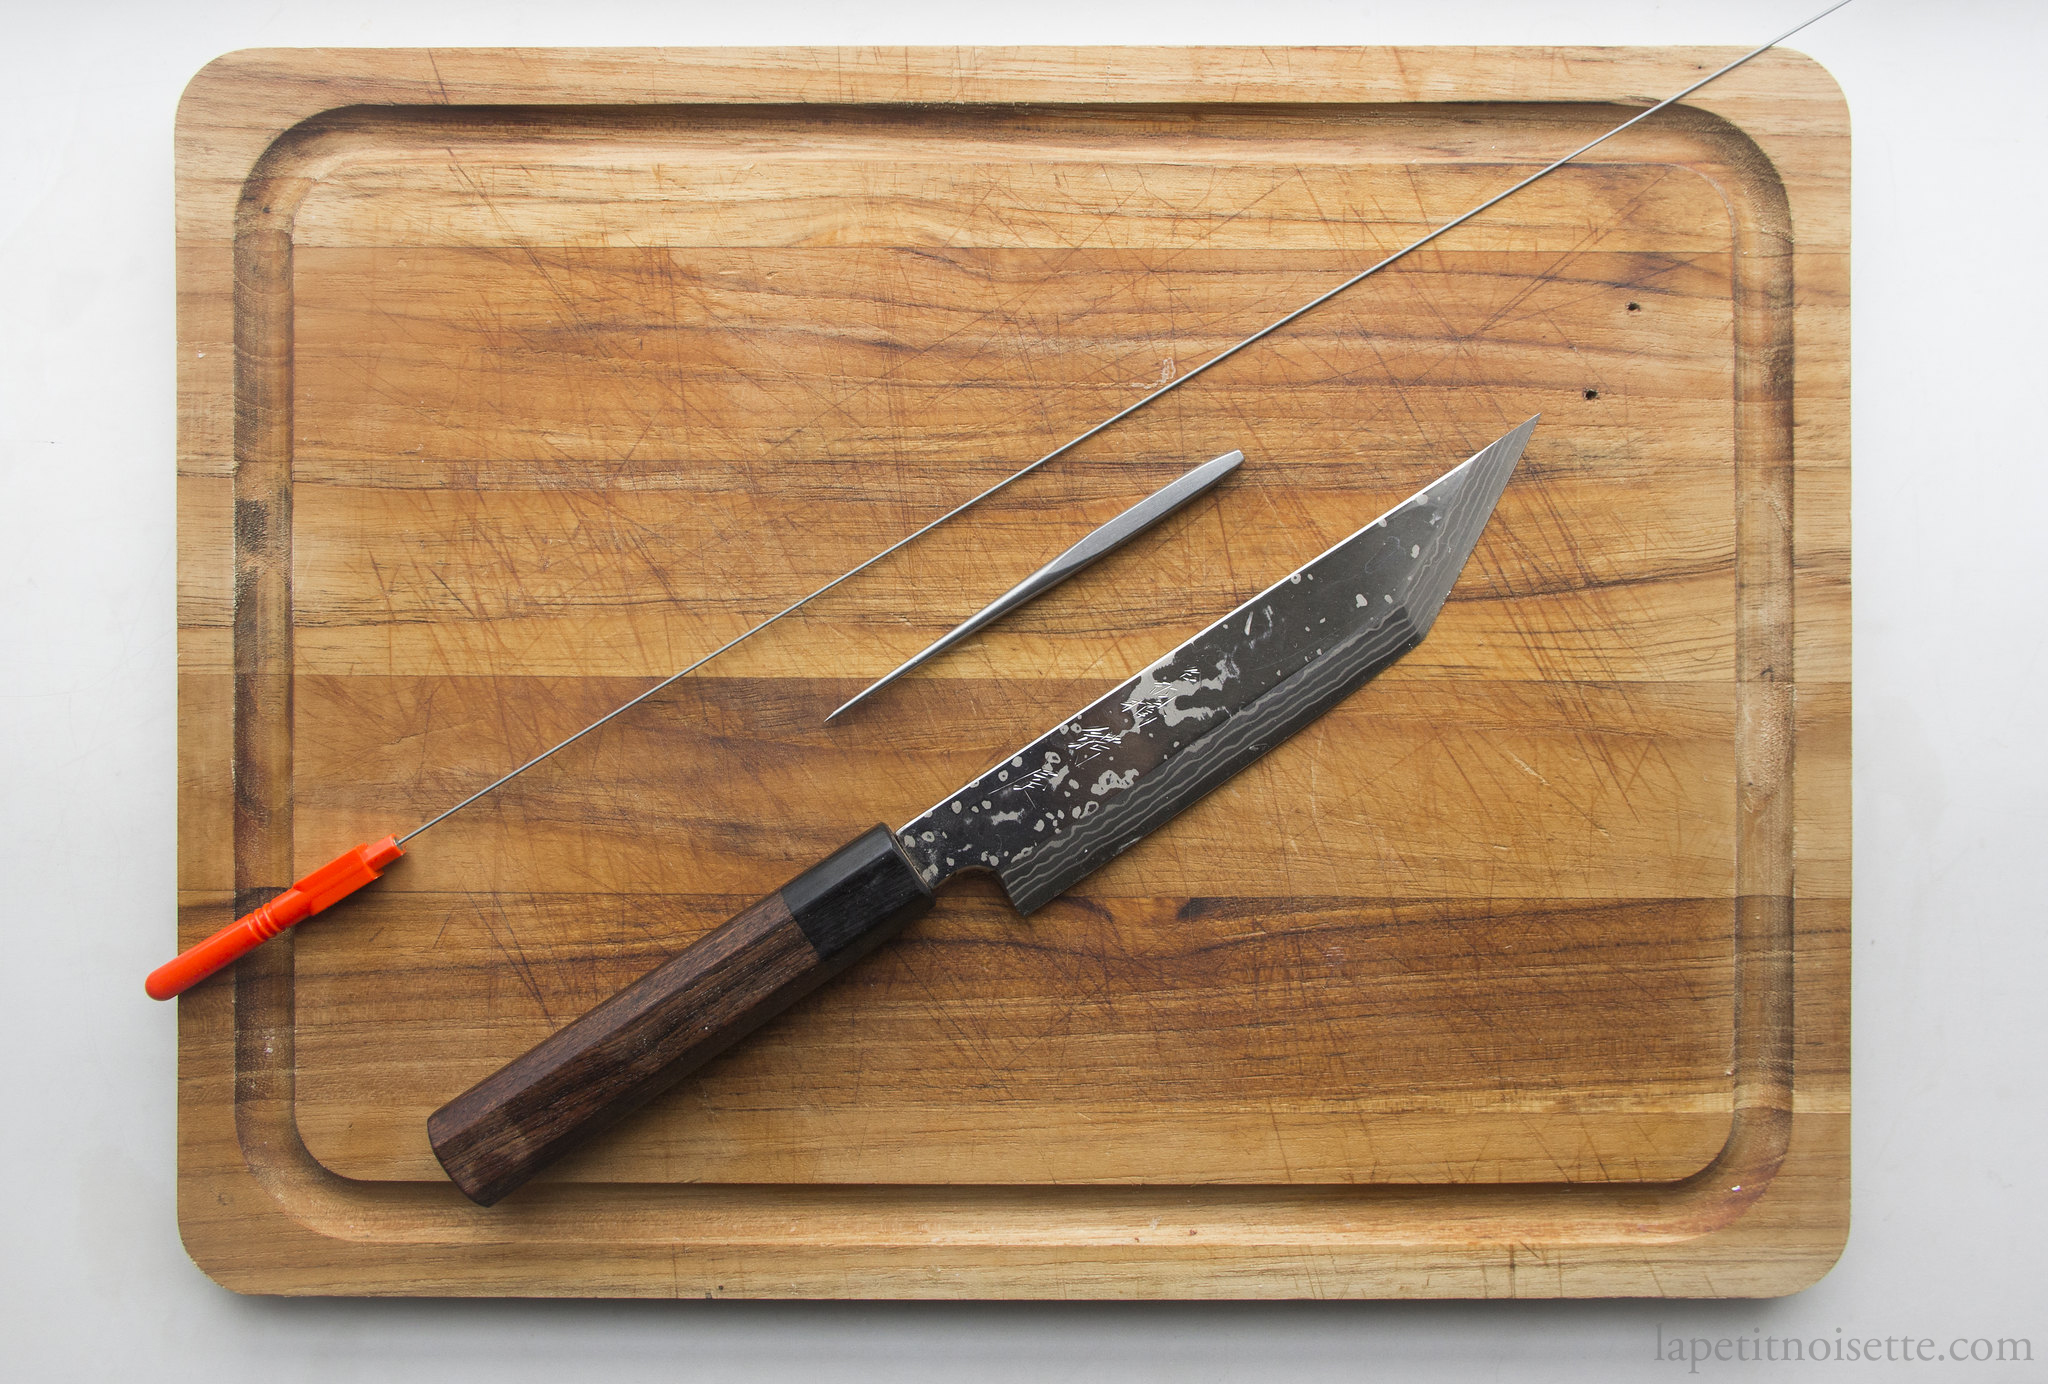
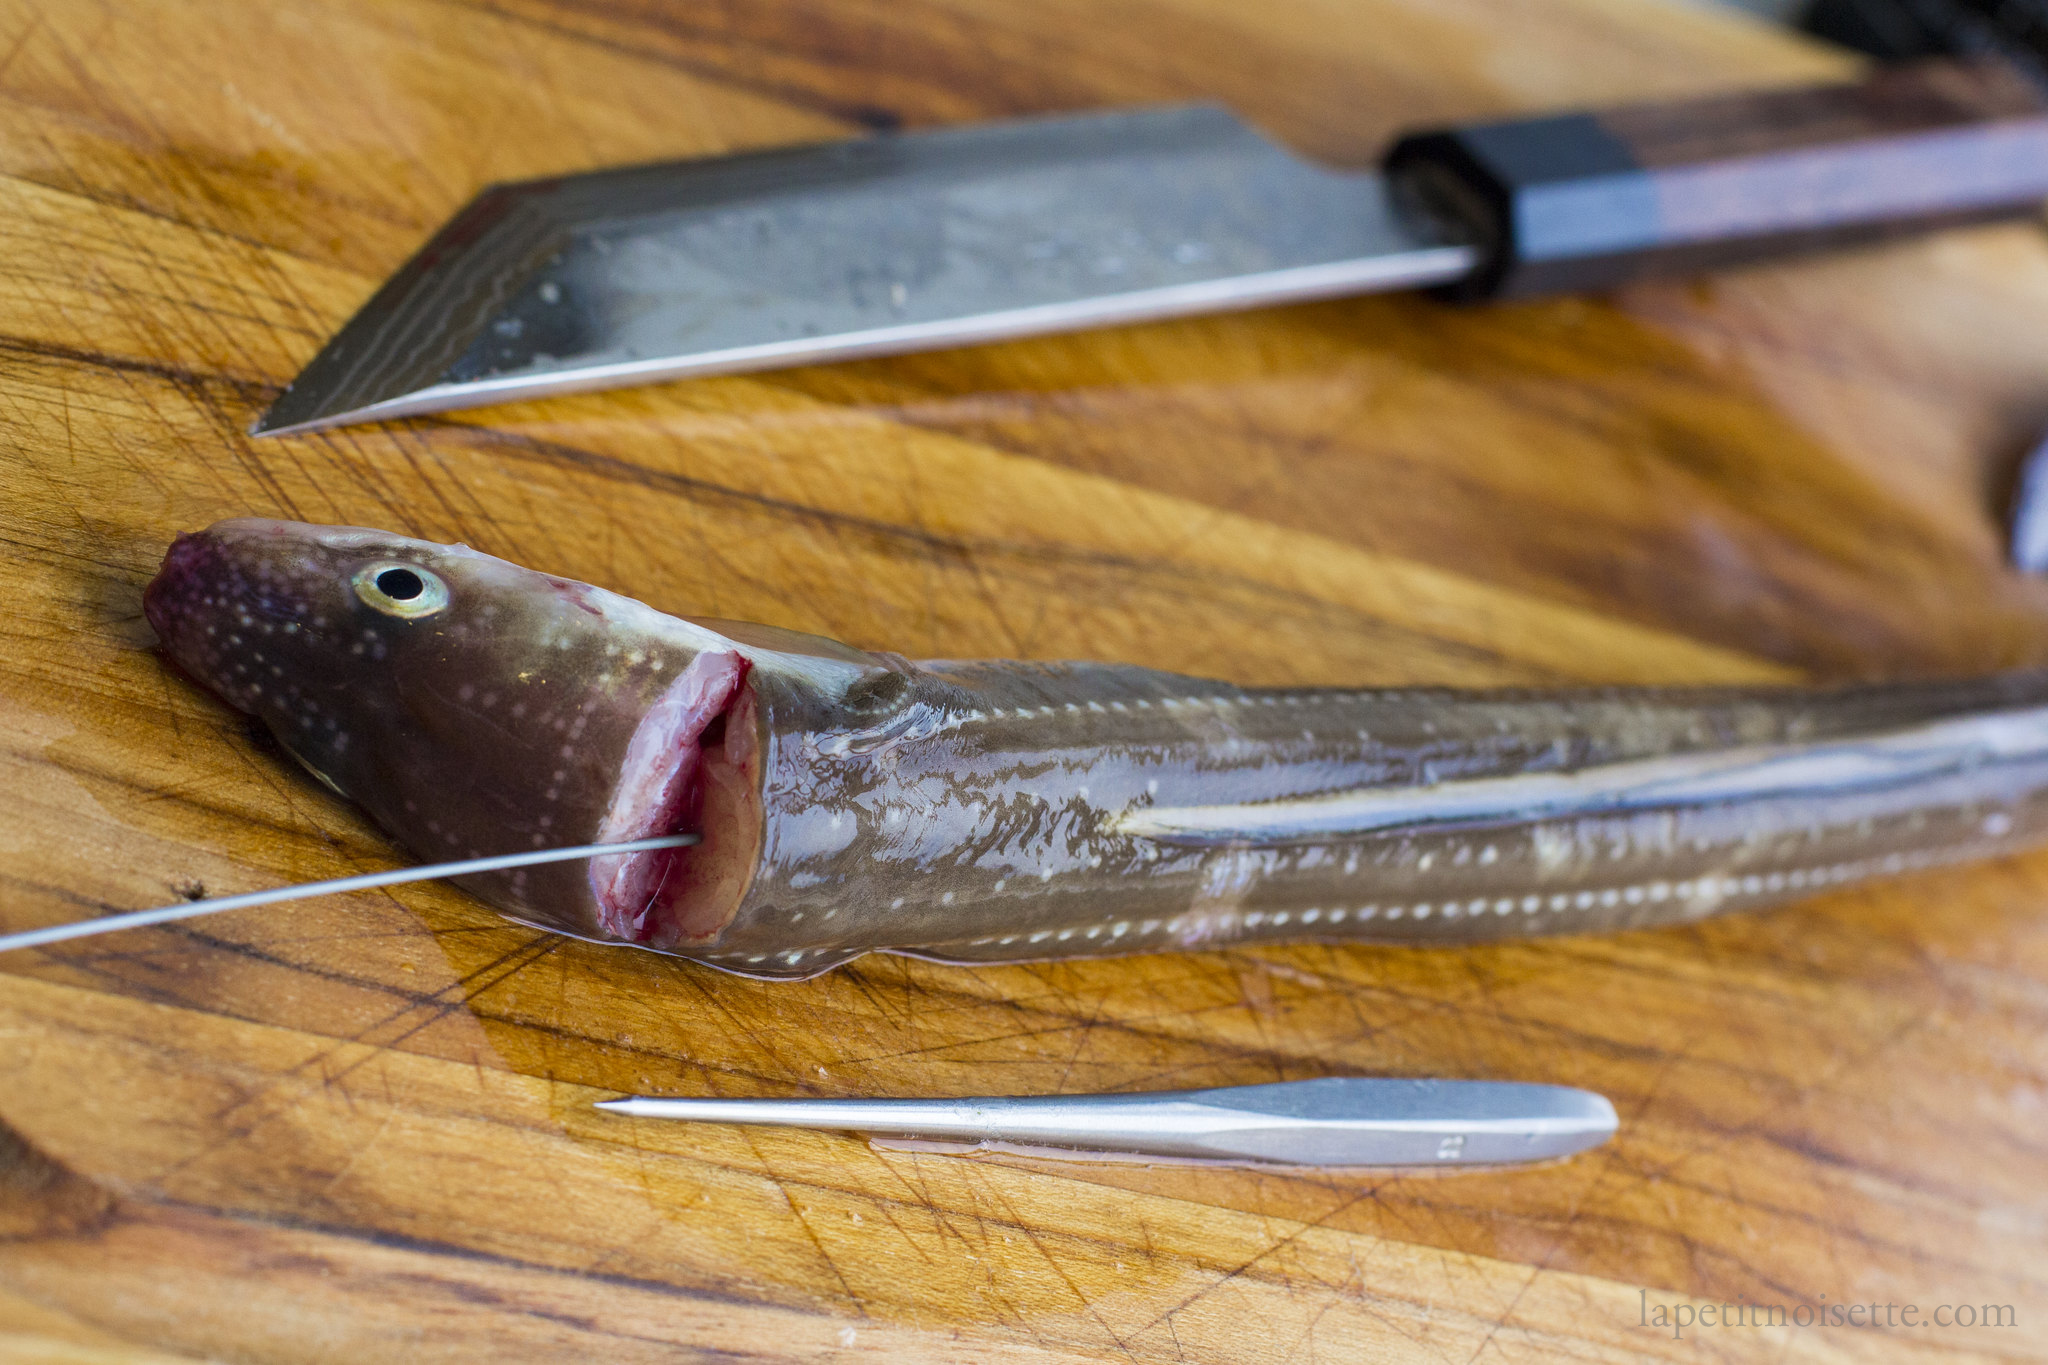
The recipe below starts of with live Anago eels that are then dispatched before cooking. I use a Japanese eel filleting knife know as an unagisaki hōchō (鰻割き包丁). The knife deliberately ends in a sharp tip designed to cut through the thick eel skin but any normal knife can be used to fillet an eel. Unagisaki knives are actually typically found in Unagi and Anago restaurants but high end sushi restaurant tend to just use normally filleting knives. The spike used to strike through the hindbrain of the eel is known as a meuchi (目打ち) whilst the thin wire used to destroy the spinal cord is 1mm in thickness.At 1mm in thickness, it is too thick to be used on baby eels. Each eel weights around 250 to 300g. The ikejime technique here can be applied to most other fish and the filleting technique here is the same for all eels.
The Ikejime Technique
- Hold the live eel securely on the chopping board. A loose grip will cause the eel to trash around.
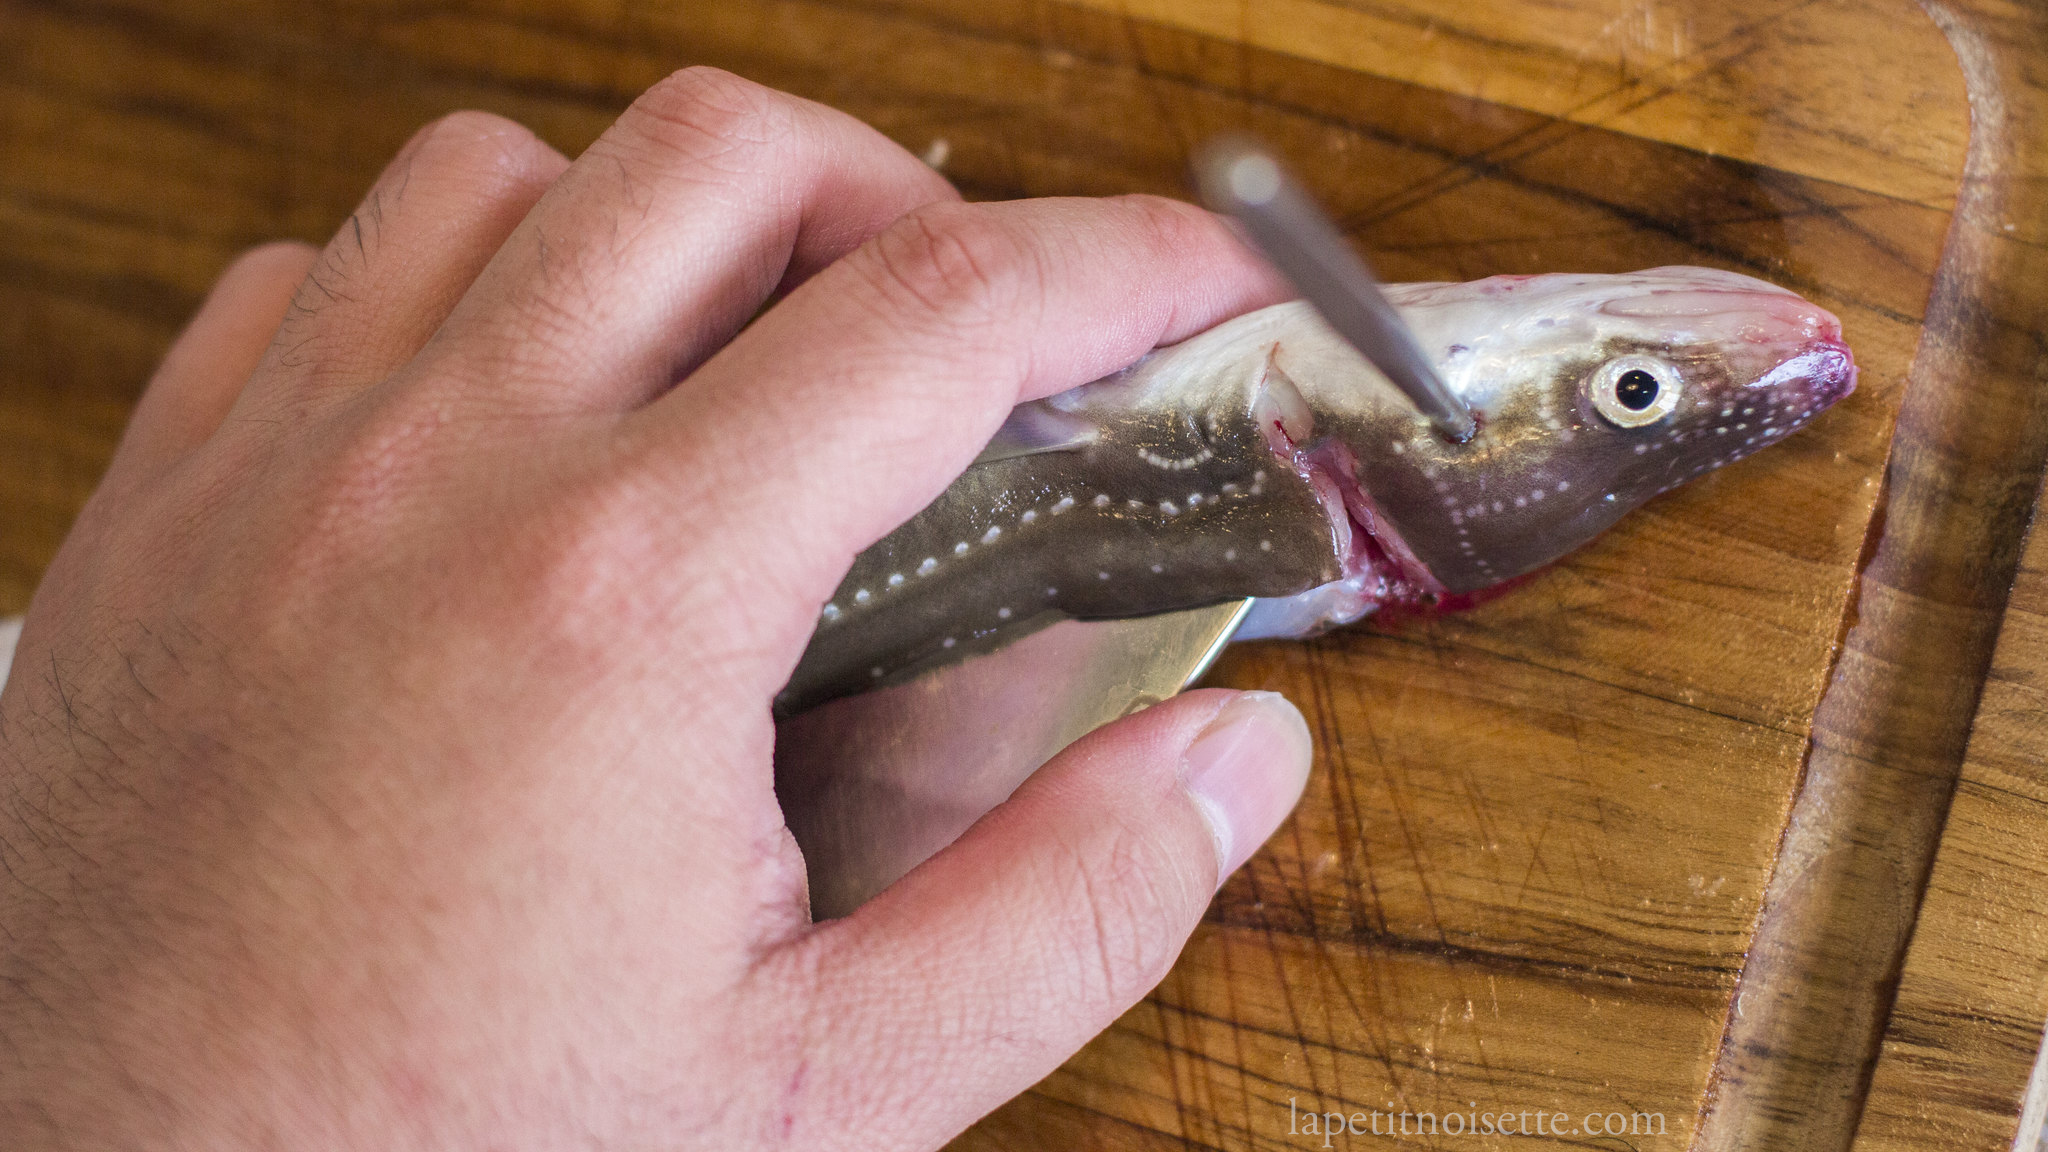
- Using the butt of your knife, hammer the Ikejime needle directly behind the eye of the eel through the hindbrain as shown below. If done correctly the eel’s fins and gills should flare up one last time, and the eel should stop trashing.
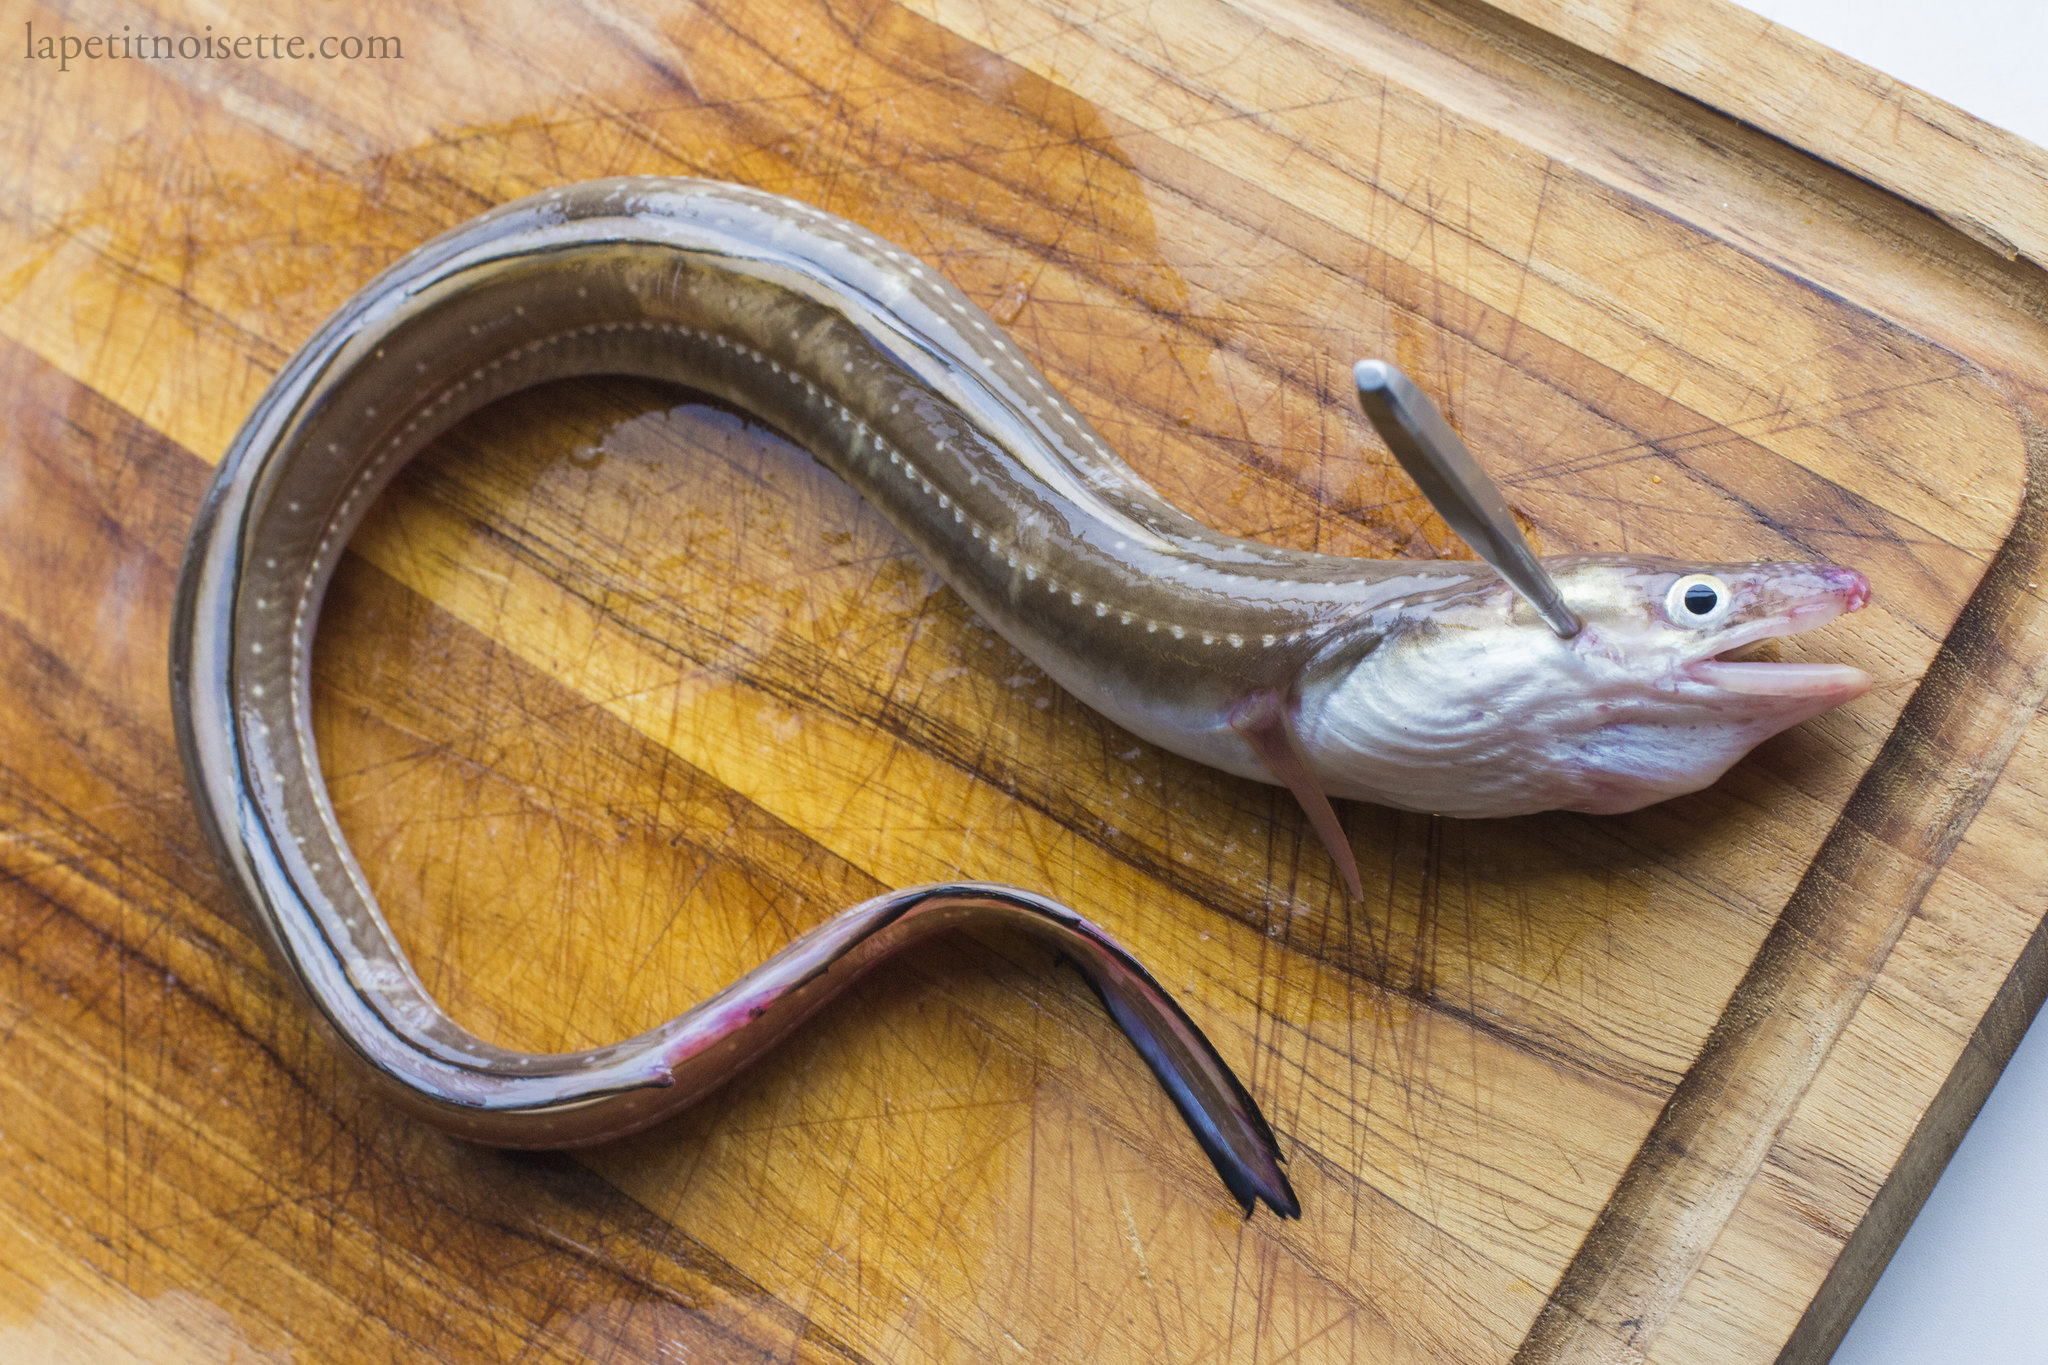
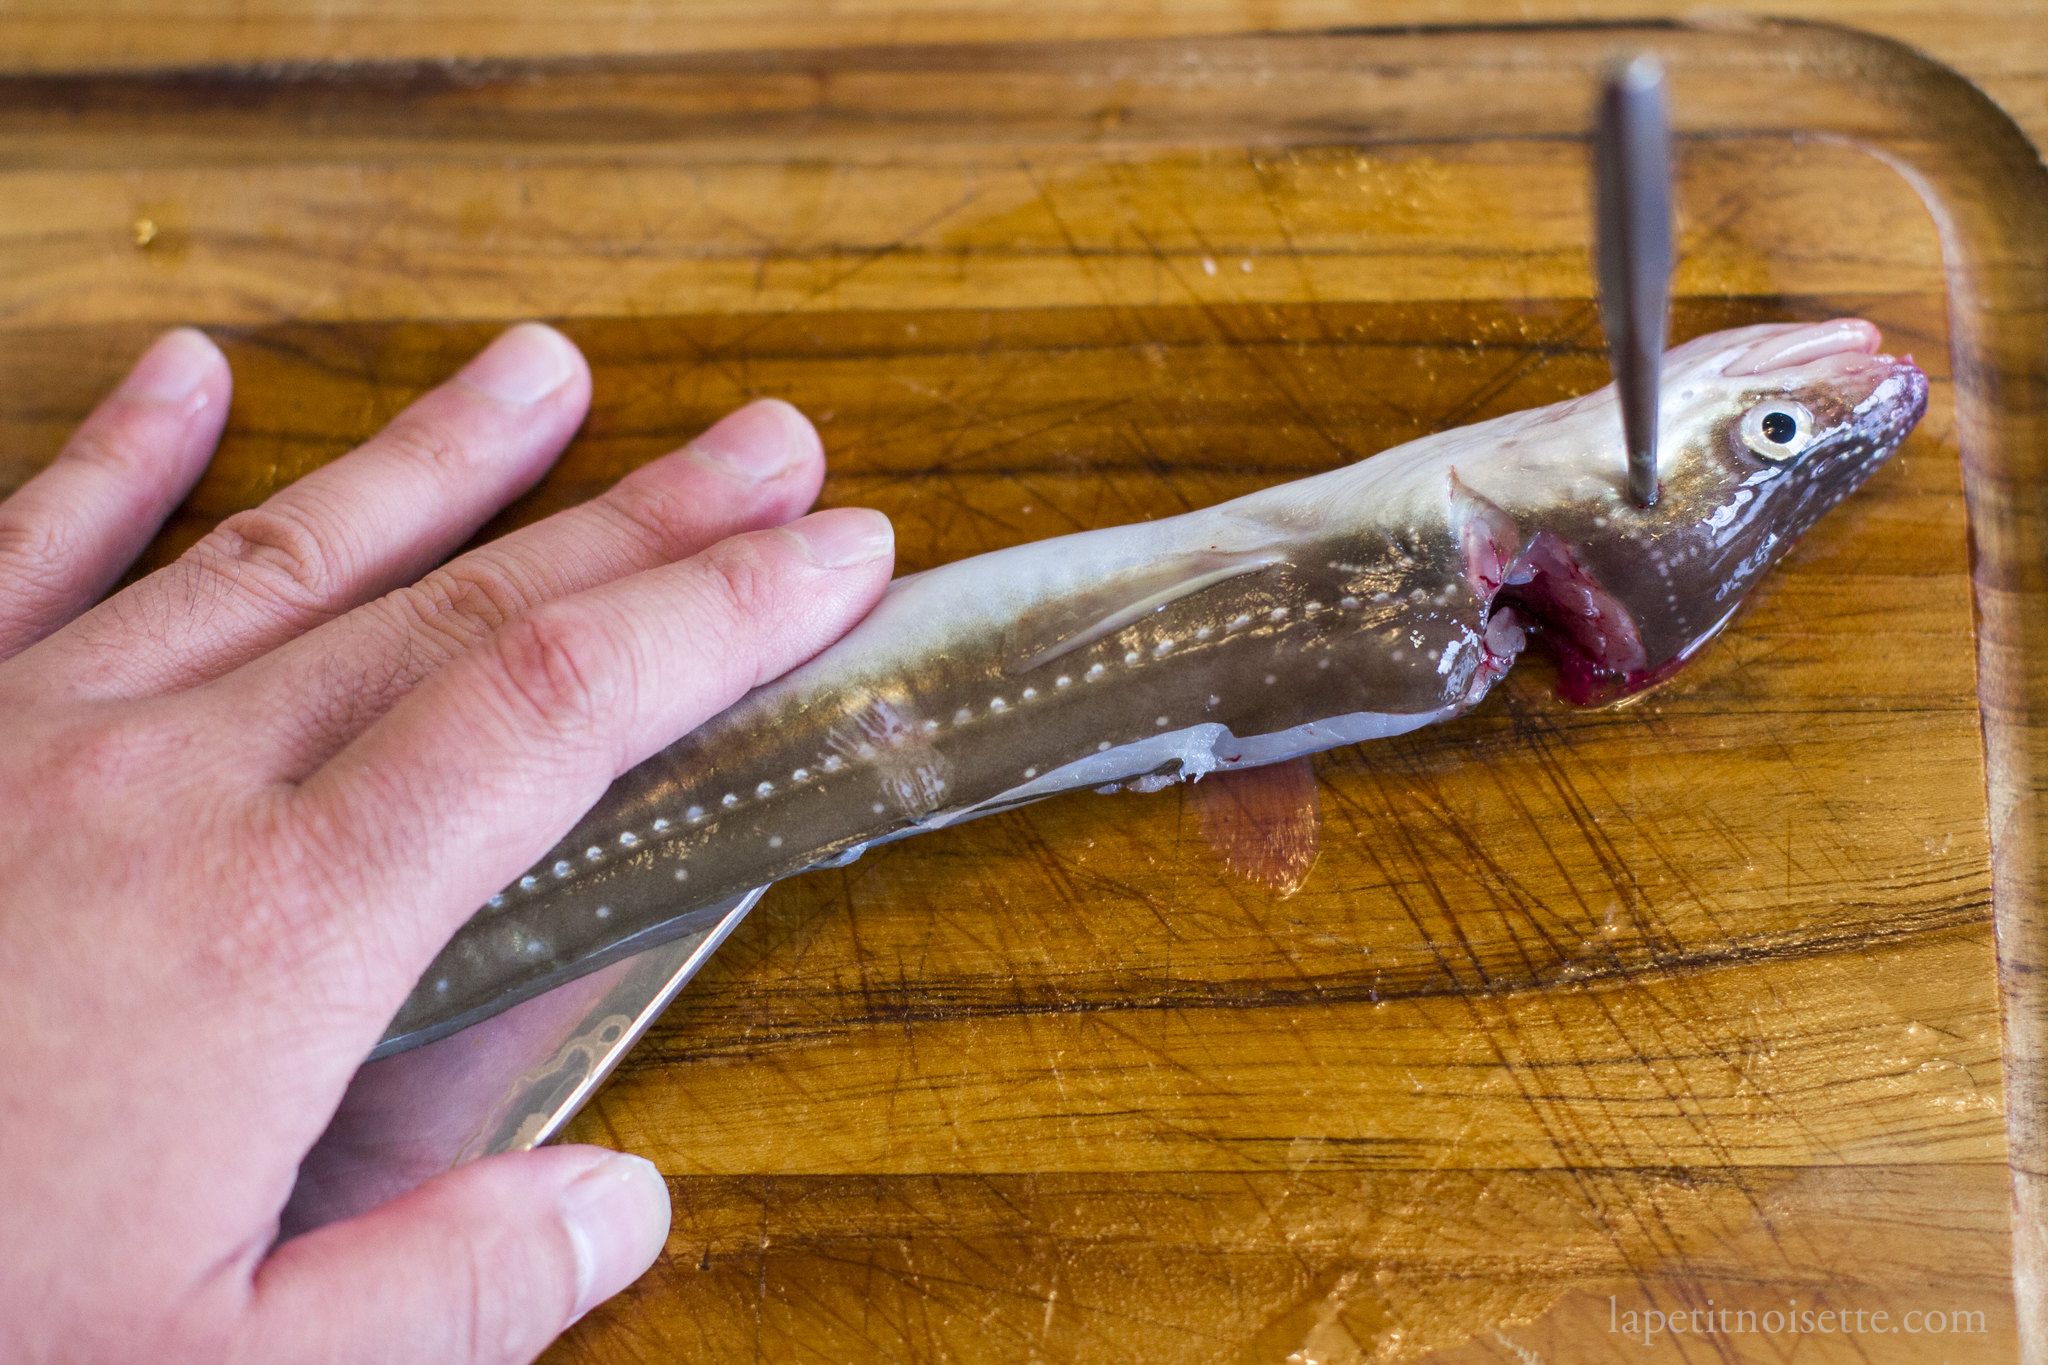
- Cut into the back of the eel just behind the head deep enough to expose the spine.
- Insert the wire into the spine as deep as you can go. The eel should relax as the wire goes in. This step and the next step can be done without the eel being nailed to the chopping board.
- Pull the wire in and out of the spinal column of the eel to ensure that the spinal cord is fully destroyed.
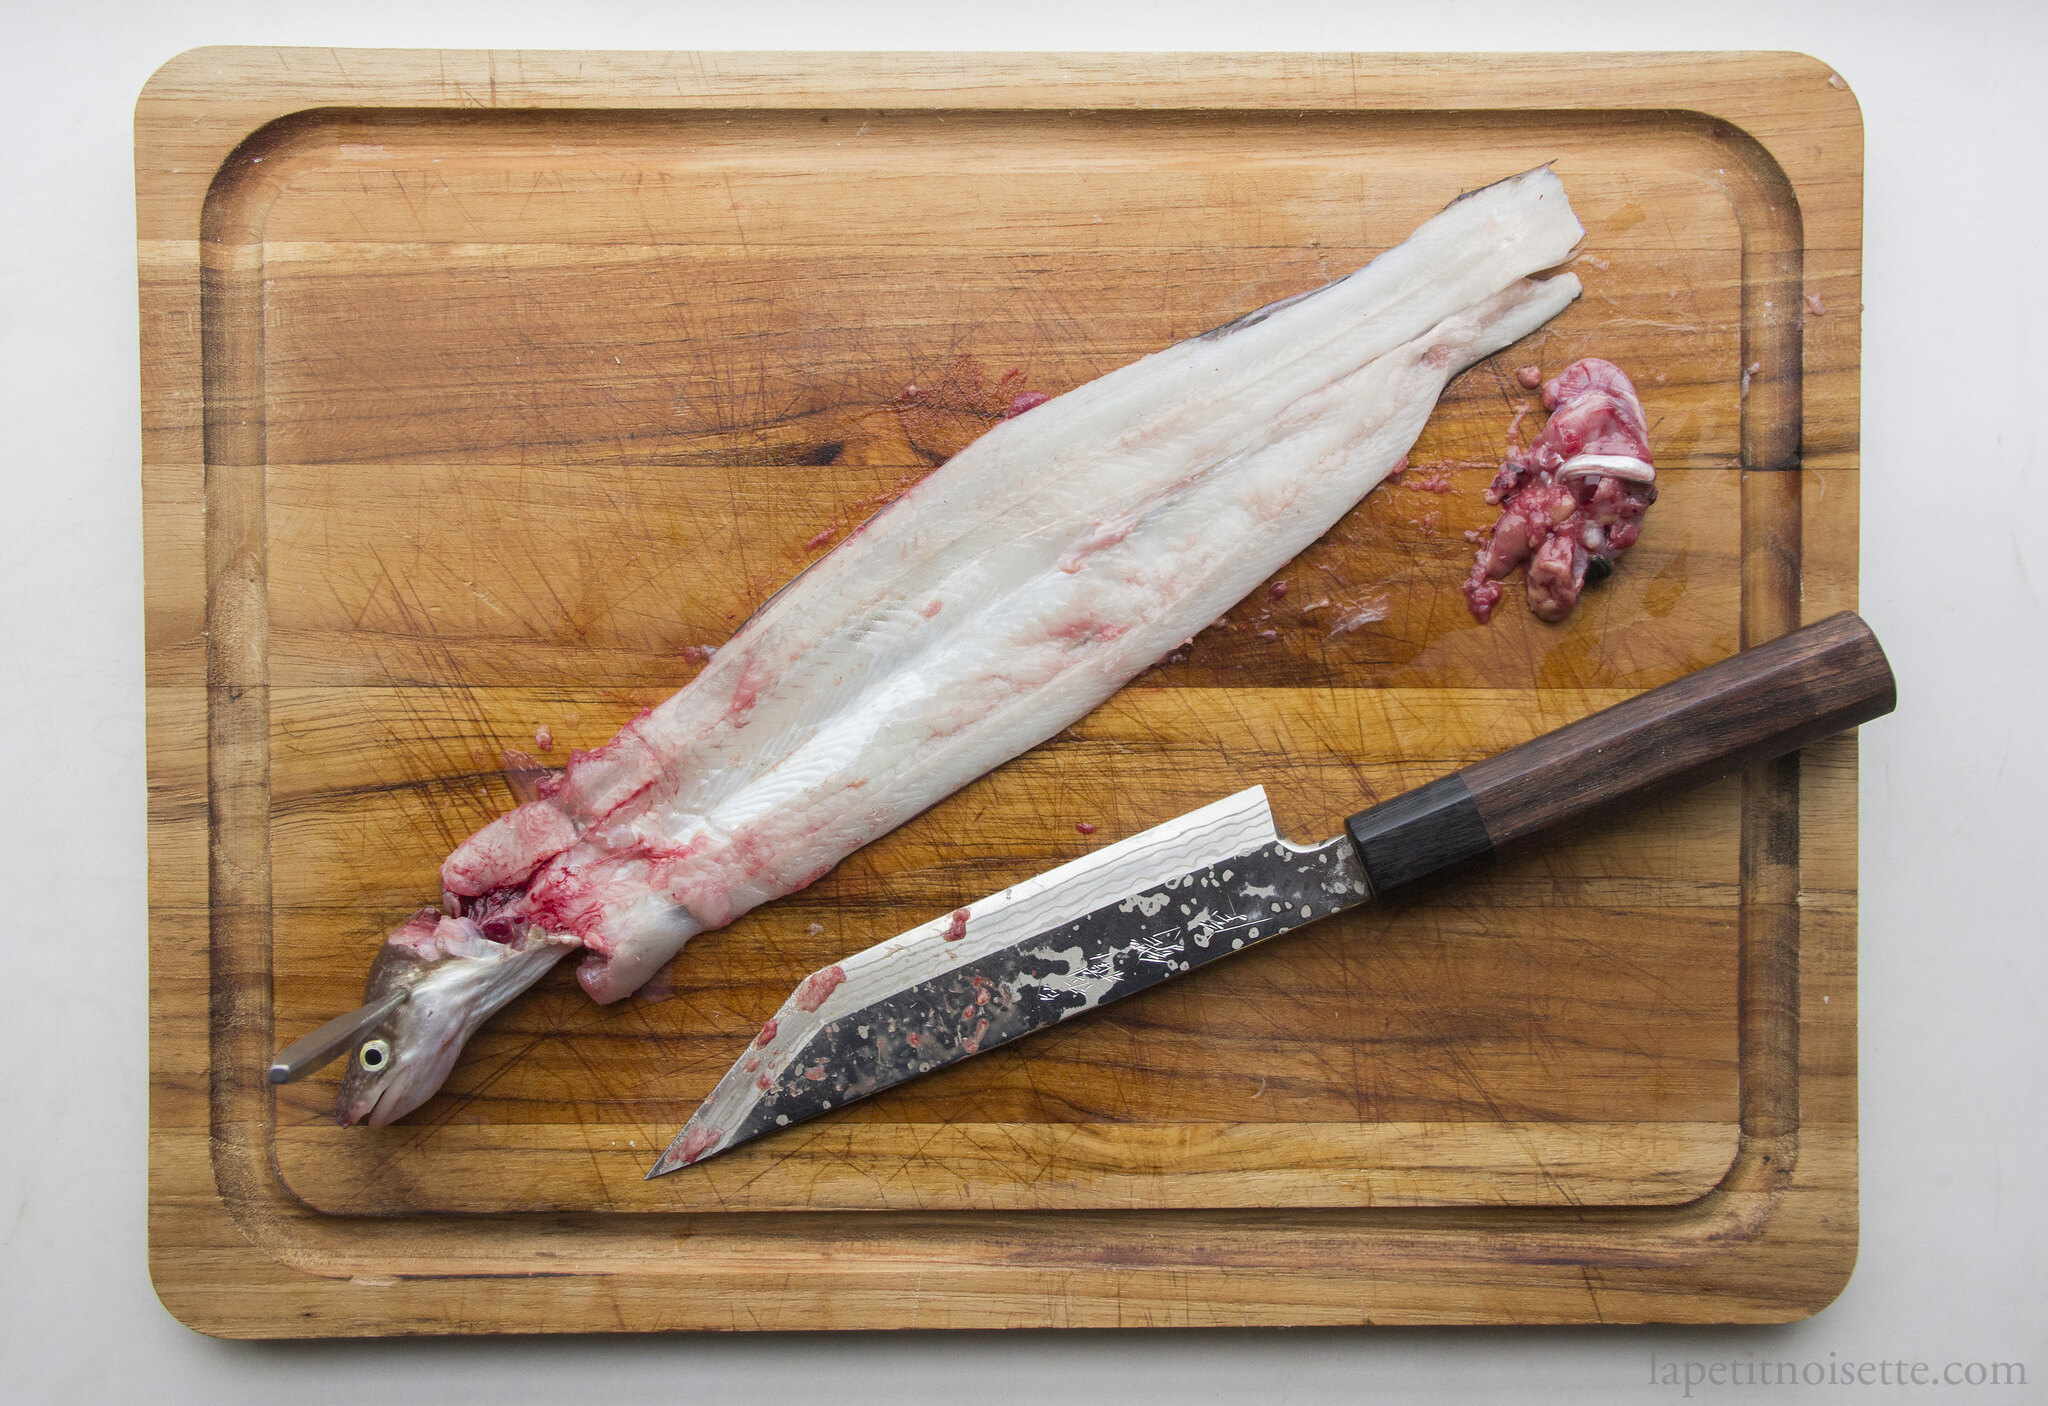
Cleaning and Filleting Anago
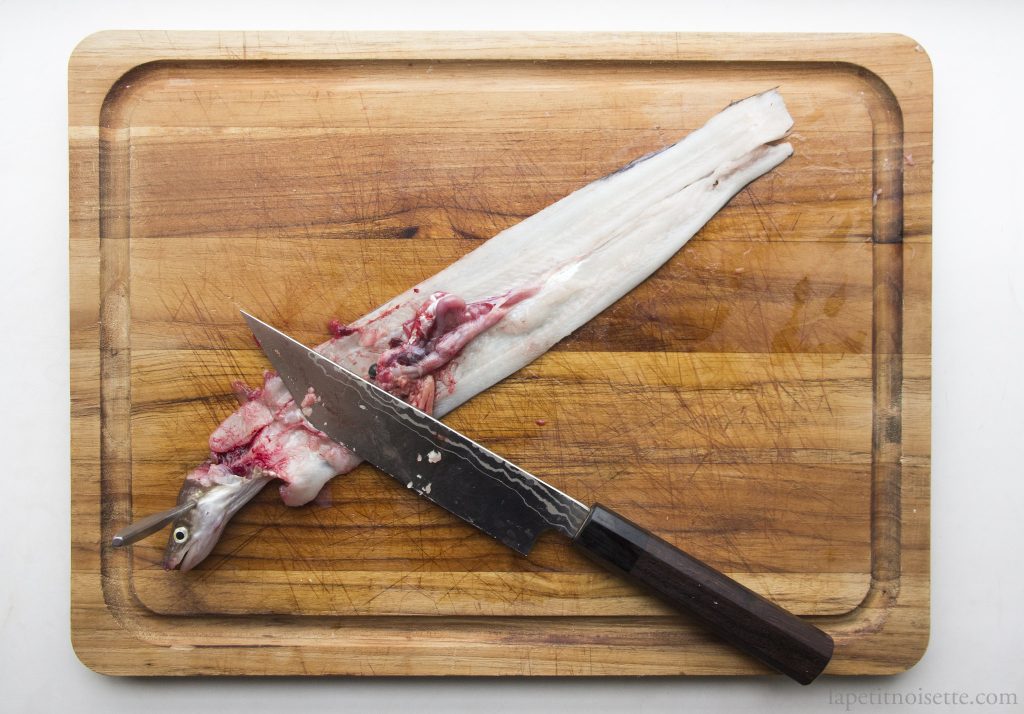
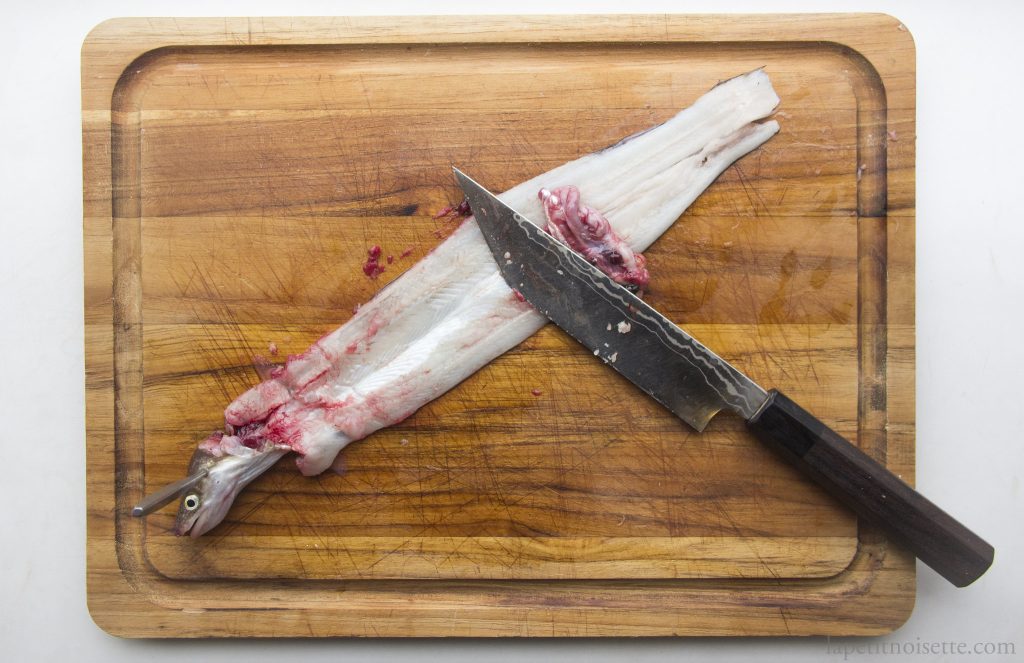
- Insert the knife through the back of the eel behind the pectoral fin.
- Whilst pressing down with your other hand, gently slide the knife along the spine to open up the eel. Be careful not to puncture the belly of the eel with the tip of the knife.
- Continue to slide the knife along all the way down to the tip of the eel’s tail.
- Open up the eel and insert the knife below the spine of the eel.
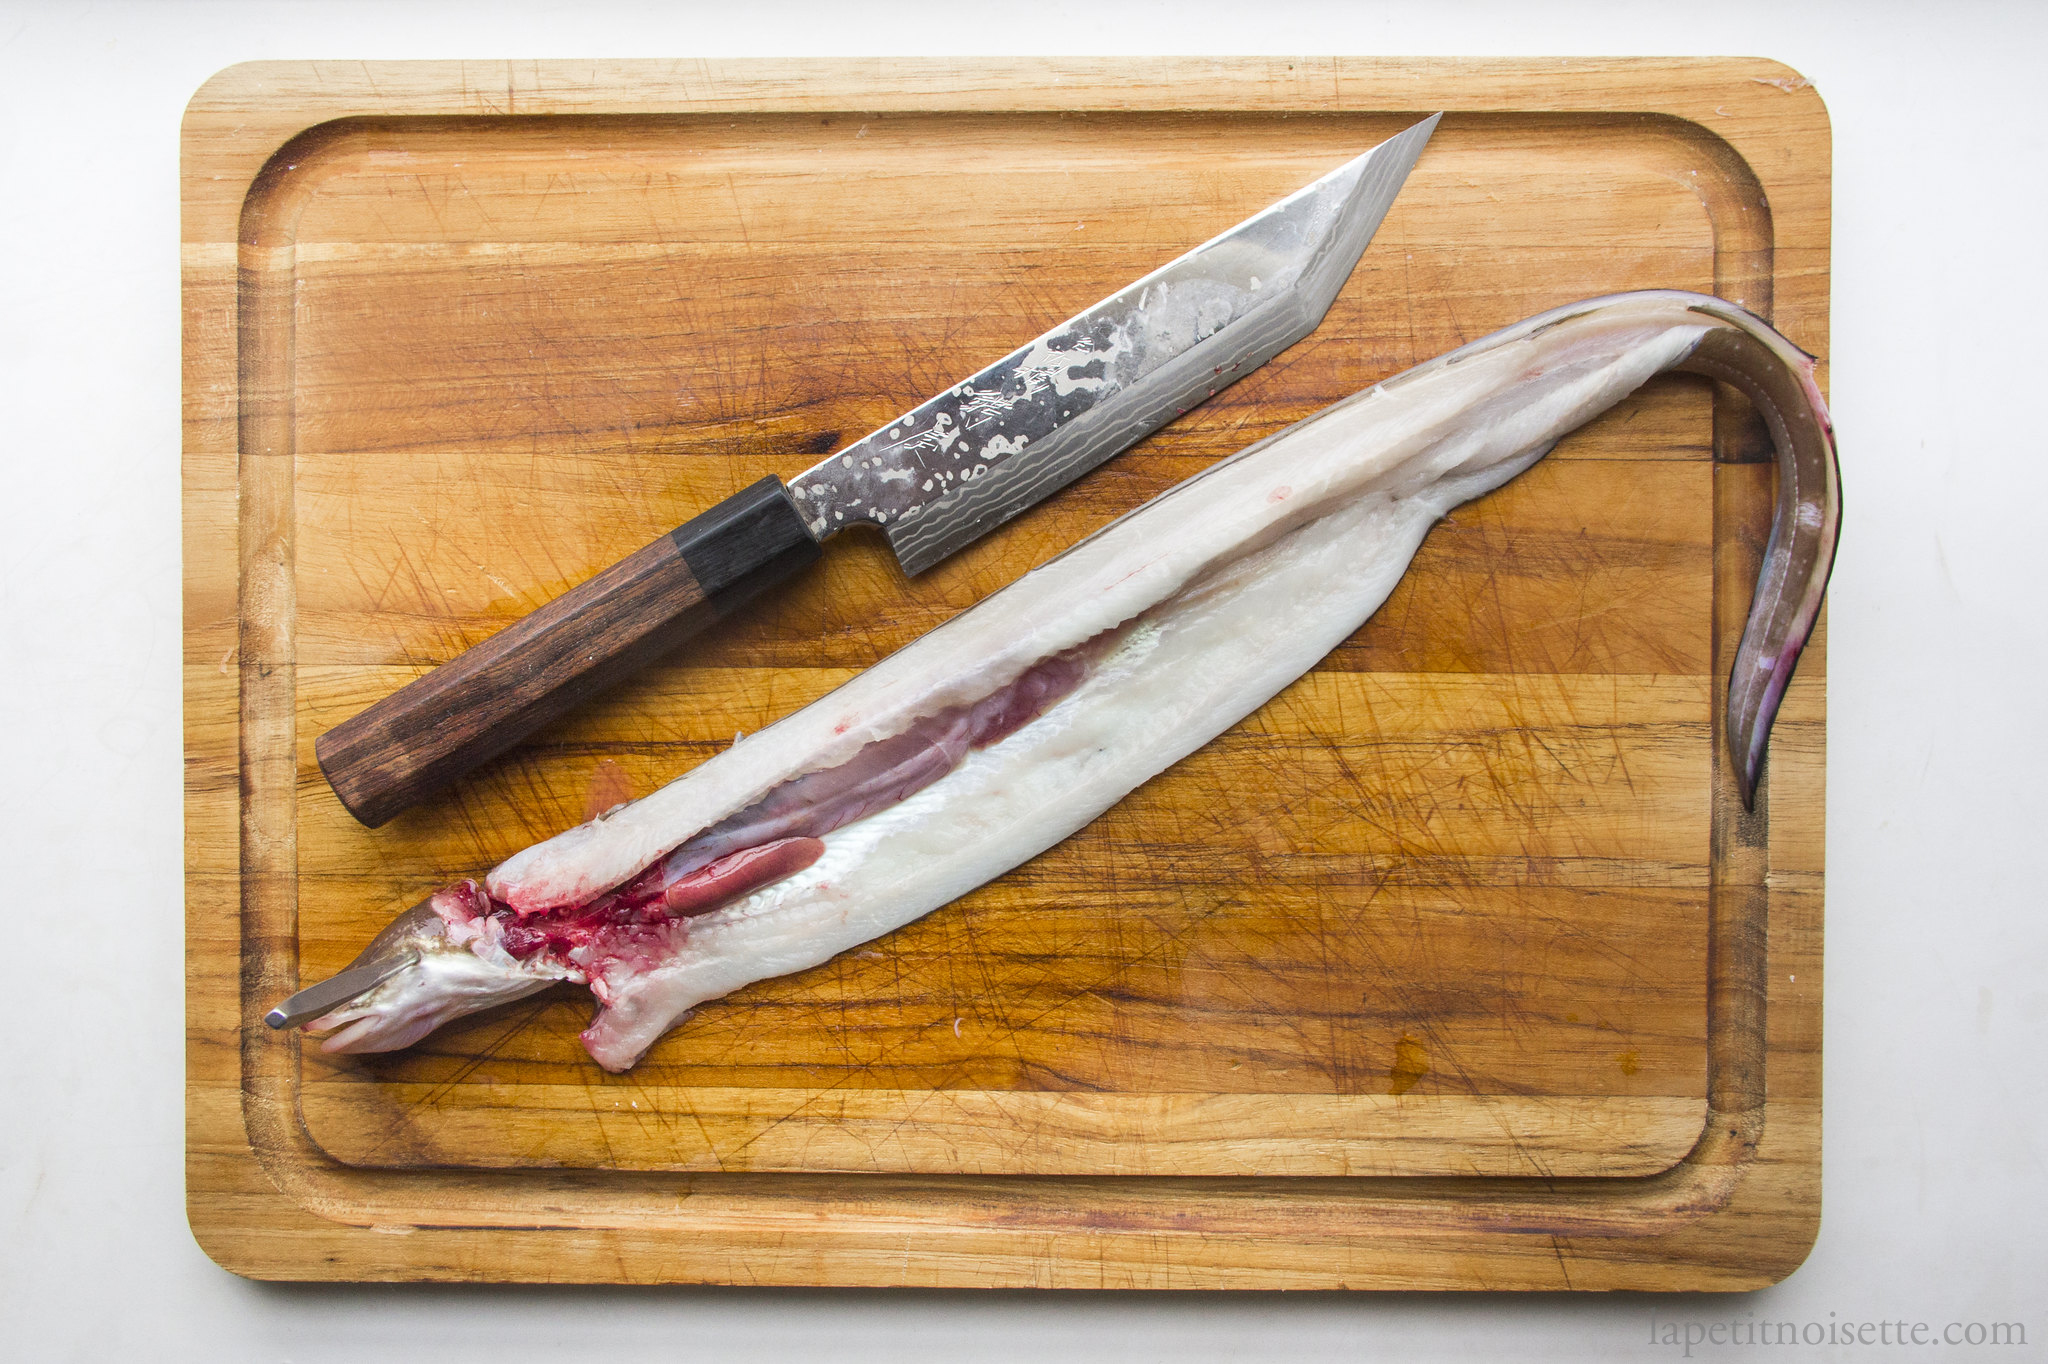
- Slide the knife along the eel again, removing the spine as you go.

- Using the tip of the knife, scrap of the innards of the eel. It should come off in one go due to the freshness.
Simmered Anago Recipe
- 2 Anago fillets (each eel weighing around 250g with bones and innards)
- 50ml Mirin
- 40g White Granulated Sugar
- 70ml Soy sauce
- 1500ml Water
- Heat a large pot of with the water and dissolve the sugar into it.
- Add the mirin and allow the alcohol to evaporate.
- Add in soy sauce and mix together.
- Once boiling, add in the anago.
- The eel might move around a lot in the pot so you might want to cover the pot with a lid or a Japanese drop-lid if you have one. you’ll want to have a Japanese drop lid, or otoshibuta (落し蓋) which allows the boiling sauce to cover the fish heads as you cook them, so that the exposed surfaces of the heads are still basted with sauce. A Japanese drop lid is a lid that doesn’t cover the top of the pot, but sits inside the pot on top of the ingredients, preventing them from moving around whilst both deflecting the boiling liquid back onto the ingredients whilst allowing for some evaporation. If you don’t have one, simply fold a large sheet of aluminium into 2 layers and then fold into a disc with a diameter smaller than your pot so that it fits inside. Use a knife to poke several holes in the disc to allow some evaporation. This works with baking paper as well.
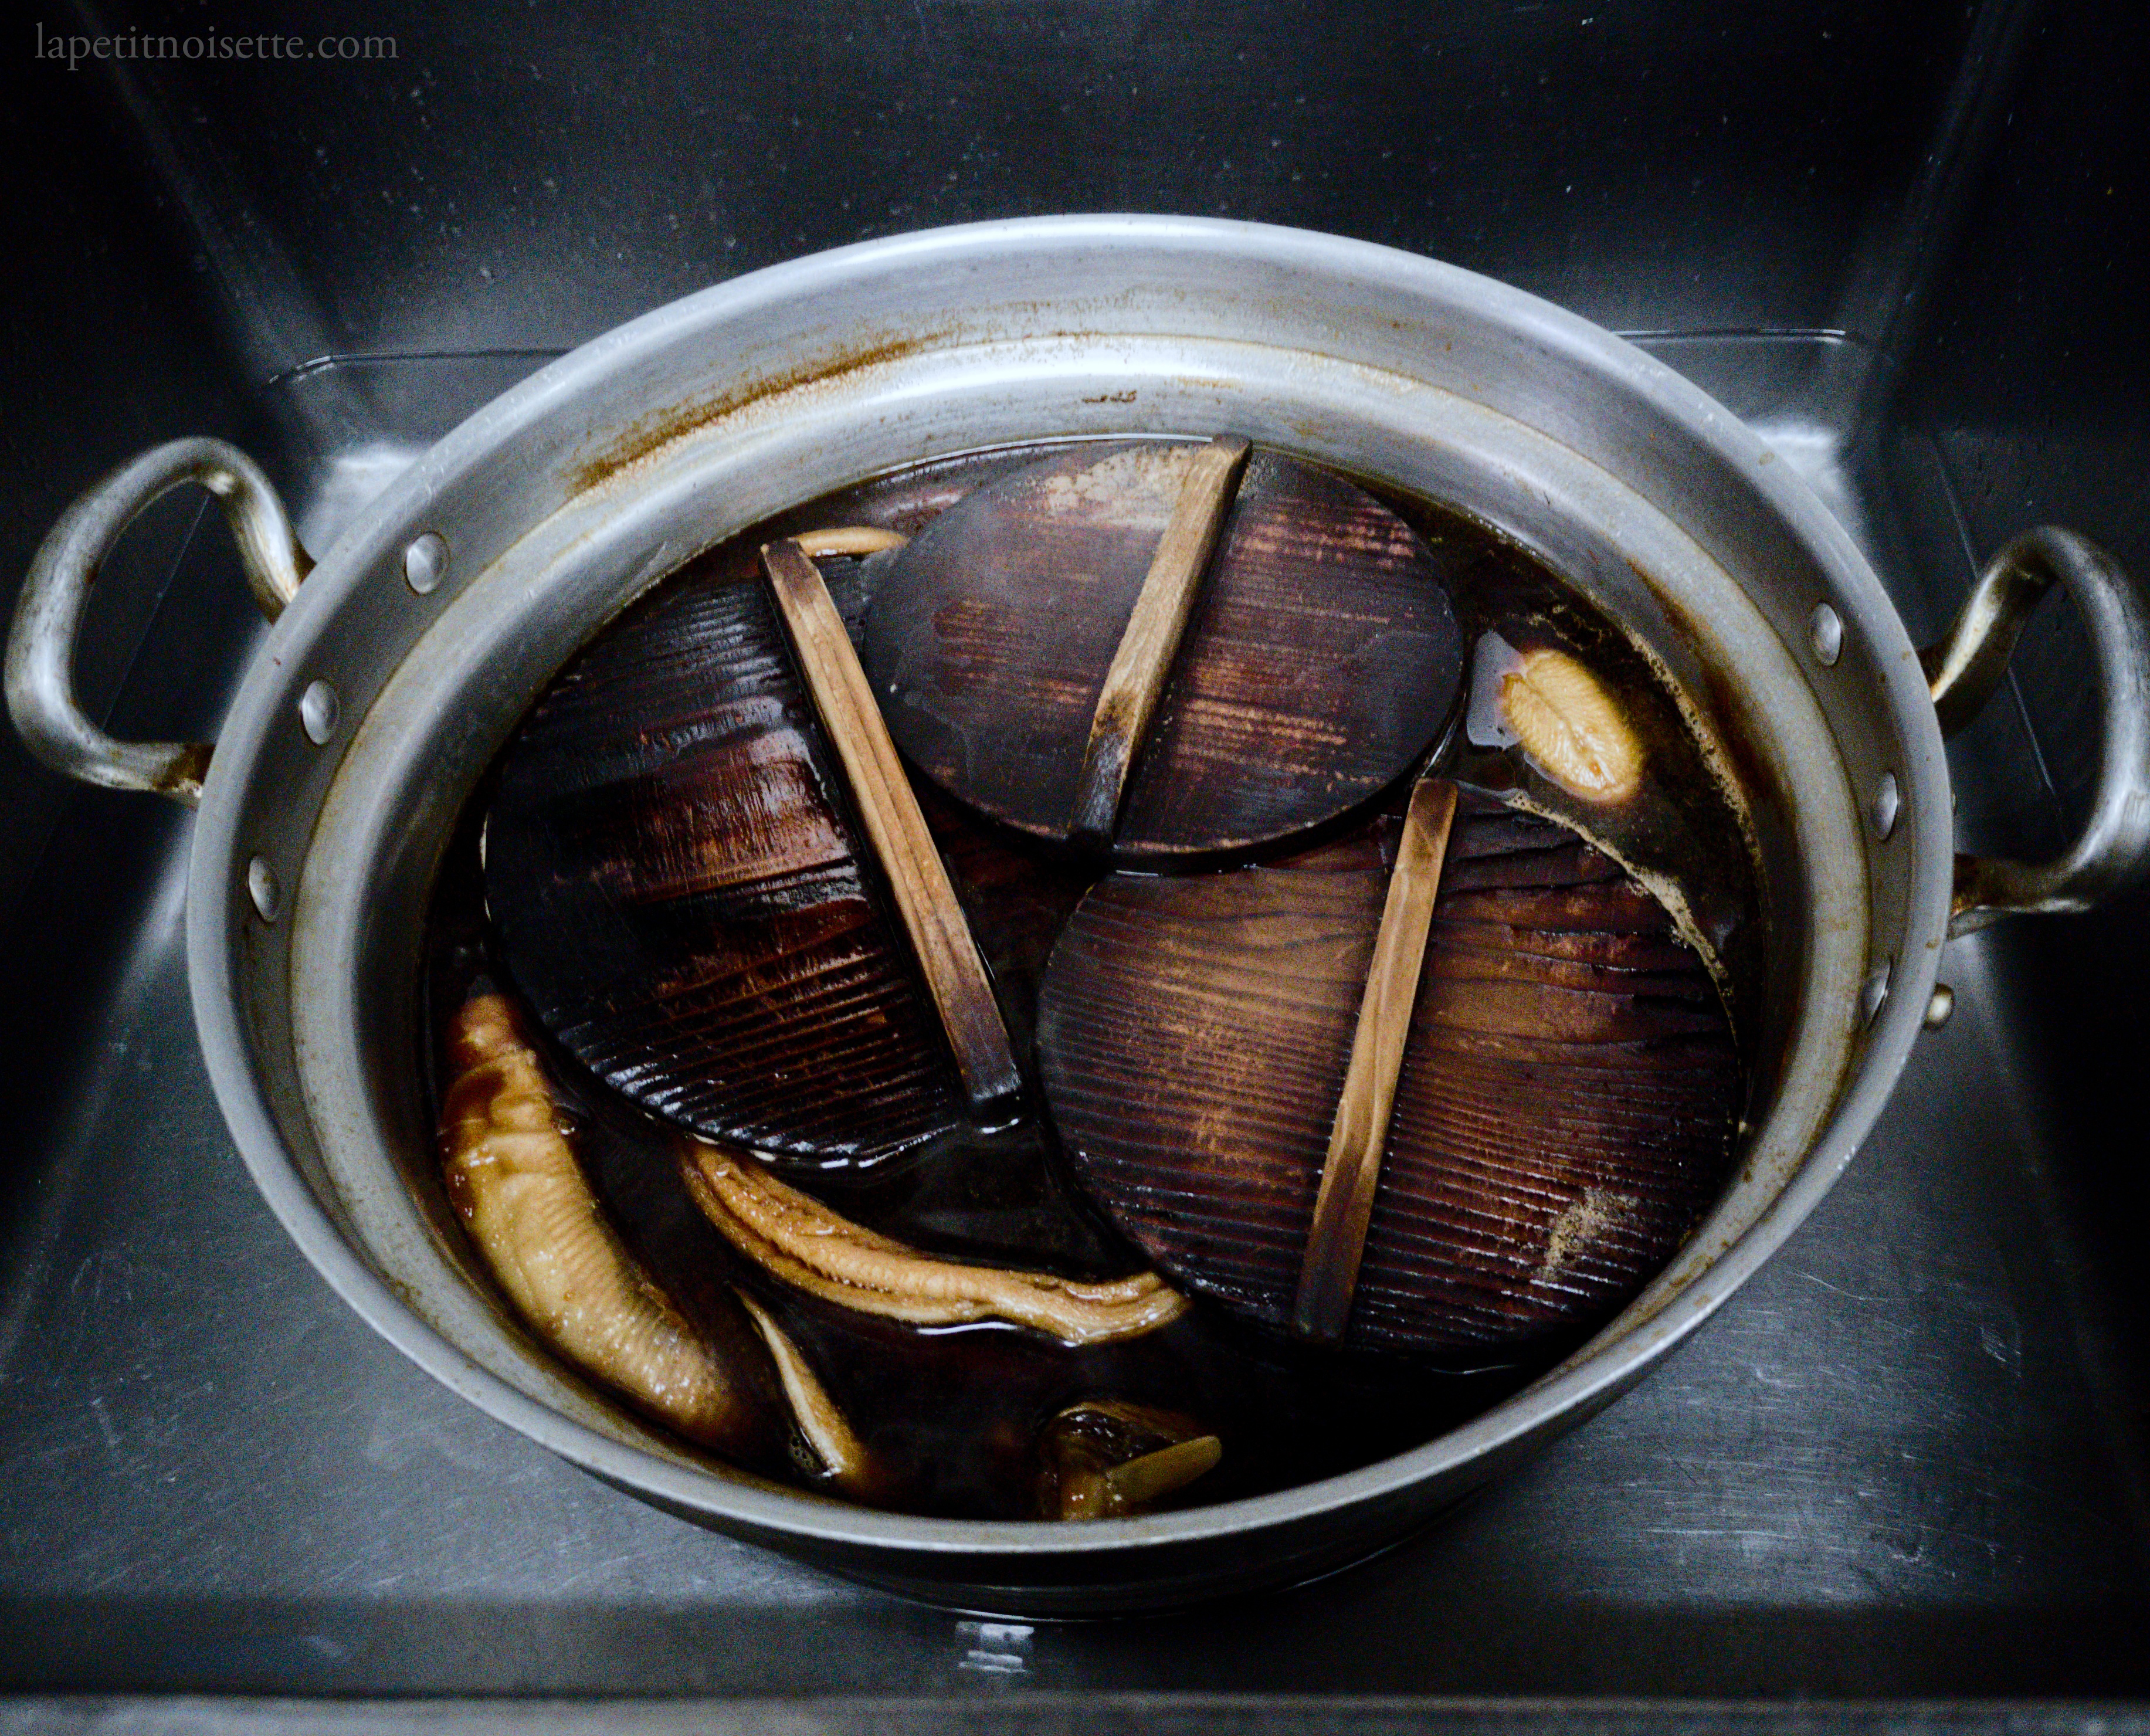
- Skim away any scum and foam that rises to the surface.
- After 25 minutes, gently remove from liquid. Save the liquid.
- The anago can be served warm over rice at this point. If serving in nigiri, gently cover with a damp towel to prevent the anago from drying out and serve at room temperature.
Hi! Just wanted to ask what about the fine bones within the flesh of the anago, how do you remove them?
Hello! You don’t remove those bones in anago as after simmering they tend to be soft enough to eat. I have eaten anago in restaurants where the bones are actually thick enough to be hard to bite through, but even then they’re not usually removed.