This article follows on from the science behind lactic acid fermentation that explains all information and method behind this recipe. A sample lactic acid fermentation recipe can also be found in our article on lacto-matsutake mushroms. Thank you to Jun for emailing me some questions regarding this recipe which hopefully are covered below.
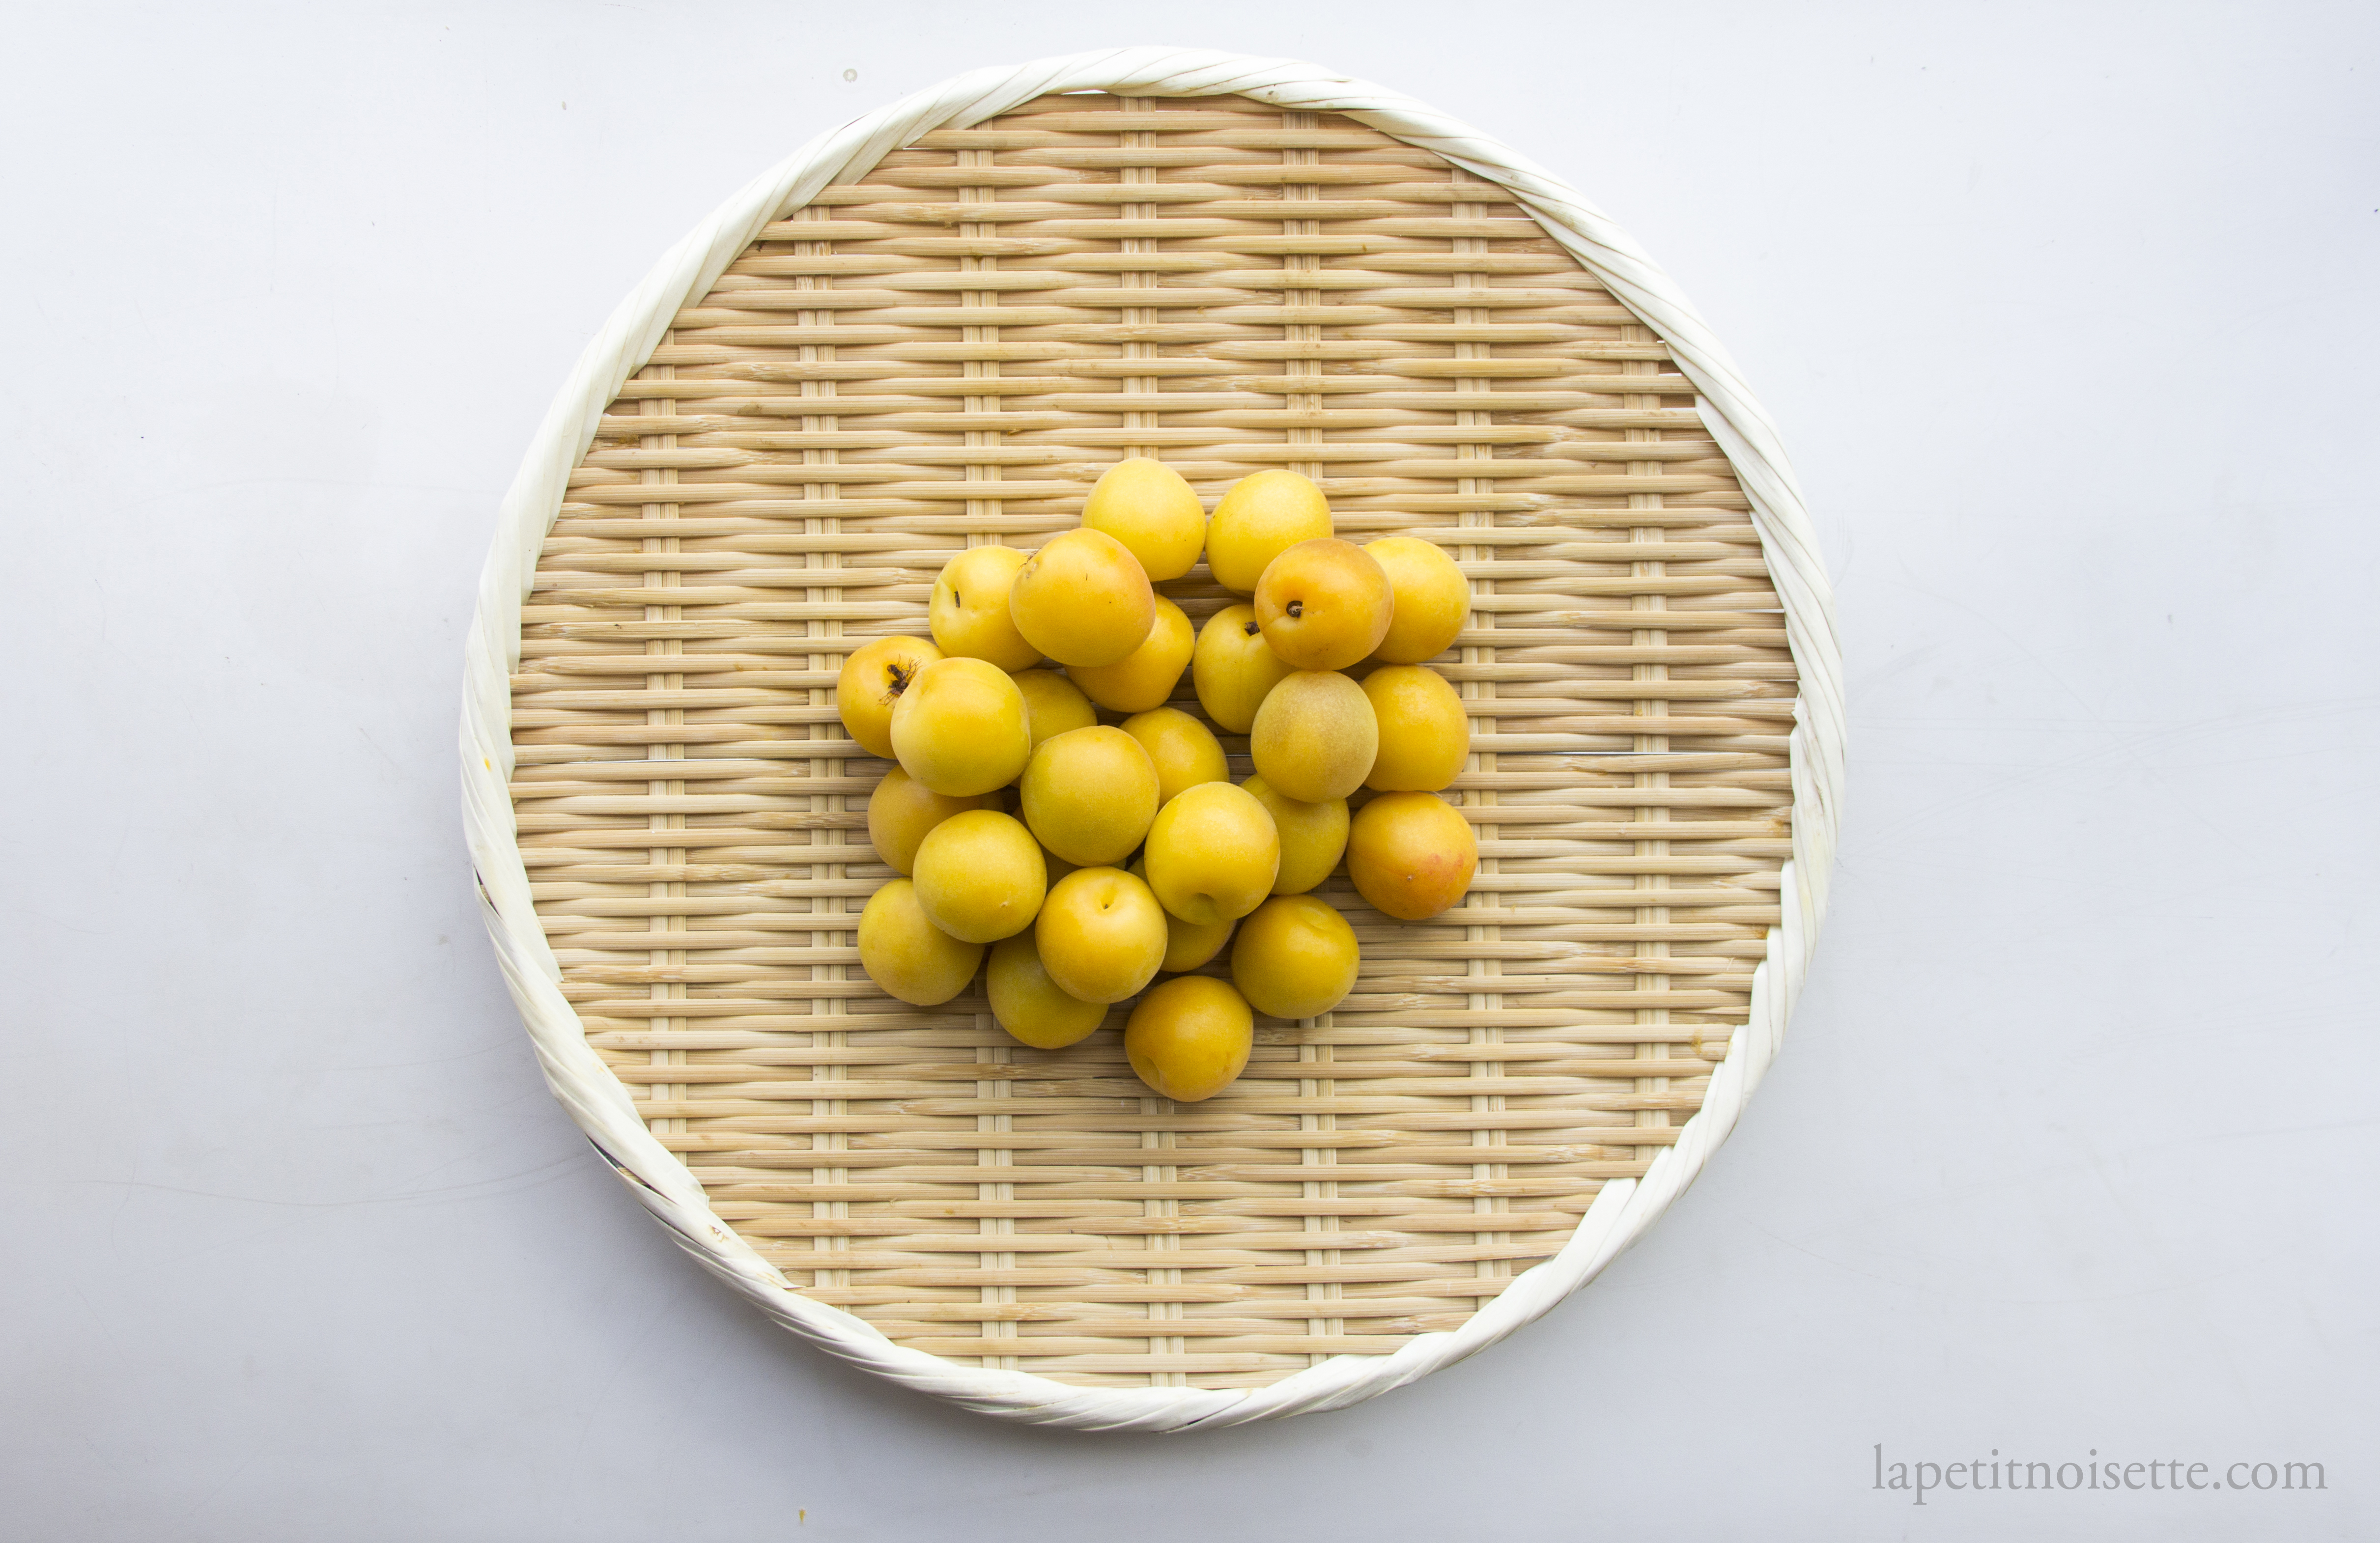
Probably the most classic lactic acid fermentation in the Japanese world, umeboshi, or salt preserved plums are a traditional staple of Japanese cuisine. To make umeboshi, unripe Japanese plums are preserved with salt before being dried in the sun to further increase their lasting quality whilst concentrating their flavour. These plums are then used as a condiment in bento boxes as they’re said to help preserve the freshness of the rice in the bento (which is a myth) or minced up and used as flavouring for various dishes. If you’ve seen my recipe on umeshu, which is a traditional liquor made from the same plums, you’d know that Japanese plums are instead not plums, but a variation of apricots. Even though unripe plums are used, the degree of ripeness actually matters, with completely green plums being used to make umeshu, whilst plums in the midst of ripening (ほぼ完熟), when the begin to develop some yellow colouration or are completely yellow but still hard to the touch, are used to make umeboshi.
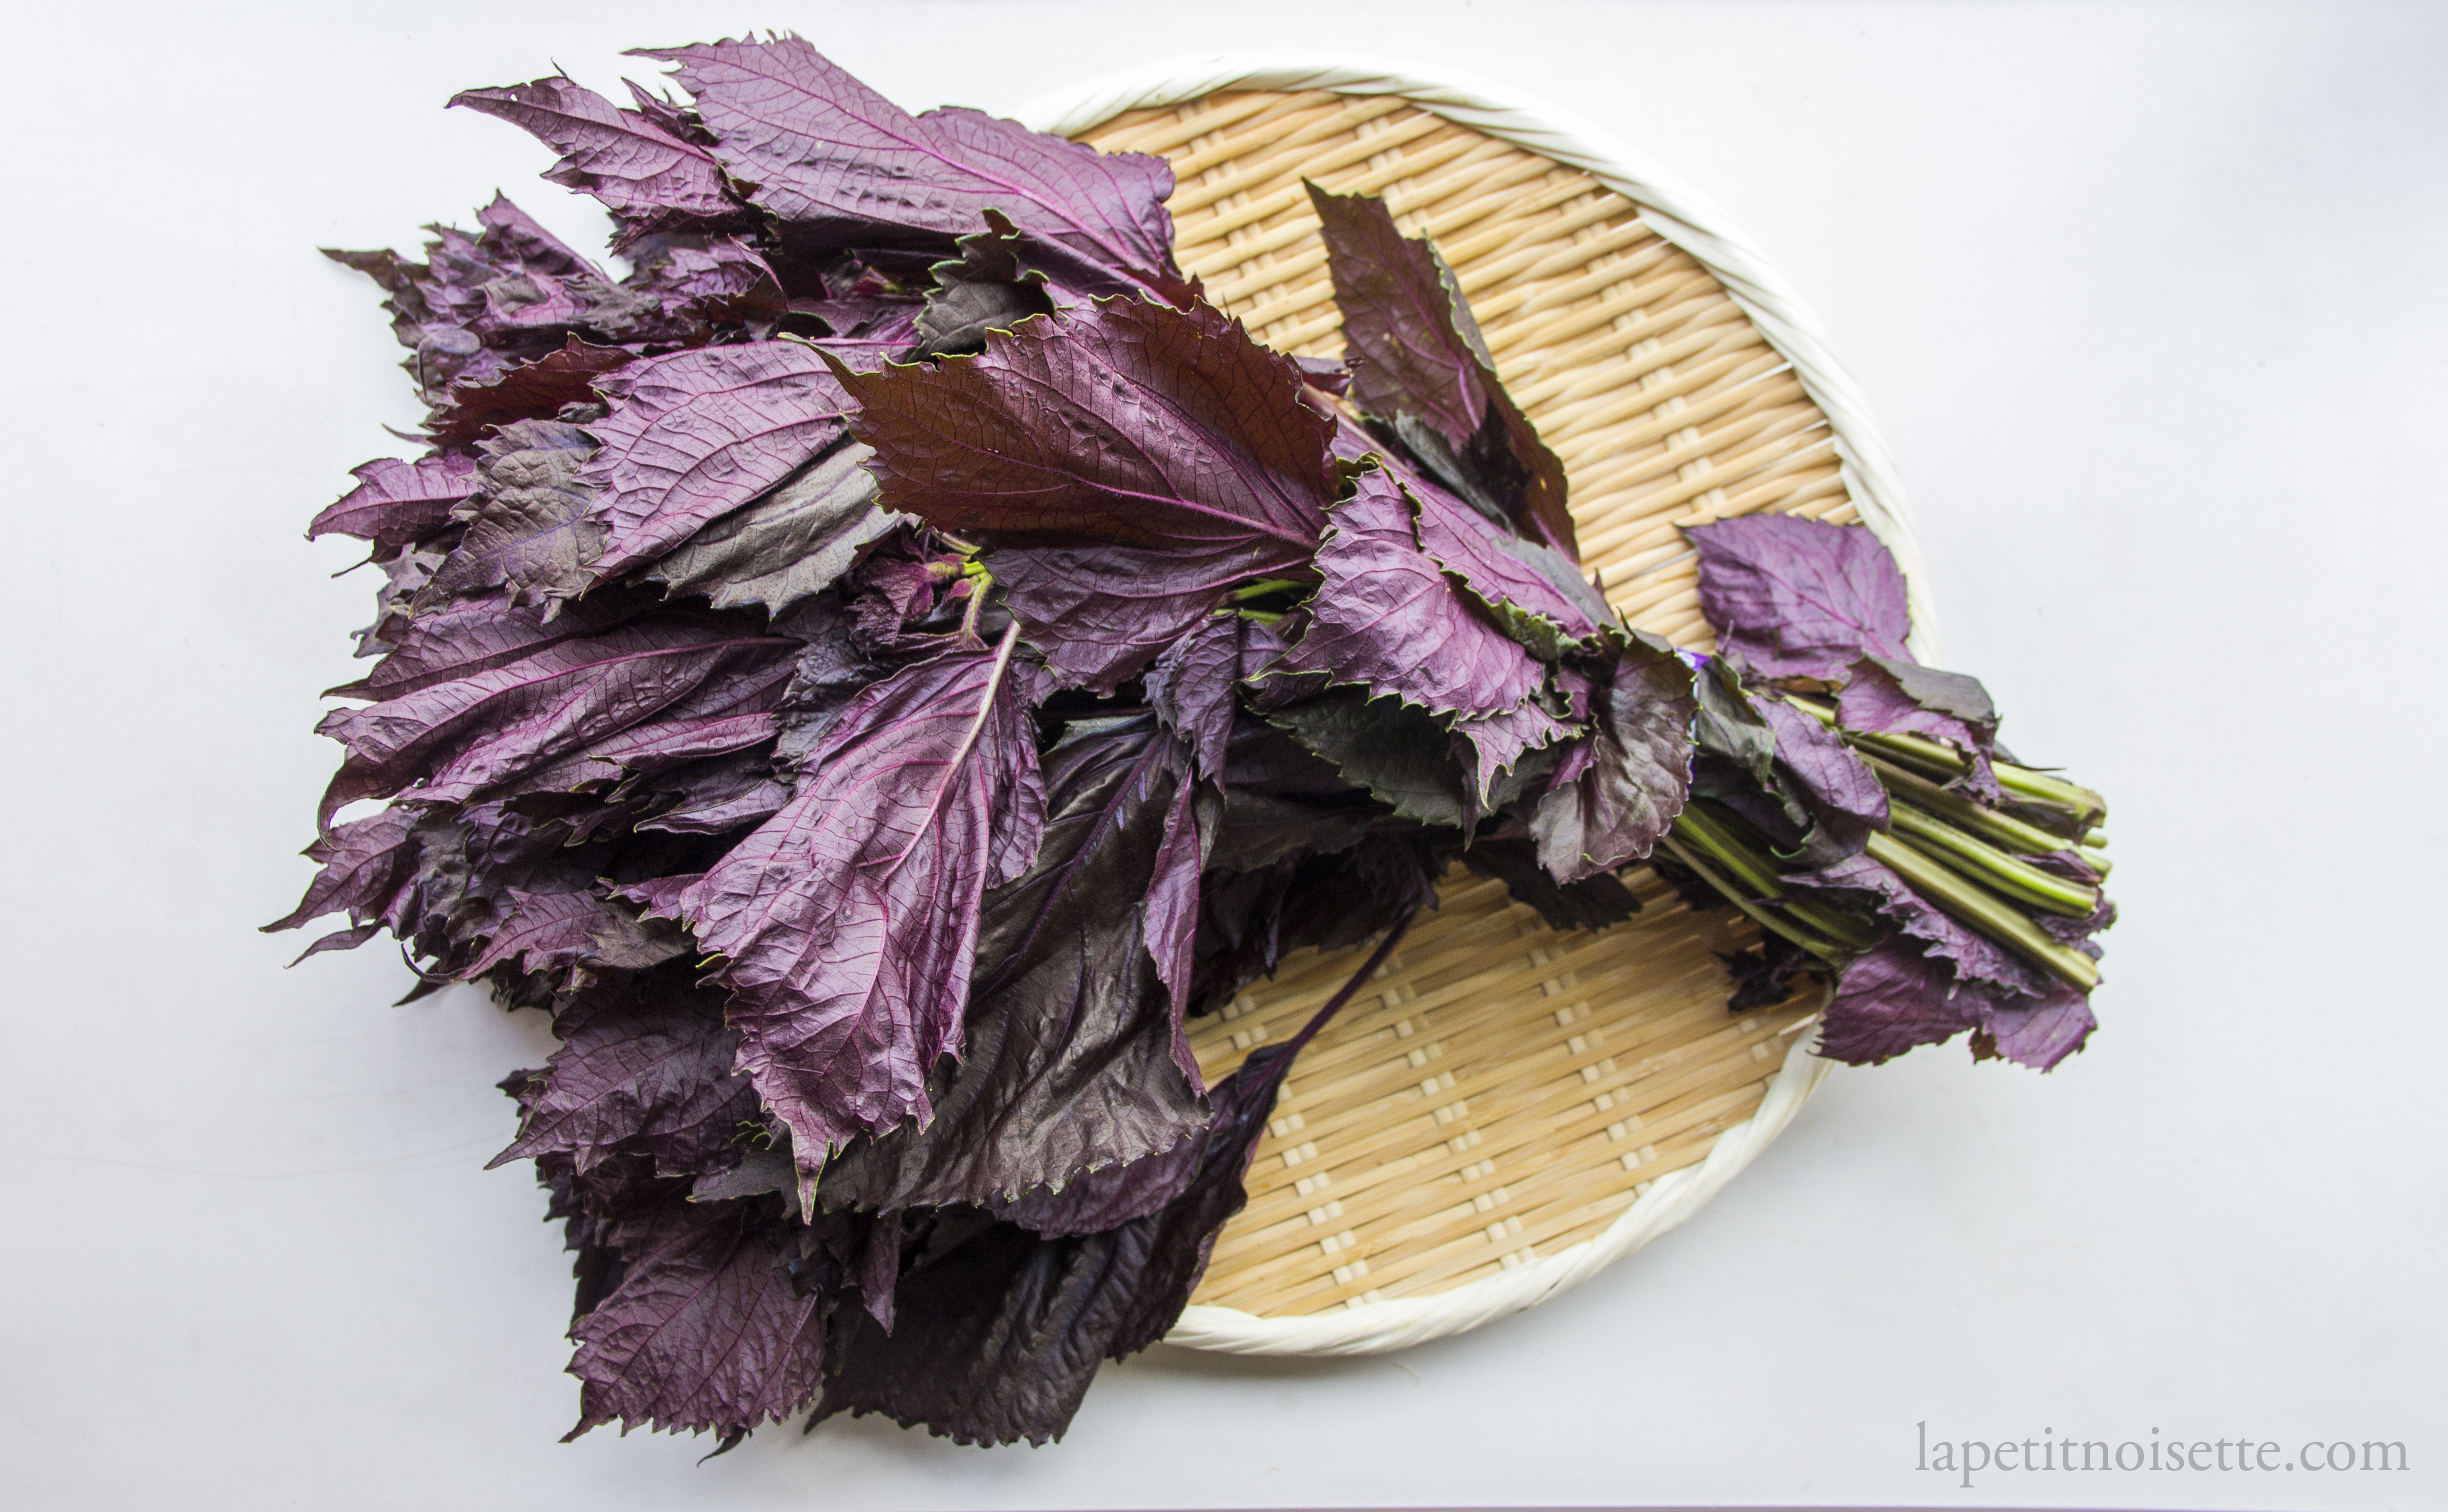
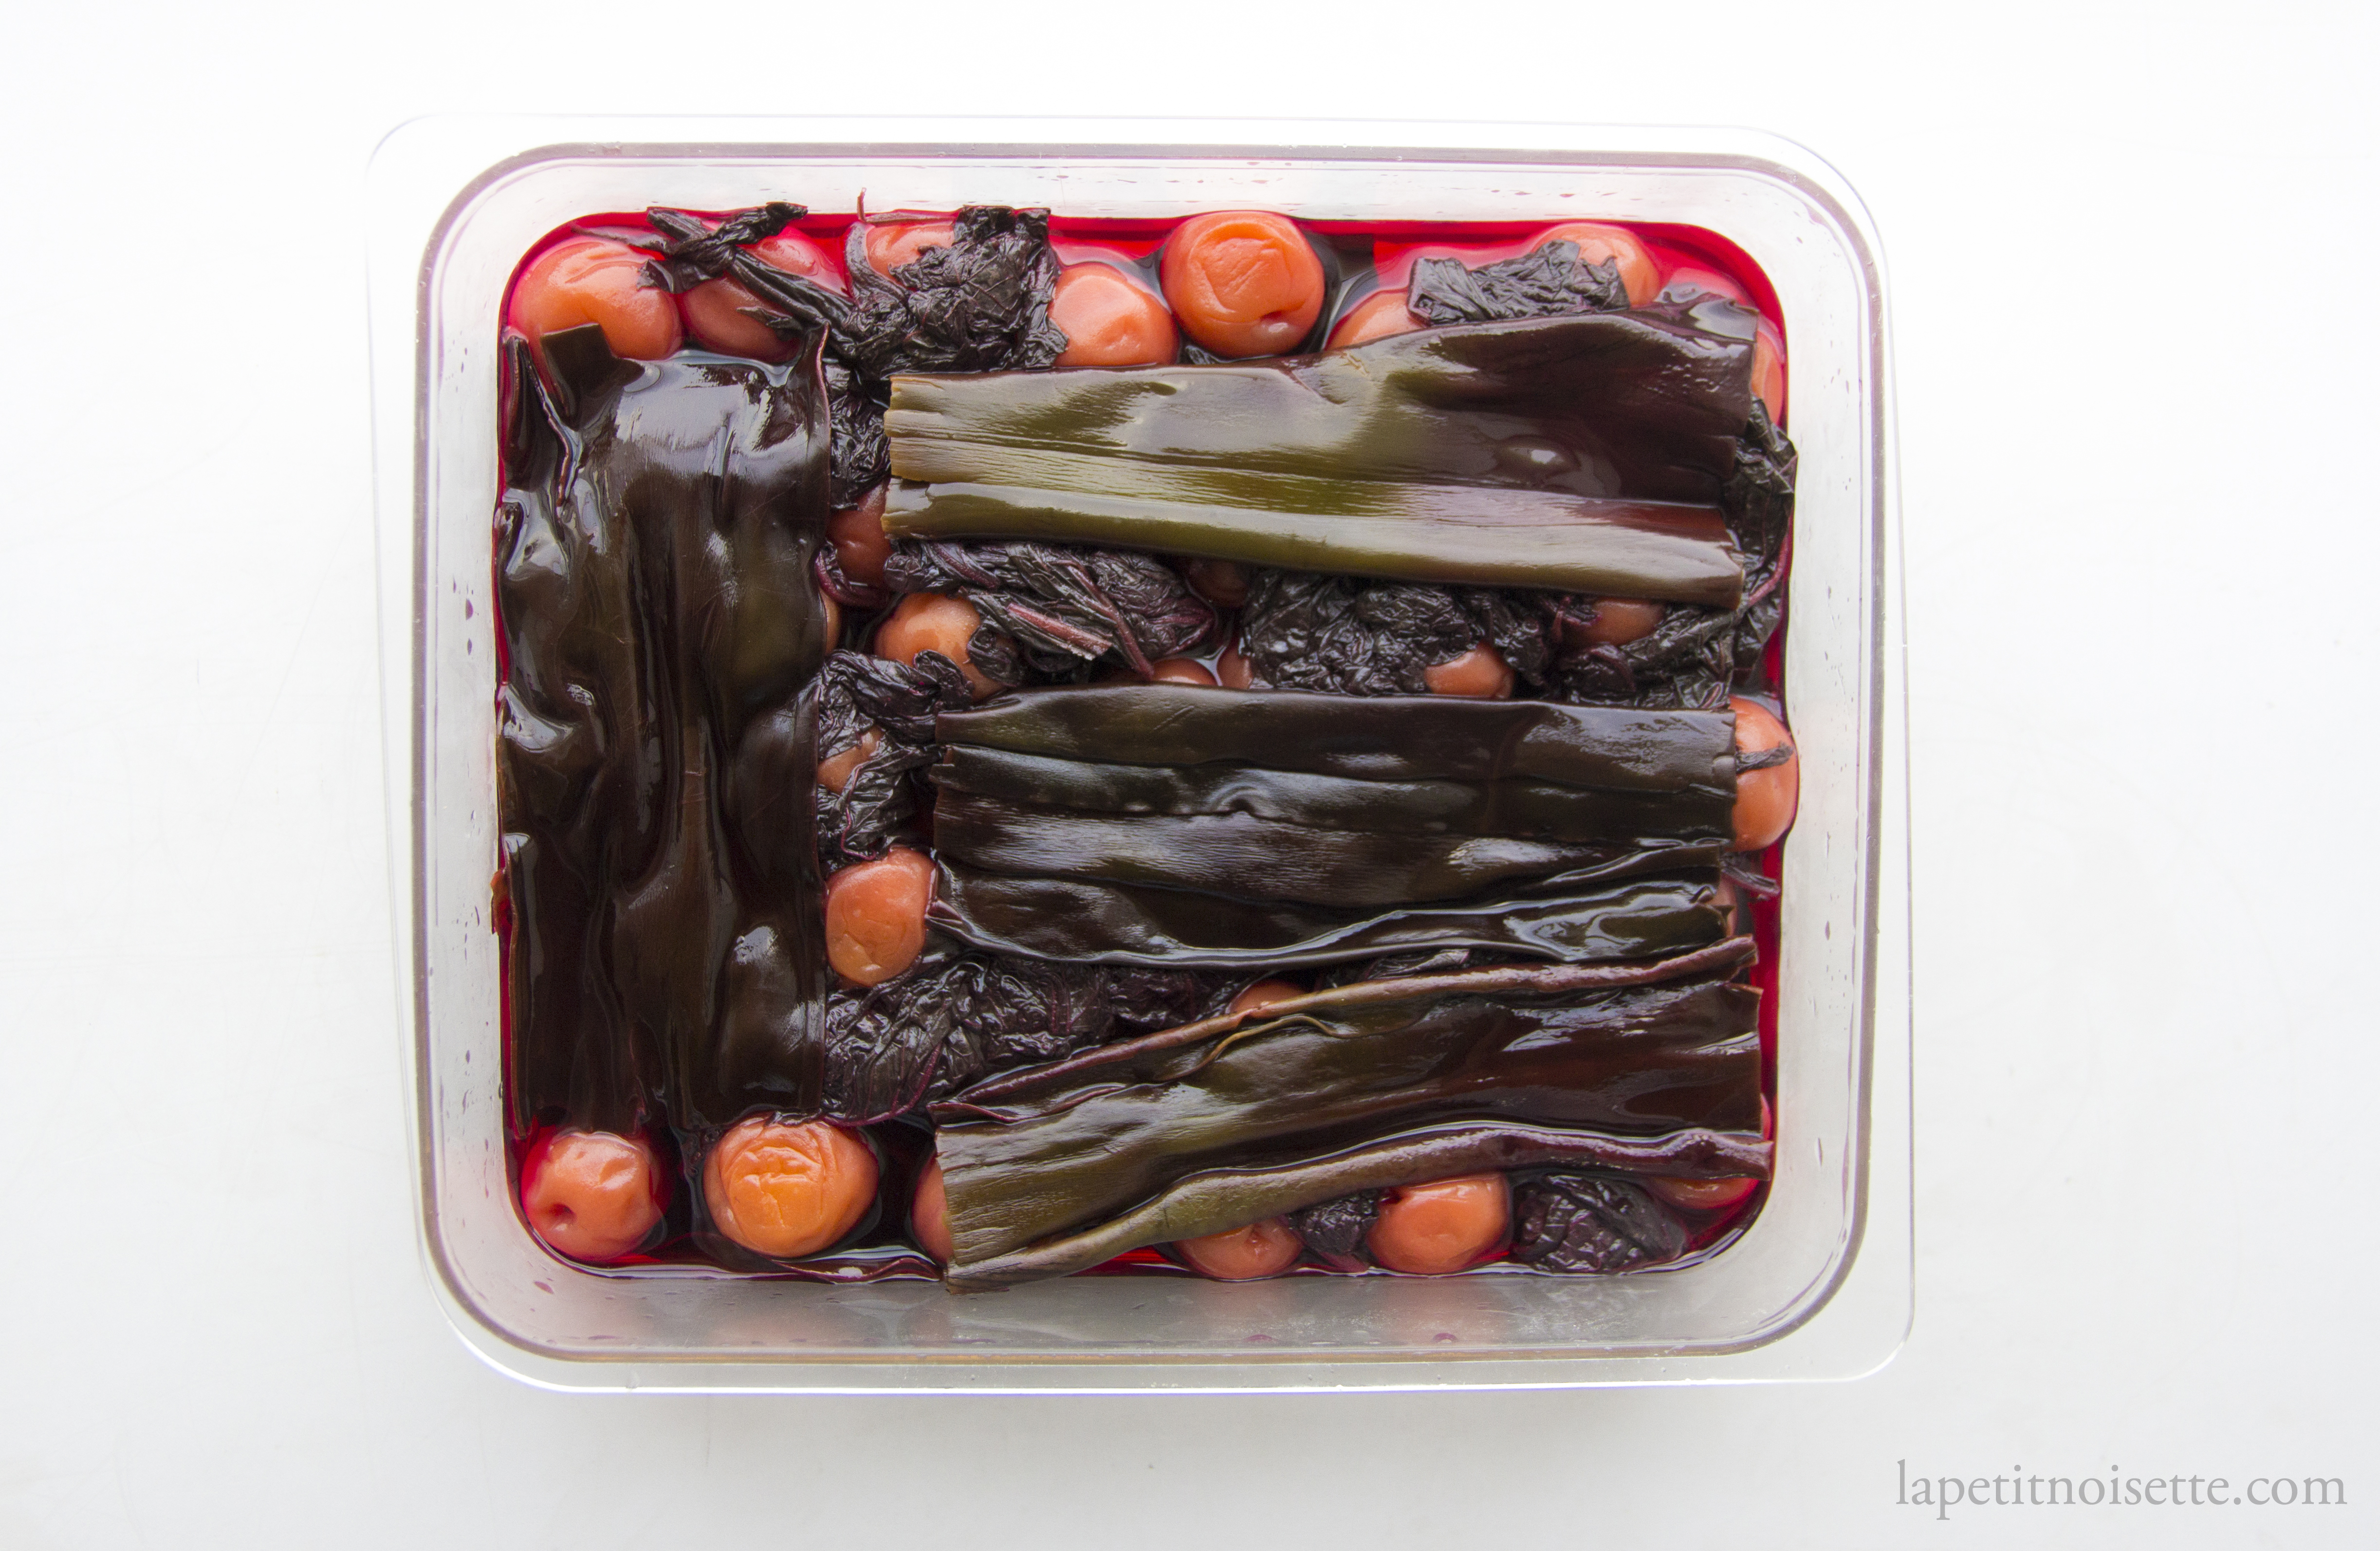
In its most simplest form, umeboshi is simply made by adding salt to the plums to draw out their juices, letting them macerate in their juice and then drying them. However, some versions of this recipe add red shiso leaves in order to not only colour the umeboshi a deep red colour, but also as an antibacterial agent. Other recipes also add kombu to boast the savouriness of the plums, which we will be doing here in this recipe. Upon finishing the fermentation, the salty plum juice left over is sometimes strained and bottled out as plum vinegar (umezu/梅酢) even though it’s not a real vinegar as the sourness comes from the unripe plum juice. The dried leftover shiso leaves are then ground down into a fine powder known as yukari (ゆかり) that is used as a seasoning over rice. Adding kombu during the umeboshi making process also infuses your resulting yukari powder with an almost sea salt taste which is an added bonus. Traditionally you wouldn’t add red shiso leaves to umeboshi because they don’t exactly come into season at the right time, but modern day transportation and changing weather means that nowadays it’s almost possible to get any ingredient at any time.
In terms of lacto-fermentations, the traditional salt amount used in the making of umeboshi can go up to 20% of the plums weight, which is almost high enough to even kill the salt tolerant lactic acid fermentation. Because of this, you could almost argue that this recipe might be more of a salt preservation rather than a lactic acid fermentation. When you do taste these plums though, an experienced tester will be able to pick out bits of lacto-fermented notes in them, as some lactic acid fermentation still goes on, especially in more modern recipes that reduce the salt to as low as 7-8%. All this actually explains why recipes of umeboshi that you’d find don’t talk about the need to release excess gas build up or venting the fermentation as such high salt concentration slows down the fermentation so much the build-up of gas is just not a problem.
The high salt concentration you’d find in traditional miso and umeboshi serves the purpose of preserving these foods for long periods of time, which is not required today due to refrigeration and additives. If you’ve been following along my blog, you’d know that I’m a big fan of recipes with long aging durations and the instructions for making umeboshi here are specifically aimed at producing a product that can age for at least 5 to 10 year as it is sometimes done and will still be fantastic for immediate consumption.
The process for this recipe is fairly straightforward though there are quite a few steps. First, you’d want to carefully vet and select your plums to remove any with cuts of blemishes which may go mouldy and ruin the whole batch. You’d then want to wash the plums in water, remove any stems and sterilize the plums and jars with alcohol. Some recipes call using hot water to sterilize the jars as you would do in jam jars but if you were to look closely at the instructions that accompany jars for umeboshi, their temperature range does not recommend you use hot water in them (this will be discussed in another article at some point). The jars used for umeboshi are the same characteristic red lidded glass jars that you use for umeshu. After that, you simply layer the shiso leaves, salt, kombu and plums in the jar and add a fermentation weight. You then let it ferment for 2 to 3 weeks before sun drying and then store them away for consumption.
With any of these recipes designed for long aging, the quality of ingredients paramount to the aging potential of the product in terms of development of flavour, the same as true for wine. What differentiates expensive wine from cheap wine isn’t its drinkability today, but that of 10 or 20 years down the line. So if you just want to make normal umeboshi for immediate consumption, just use any ingredients you can find, but if you want them to last the journey, make some effort to find better quality ingredients.
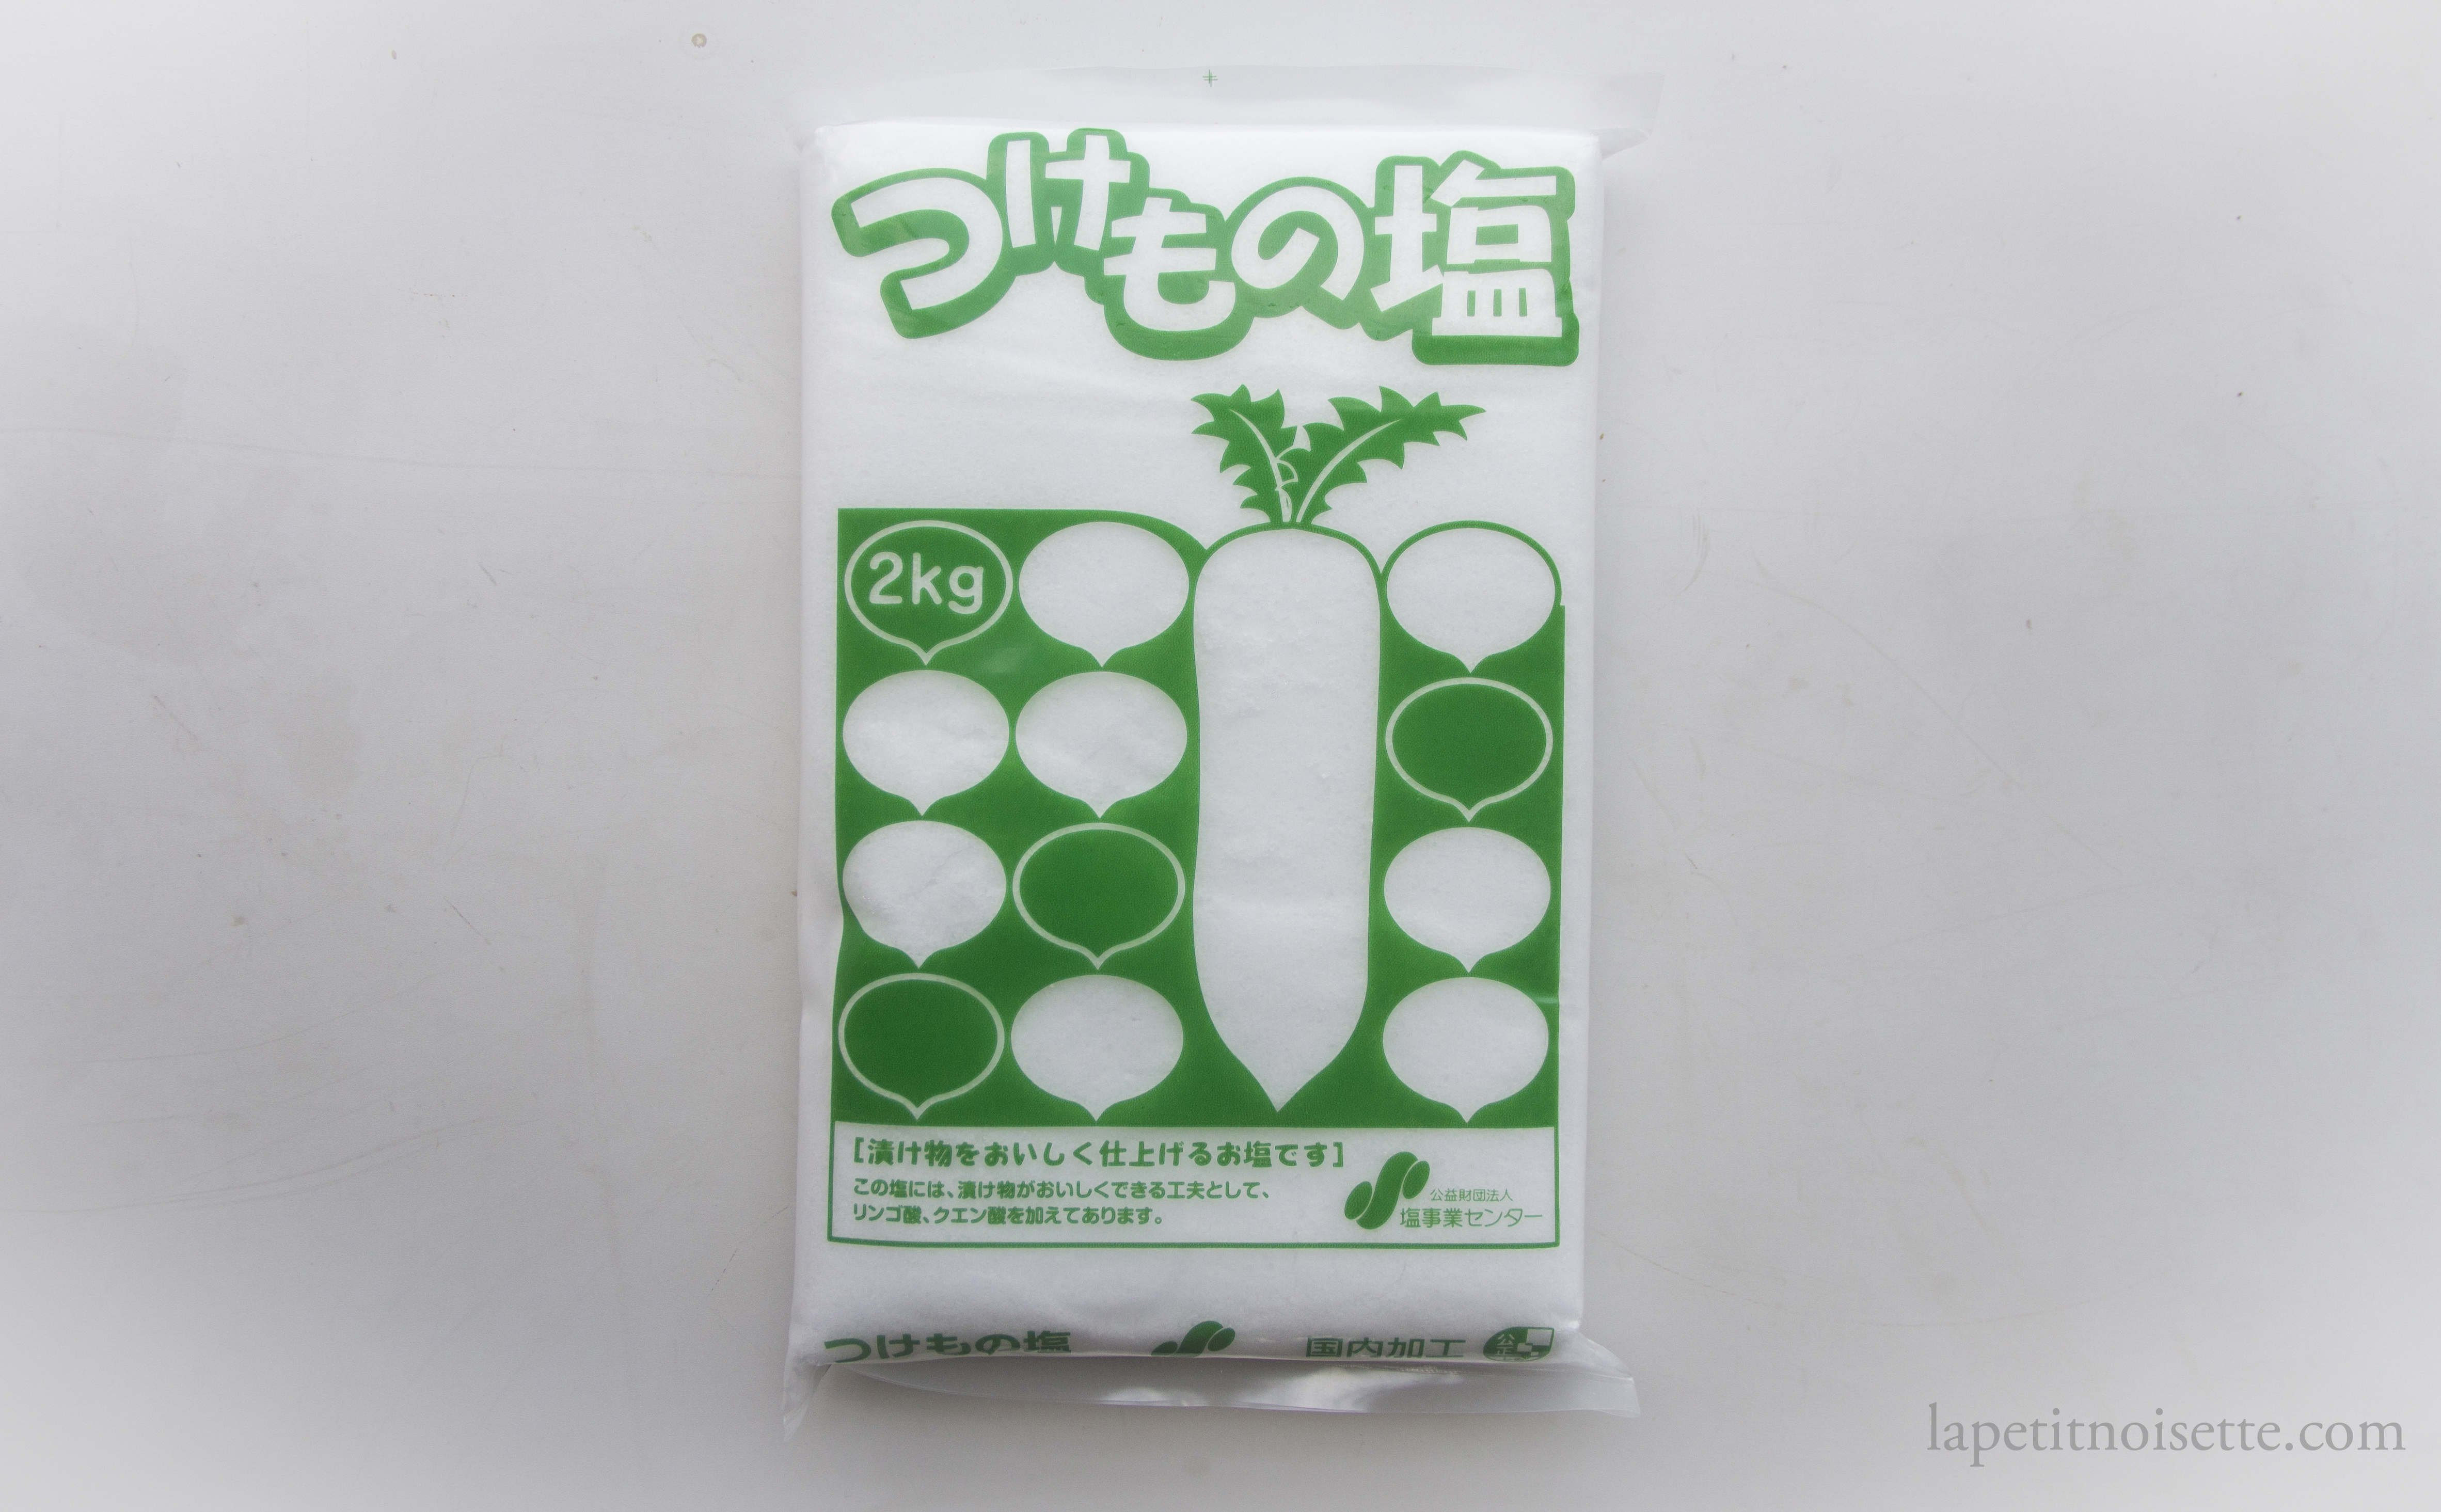
Any alcohol above 35% proof is good enough to sterilize the plums and bottle. The apricots or plums you use should be firm and unripe. They don’t have to be green specifically, as even yellowish plums as seen in this recipe work so long as they are unripe, which you can tell from their firmness. You can buy salt specifically for making preserves in Japan but any high quality sea salt works. Avoid iodized salt.
- Alcohol for sterilizing the jar and plums
- Enough unripe Japanese plums (Ume) to fill your jar of choice (2kg is a good amount to start)
- 15% of the plums’ weight in salt
- 10% of the plums’ weight in shiso leaves
- 10% of the shiso leaves weight in salt
- 0.01% of the plums weight in Kombu
- To start, soak the plums in cool water overnight.
- The next day, before preparing the plums you’d want to prepare the shiso leaves. Pick the shiso leaves from the main stem. You don’t need to remove each individual leaf from all their stems, just try to remove the main thick stem in the middle and any other really tough stem.
- Wash the shiso leaves and drain well before sprinkling 3% of the shiso leaves’ weight in salt on them (this salt is not included in the salt weight for the plums).
- Rub and massage the salt into the shiso leaves until they start to go limp, around 3-5 minutes) and squeeze out any excess liquid extracted from the shiso leaves by the salt.
- After soaking overnight, one by one, remove the plums from the cool water the next day and remove their stems with either a toothpick or the tip of a paring knife. Take care not to piece or cut the skin of the plums which may lead to mould.
- Once all the stems are removed, wash them plums in water 2 or 3 times.
- Add some alcohol to your fermentation jar/vessel and swish it around to sterilize the jar.
- Pour the alcohol out into a bowl and dunk each plum in the alcohol briefly to sterilize the plums.
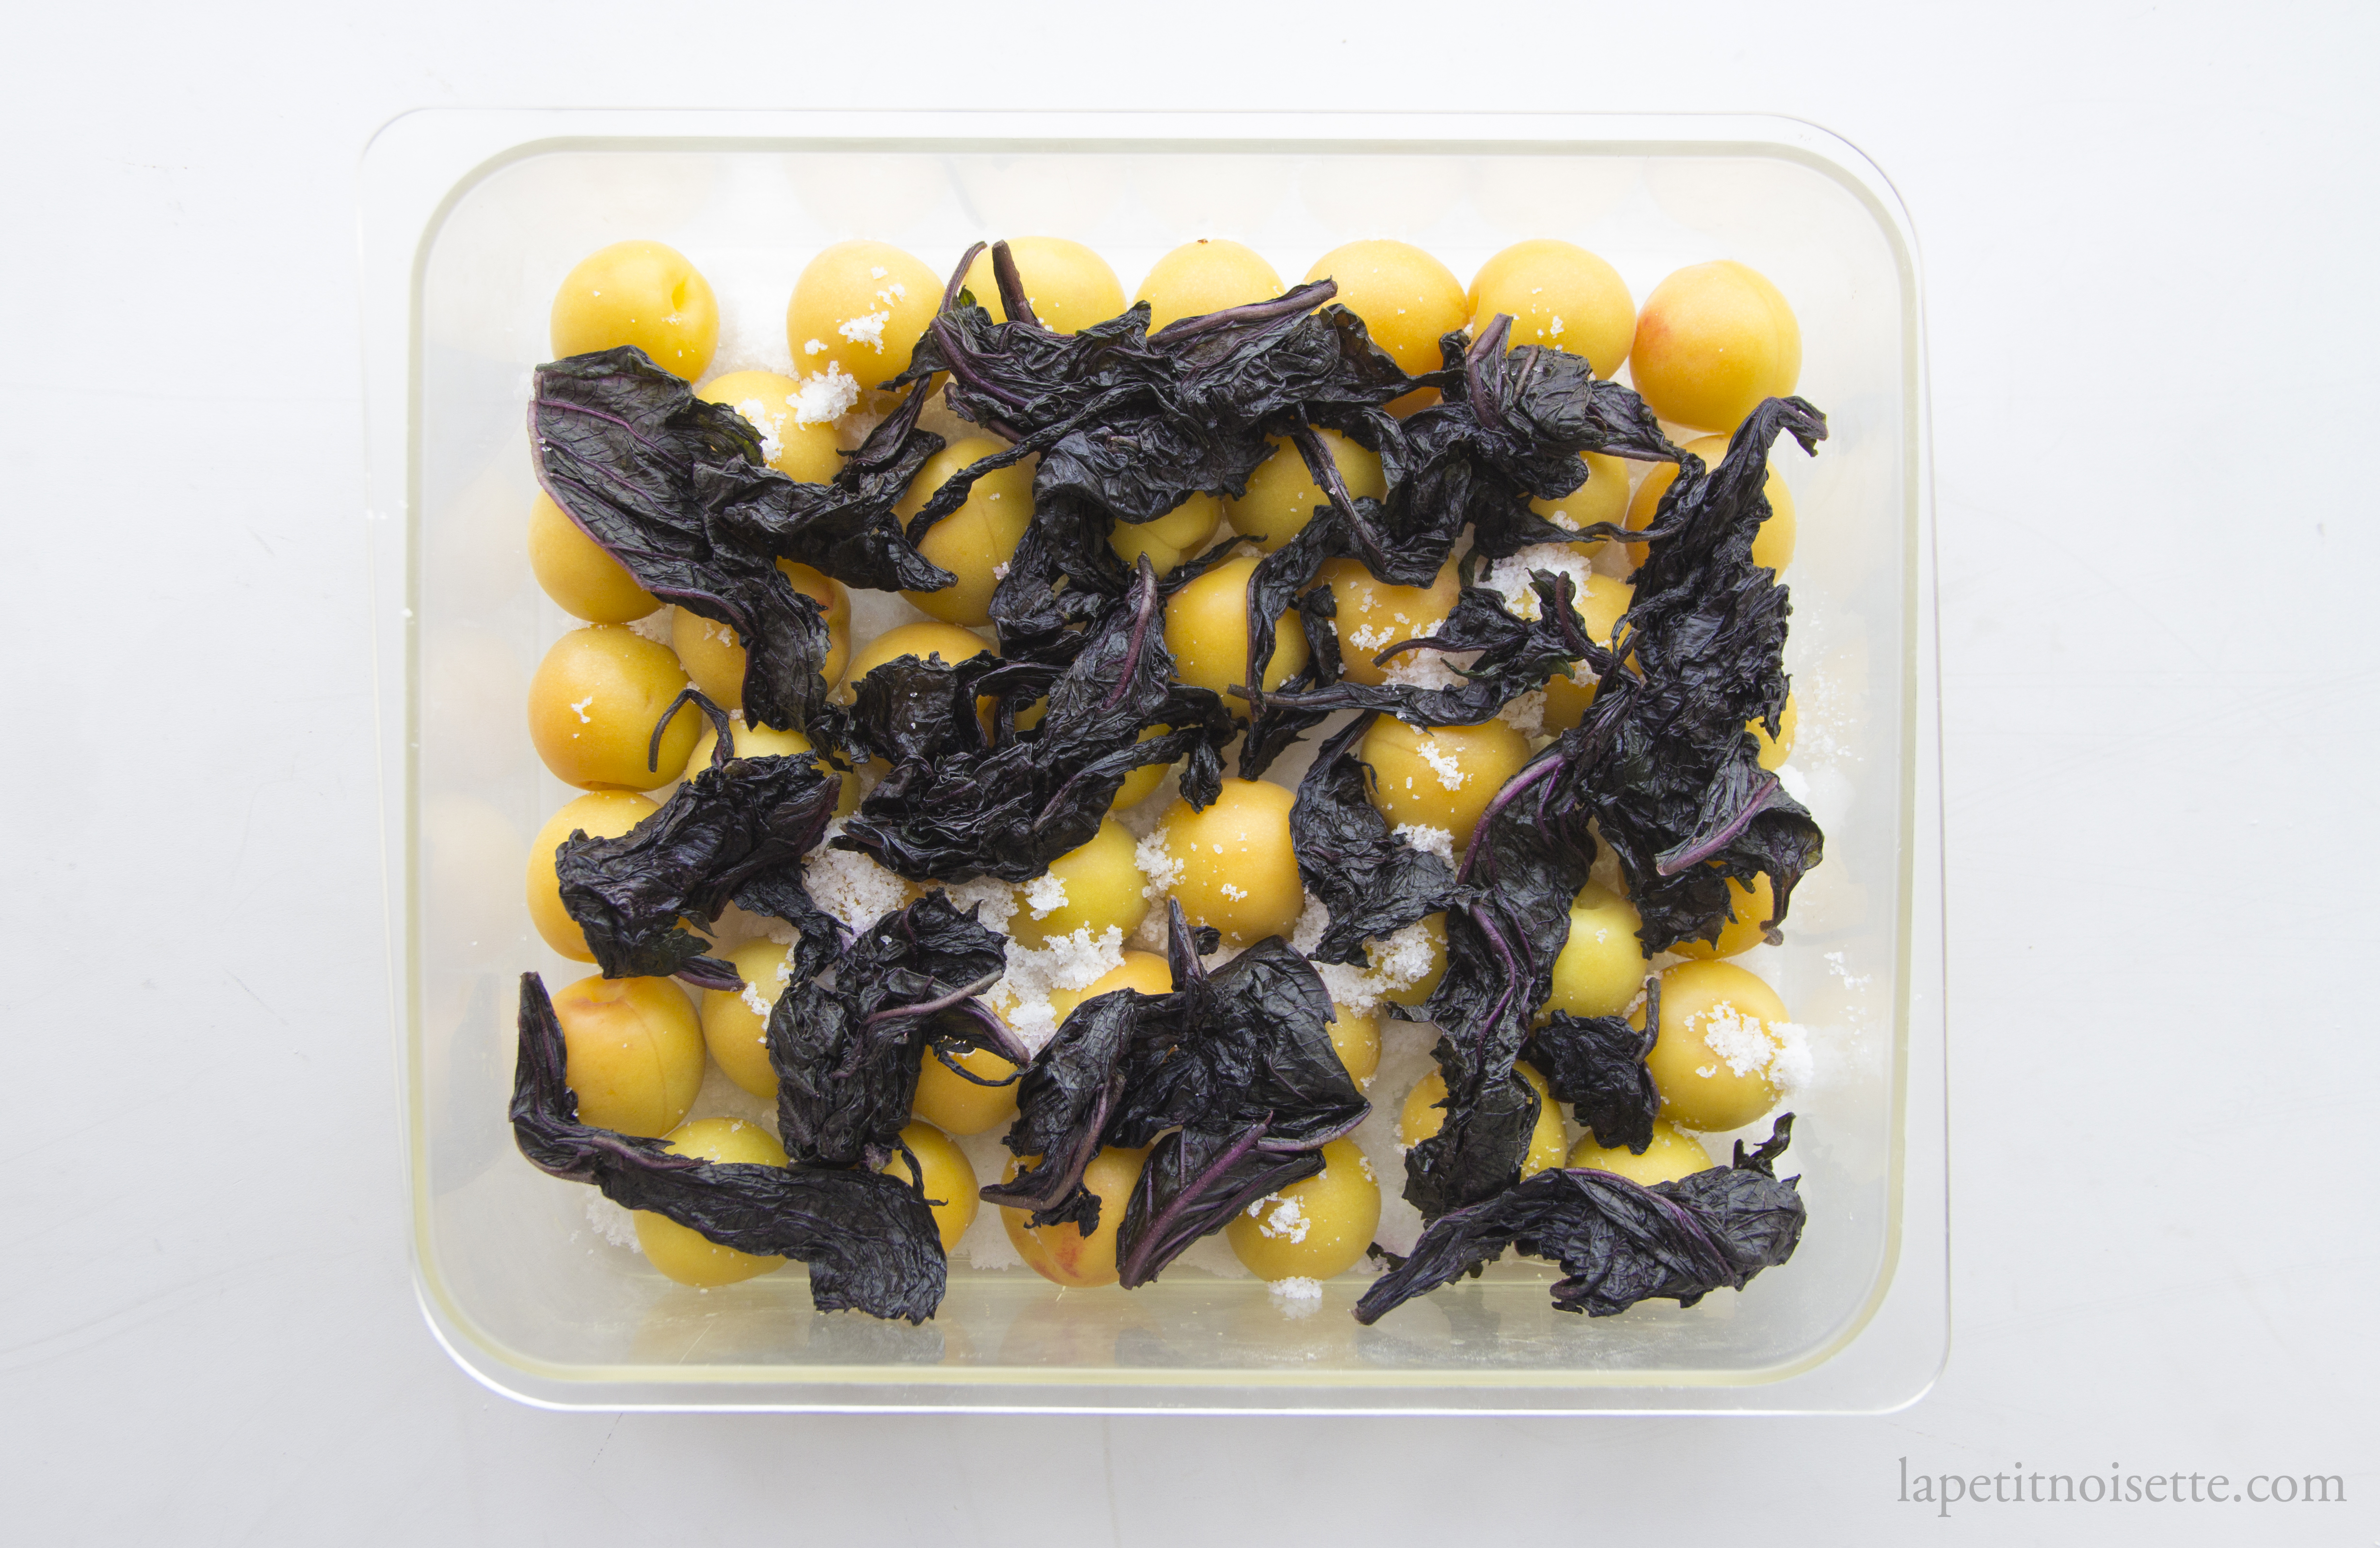
- Add a layer of plums into your jar and sprinkle with salt before layering on the shiso leaves followed by the kombu.
- Repeat until all the ingredients are in the jar. Try to sprinkle the salt so that all the salt is distributed evenly in the jar but if a small amount of salt remains just pour it in at the end.
- Cover the plums with muslin cloth and add a weight into the jar to press on the plums that is at least 50-70% of the plum’s weight. Any less and you might not get enough juice and anymore might crush the plums. I just use a doubled bagged ziplock filled with water.
- Cover the jar with another layer of muslin cloth and fasten with string or a rubber band. Alternatively, you can loosely close the lid on the jar.
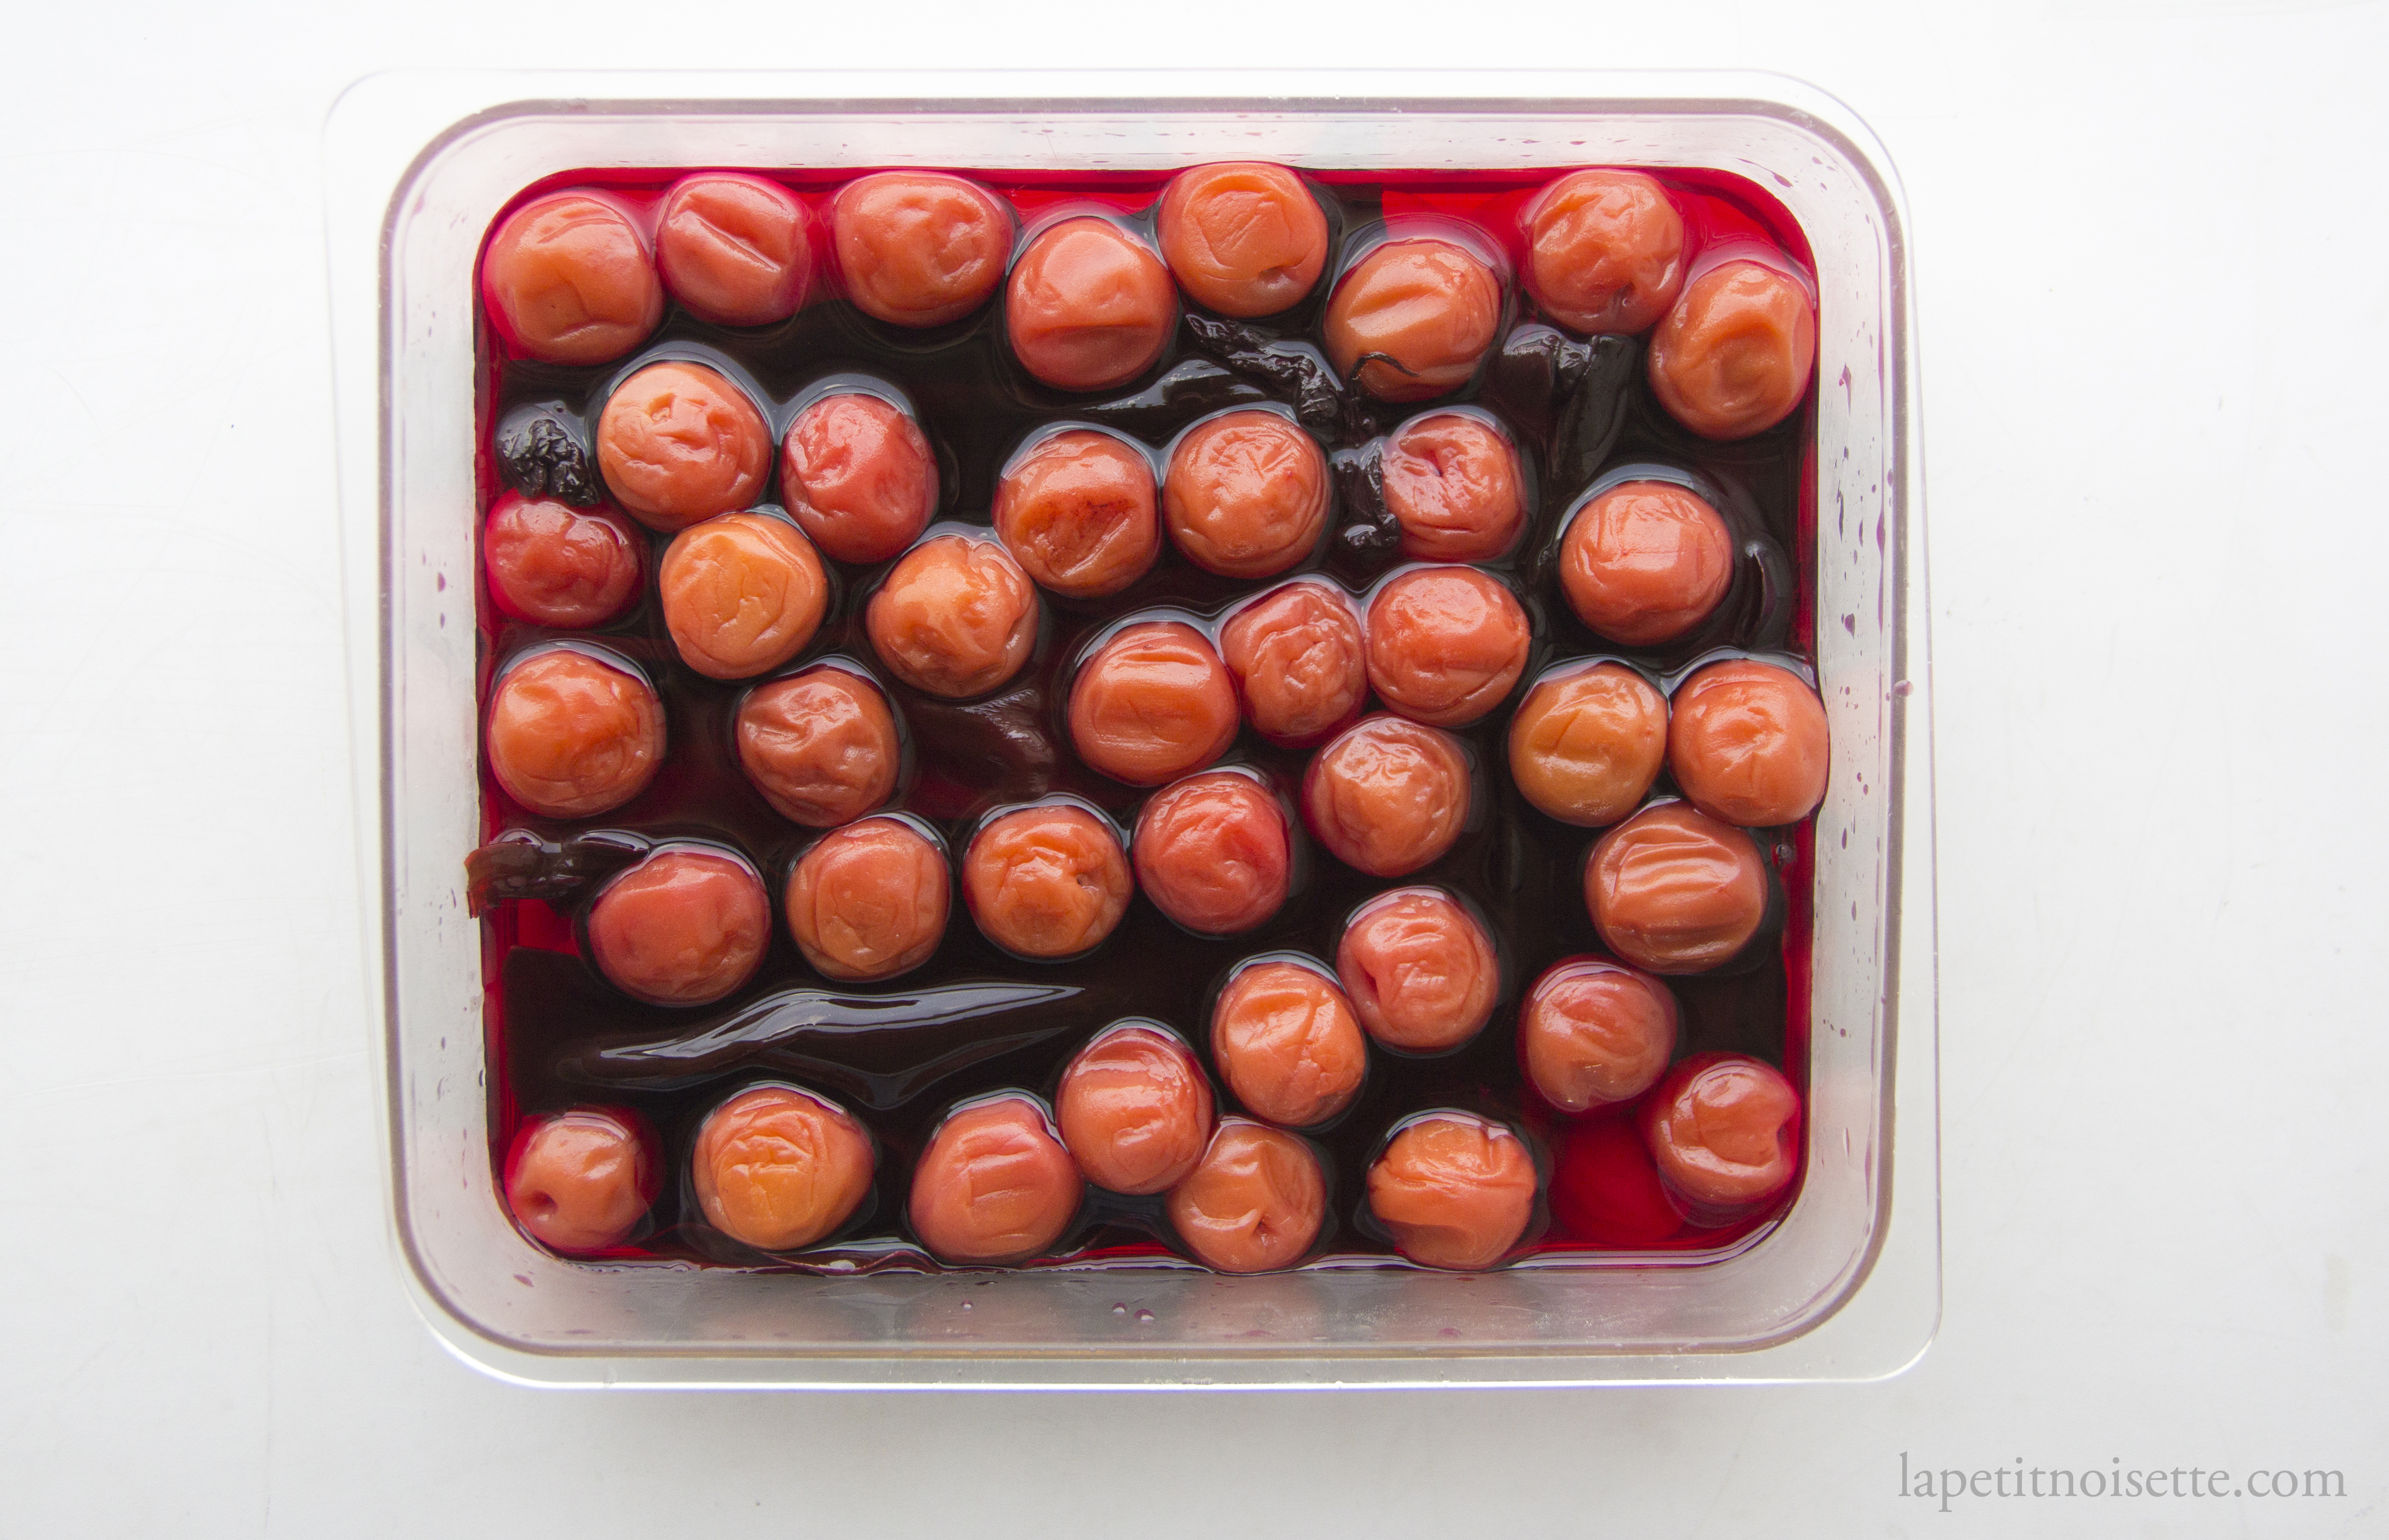
- After 3 to 4 days you should see the plums start to submerge into their own liquids. Check on the plums every few days to make sure no mould is growing on them but after around a week to a week and a half, the plums should be completely submerged in their liquid. If they aren’t, there should be some undissolved salt that has accumulated at the bottom of the jar. Scoop this salt up onto the top of the unsubmerged plums.
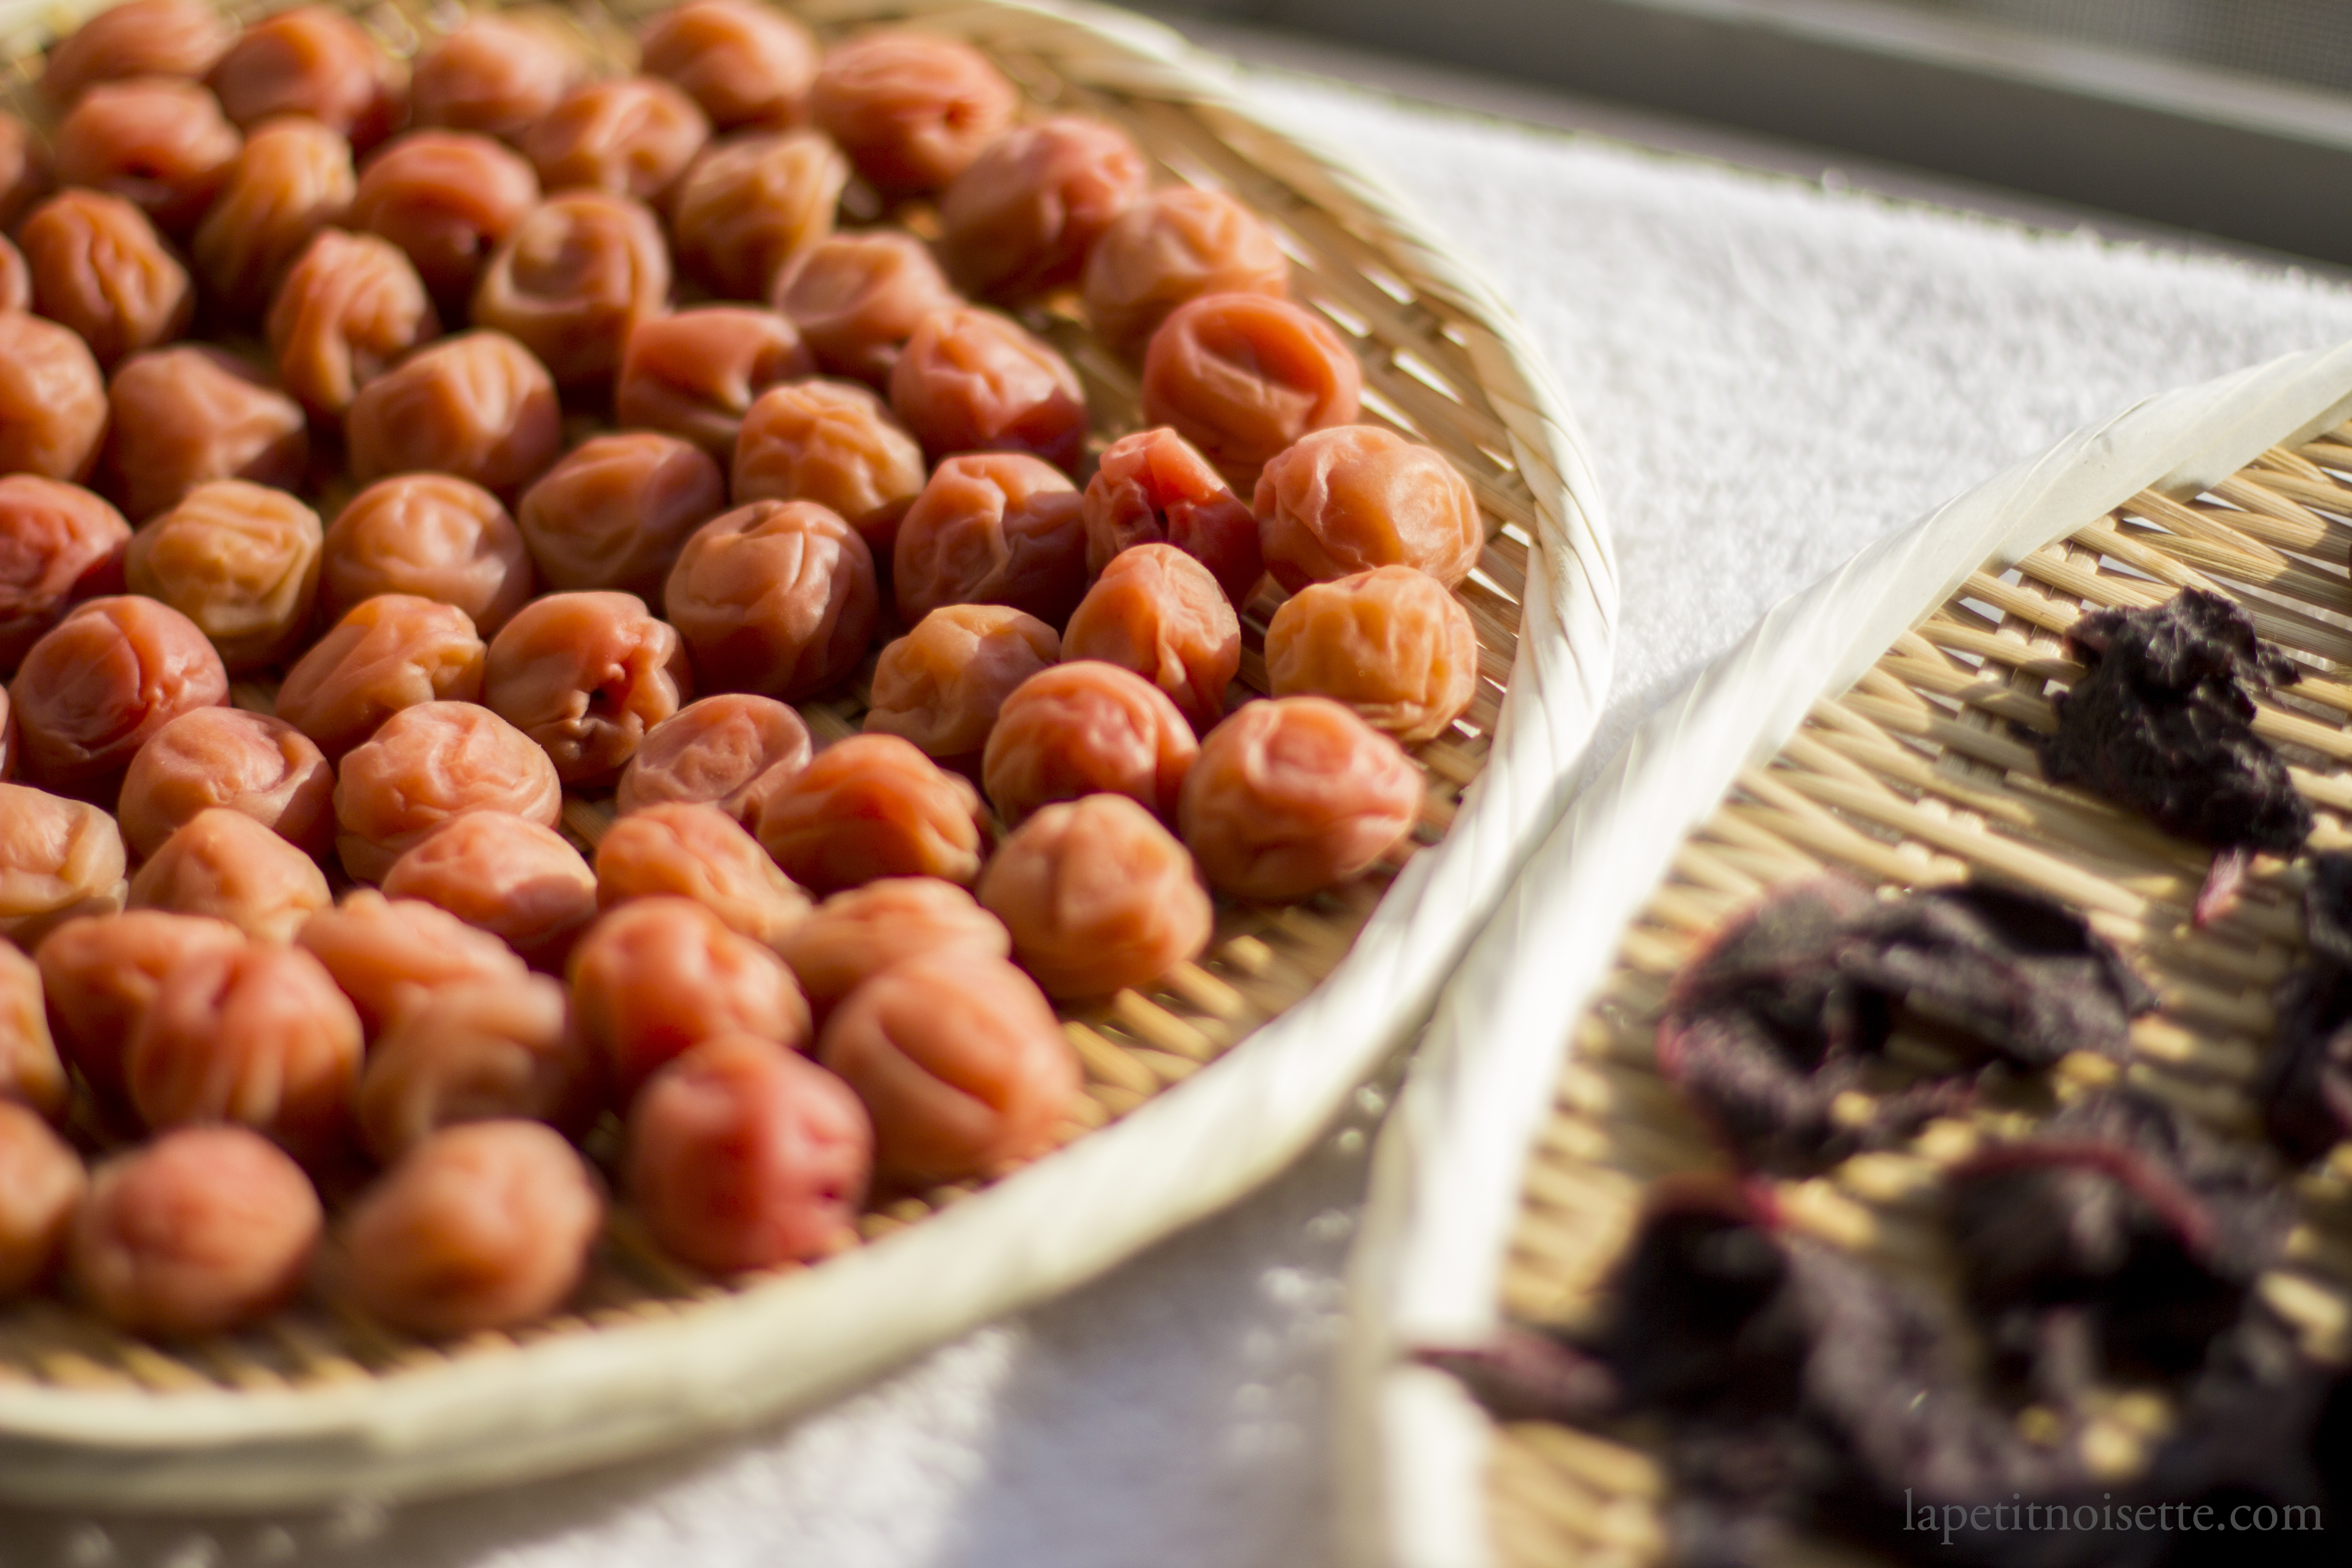
- After 2-3 weeks from the time of initial salting (not from the time the plums are fully submerged) it’s time to sun-dry your plums. Strain them out of the jar and carefully lay them out to dry in a well spaced single layer, making sure there is enough space between each plums for air circulation. The Japanese bamboo strainers work perfectly for this but even a cookie cooling rack works as long as the acidity from the plums don’t cause it to rust.
- You’d also want to dry the shiso leaves at this point as well in the same way but remember to squeeze to remove excess salted plum juice first.
- Allow the plums to dry for 3 days (4 days if you live in a humid country) and turn them over once each day to let them dry evenly, especially the underside. You’d want to check the weather forecast to make sure that it won’t rain during those 3 days, even if it means leaving your plums in their juices for a couple days more. The shiso leaves might take up to 5 days to dry depending on how much moisture is in them, which can be longer than the plums.
- The plums are now done and are ready to be stored. Rinse each dried plum in their own salted juices (now known as ume vinegar) once before filling them back into the jar. Reserve the vinegar in a different bottle for seasoning.
- Once the jar is filled with the dried plums, cover with a layer of dried shiso leaves and seal the jar with an airtight lid. You may want to reserve some of the shiso leaves to make yukari seasoning.
- Ideally allow the plums to age for 3 to 5 years before opening but they’re pretty good after one year already.

2 weeks of maceration/brining is more ideal for smaller plums like the ones you see in the pictures here. If you use larger plums like the ones in my umeshu recipe, or green apricots which tend to be much larger, you’d want to salt your plums for at least 3 weeks. In Japan, the end of the time taken for the ume to be harvested and salted just about coincides with a period of hot and sunny weather that acts as a marker between the end of the rainy season and the start of August’s typhoon season known as the doyo (土用). This of course has been getting less and less accurate due to climate change but you only need around 3 to 4 days of sunshine to get the drying done.
Can I use apricots to make umeboshi?
Most sources on the internet, including the books by the famous Nancy Singleton state that the recipes for umeshu or umeboshi might be possible with apricots but they are unsure if this is possible. I’ve personally done many tests myself and can say with confidence that these recipes can be accurately replicated with apricots with the caveat that you use unripe apricots, in the same way that the Japanese plums used in this recipe are still in their green/yellowish unripe state. Unless you order from a farmer directly, it’s most likely hard to get green apricots but it is possible to use yellow apricots as long as they’re still very unripe which you can tell from their firmness- they shouldn’t give when lightly squeezed.
A note on salt percentages when making umeboshi
You’d notice that this recipe uses 15% of the ume’s weight in salt, which whilst is closer to how they were made in the past, makes for incredibly salty plums. The idea here is two fold, first, the extremely high percentage of salt allows the plums to keep for much longer than you’d be able to otherwise, which was important back in the day without refrigeration. If you look at store bought umeboshi nowadays, a lot of it states: ‘keep refrigerated once open etc’ on the back, which is just mind boggling to some of older generation as you’d almost always keep your umeboshi at room temperature, even if you’re keeping it for many years.
This brings us to the second point, which is that the saltiness mellows after many years of aging giving your older umeboshi a better balance of flavour, so a higher percentage means better eating for later, but a lower percentage (7-8%) makes for a better product to eat immediately. If you do choose to make your umeboshi with a lower salt percentage, you may want to refrigerate them after drying and they won’t last many years down the line. I’ve seen references in old Japanese books that go up to 30% salt, which is absolutely crazy given that I’m sure even the lactic acid bacteria at that point would have died. However, I’m sure that was necessary as the goal was to preserve a product and not to optimise for flavour.

Should I store my umeboshi with or without their ume vinegar or brine?
Once dried, the umeboshi can then be stored in jars with their own juices (the plum vinegar), or stored dried without their juice. Whilst the plums technically have an almost indefinite edibility lifespan whichever way they’re stored, they tend to lose their texture and become mushy after a few years when stored in their own vinegar. Conversely, plums that are stored dry sometimes have a tendency to become a little shriveled and hard when stored over the years due to a lack of liquid. Therefore, I’m a big advocate of a trick I learned in Japan which was to take the middle ground and give the dried ume plums a brief dip in their vinegar before storing in the jar with a covering of red shiso leaves on the top to protect them.
Whether you store them dry or with a brief dip in their juices, either way you’ll find a thick liquid gathered at the bottom of the jar which is essentially the remaining plum juices being pressed out from within the dried plums. This syrup like liquid helps protect the plums so just let it be. To elaborate, 3 to 4 days of drying in the sun is no way enough to completely dry out the umeboshi to the core and you still want them to have a succulent inner texture so the few days of drying mainly drys out the outer parts and concentrates the inner juice, explaining the thickness of the juice.
If you store them in their vinegar, you might find that the vinegar might slowly thicken over the years as the pectin from the fruit acts on the brine or evaporation occurs which is totally fine. I’ve seen umeboshi that are around 20 years old that are so dark in colour that they’re on the way to becoming black. The plums were covered in large salt crystals that had been growing on them over the years.
Are aged umeboshi better than fresh umeboshi?
The answer to this question can be found in an amazing website called http://homepage45.net/ which has an incredible amount of resources on how to make umeboshi (in Japanese). There was a blind taste test done on plums aged from 0 to 5 years on quite a number of people and the results showed that people who ate a lot of umeboshi preferred those that had been aged longer whilst those that were accustomed to eating them preferred those that were freshly made. The results were enlightening though not exactly surprising, as I feel that they mirror a common theme that you’d find in the wine tasting world where aged wine is more of an acquired taste and those who appreciate aged wine also tend to be those who drink a lot of wine, whilst people who don’t drink wine open typically prefer younger wines with a sweeter and fruitier finish.
Are umeboshi a type of lacto-fermentation
Whilst they are technically a kind of lacto-fermentation, you’d notice that umeboshi are not made in an airtight and oxygen free (anaerobic) environment in the same way most lacto-fermentations are carried out. That explains why you’d need to use a higher salt-percentage for around 8-15% rather than 2%. A 2% fermentation would also yield flavourful results but with 2 caveats. Firstly, it wouldn’t taste like the umeboshi you know of as it will be more fruity than mellow and it’s life-span will be much shorter, 2 or 3 weeks compared to the many years of a traditional umeboshi. If you sun dry a 2% fermented ume, I do believe that your plums might rot in the sun as they do not contain enough salt to be sun dried, unless your sun is extremely harsh. Secondly, the state of the Japanese plums that are sold in Japan are far more unripe than the unripe fruit you would use in a traditional 2% fermentation, so you’d expect it to be much more tart and sour to the point it’s almost unappetizing which is why it’s more suited for the 3 weeks fermentation rather than the 5 days you might have for a normal lactic acid fermentation.