
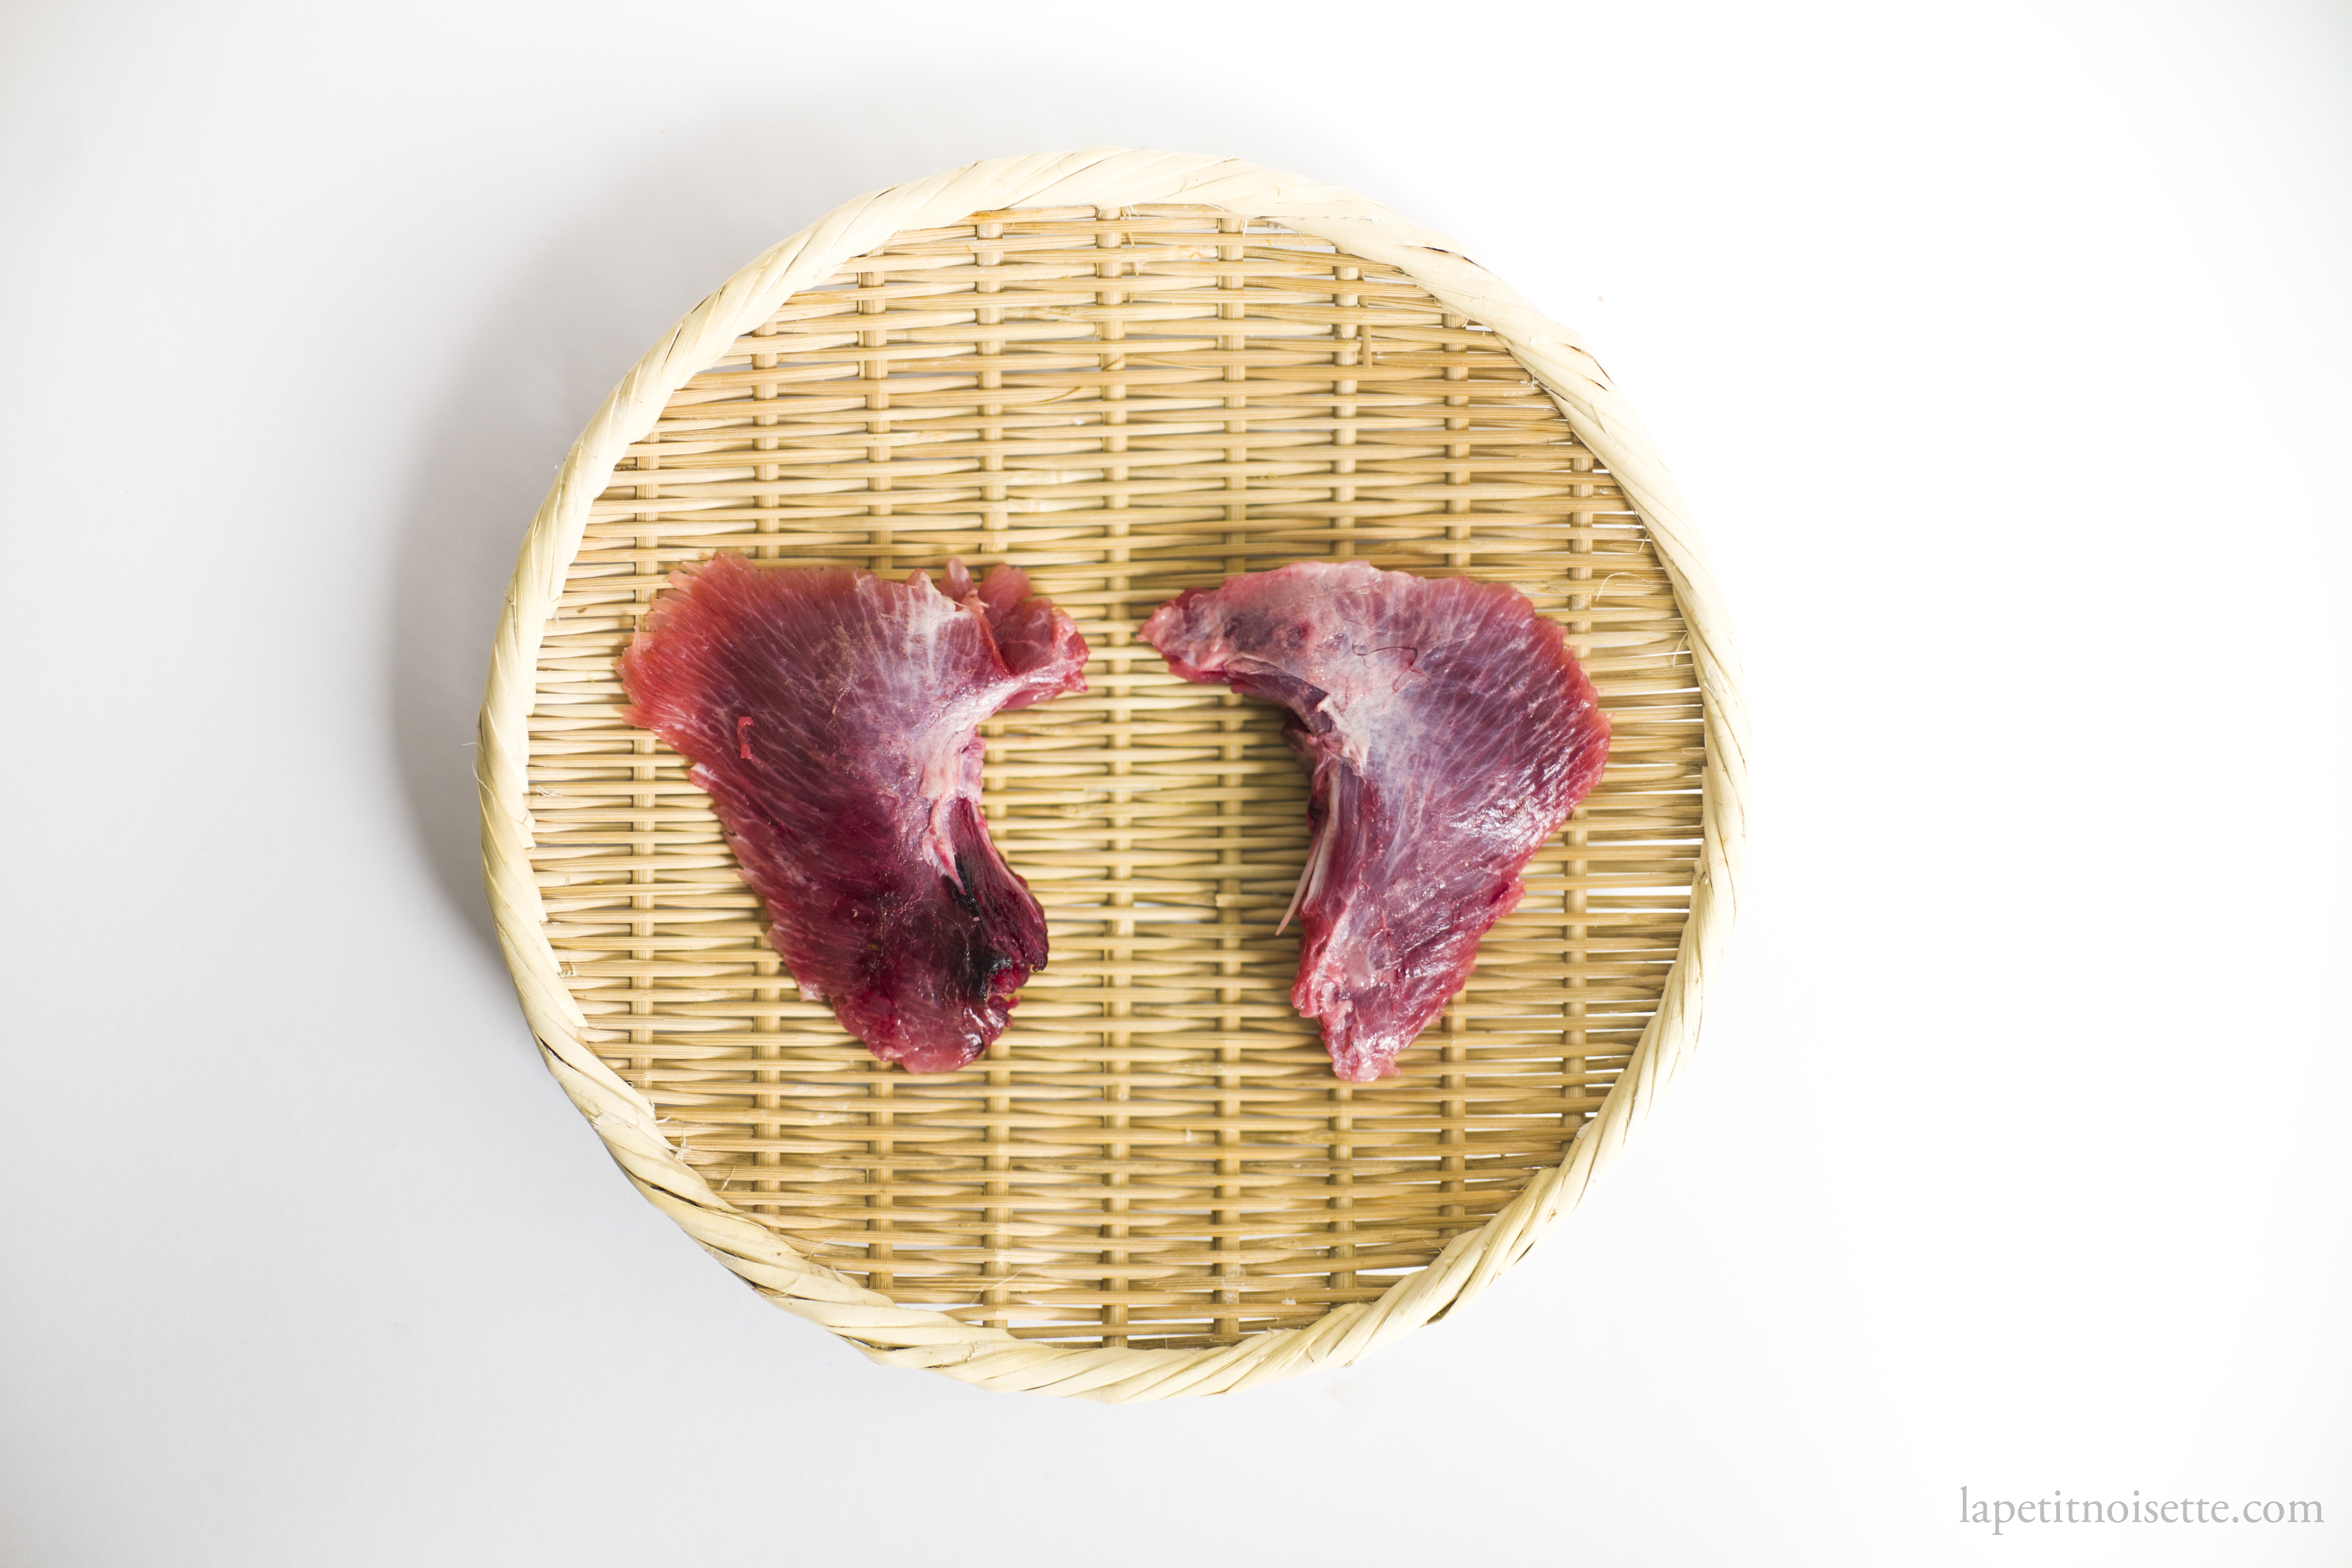
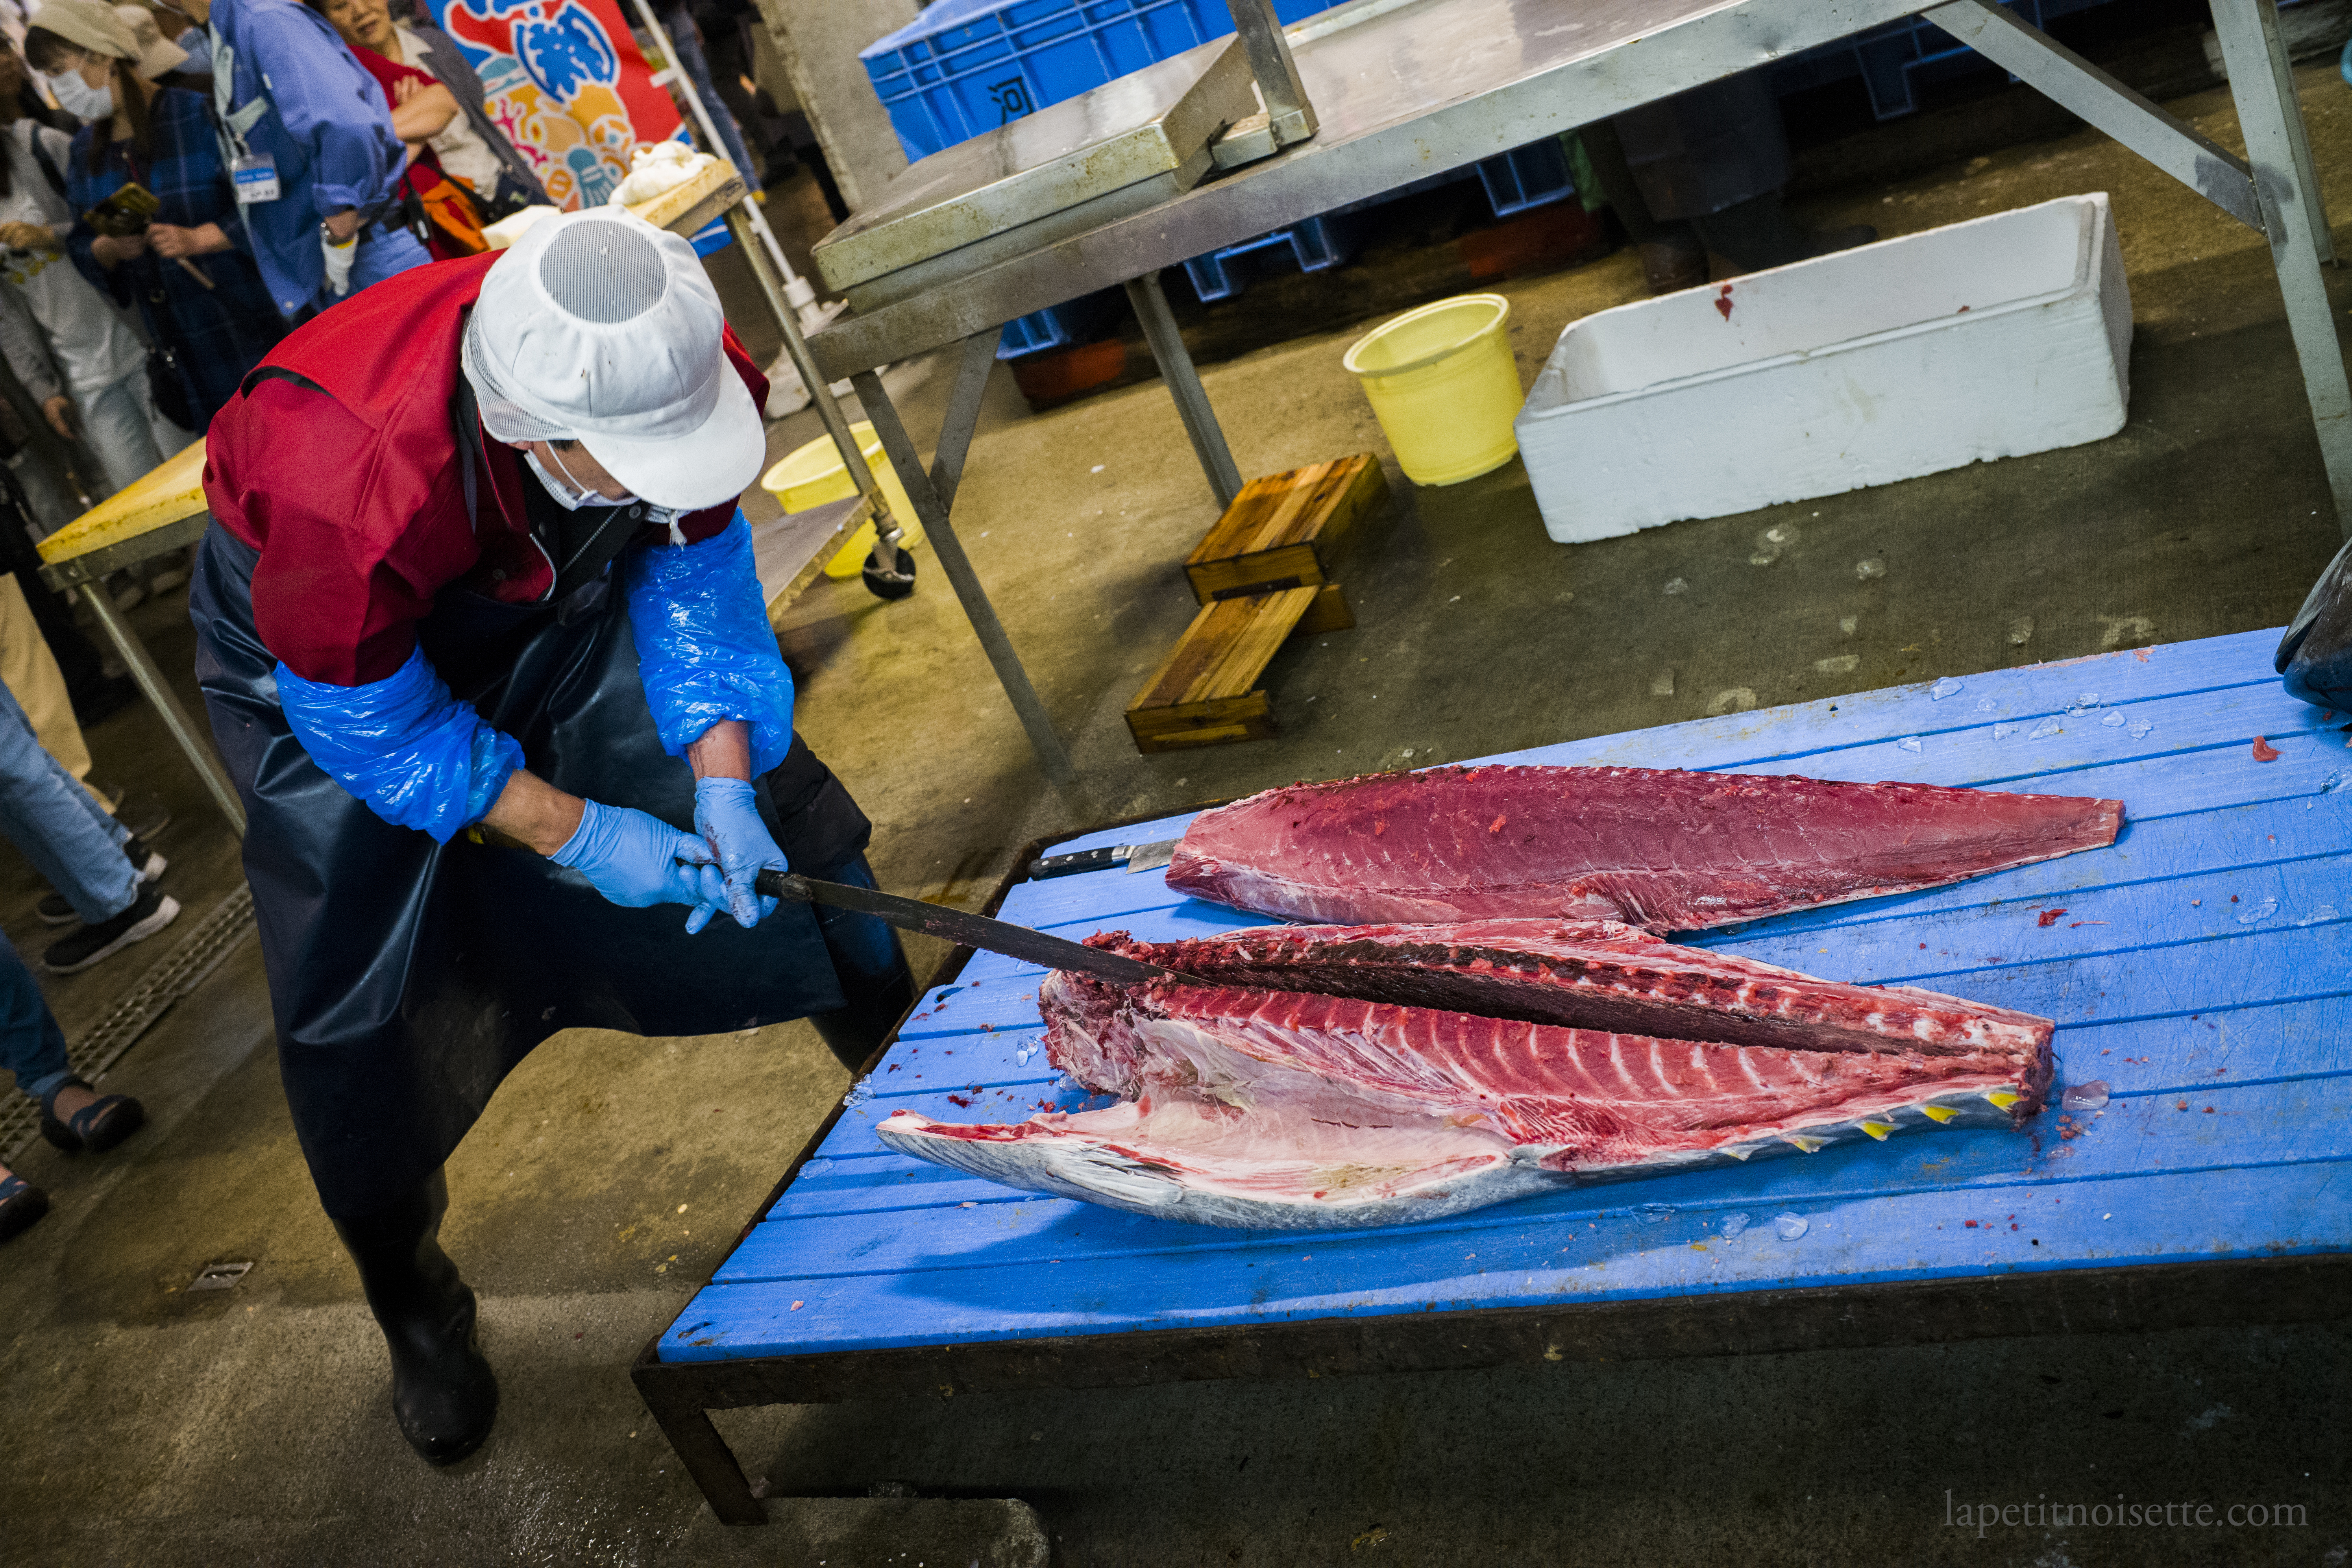
Tuna head and its constituent parts are one of those overlooked ingredients that are not only tasty, but surprisingly affordable as well. Whilst the flesh of the tuna body is expensive and sought after, the leftover head is typically ignored and sometimes even thrown away. Given the size of an adult tuna however, the remaining meat that you can obtain from a single collar is enough to feed two people and is almost sold for nothing. The main issues here are being able to source them of course, but if you live in Japan, the tuna seller at your fish market usually sells them if you ask as they’d probably just take it home for dinner themselves otherwise.
Tuna head does not feature in high end dining in Japan, but can sometimes be found on the menu on some izakayas. If you want to try the various preparations of all parts of the tuna however, you’re going to have to look for a restaurant that specializes in tuna. I personally enjoy tuna collars due to the variations in different meat textures across the different crevices, and adore tuna eye not for it’s gelatinous texture that people like, but how the fat surrounding the eyeball melts into sauce and enriches it. Even if you find the idea of eating tuna eyes repulsive, the cheeks and collars are still worth trying.
Here, we’re going to cover how to break down a tuna head into its three main parts, the collar, the cheeks and the eyes. A note of caution, the tuna head is big and can get quite messy so be careful not to accidentally cut or stab yourself with your own knife when handling it, especially as some parts may be bloody and oily from the fish fat.
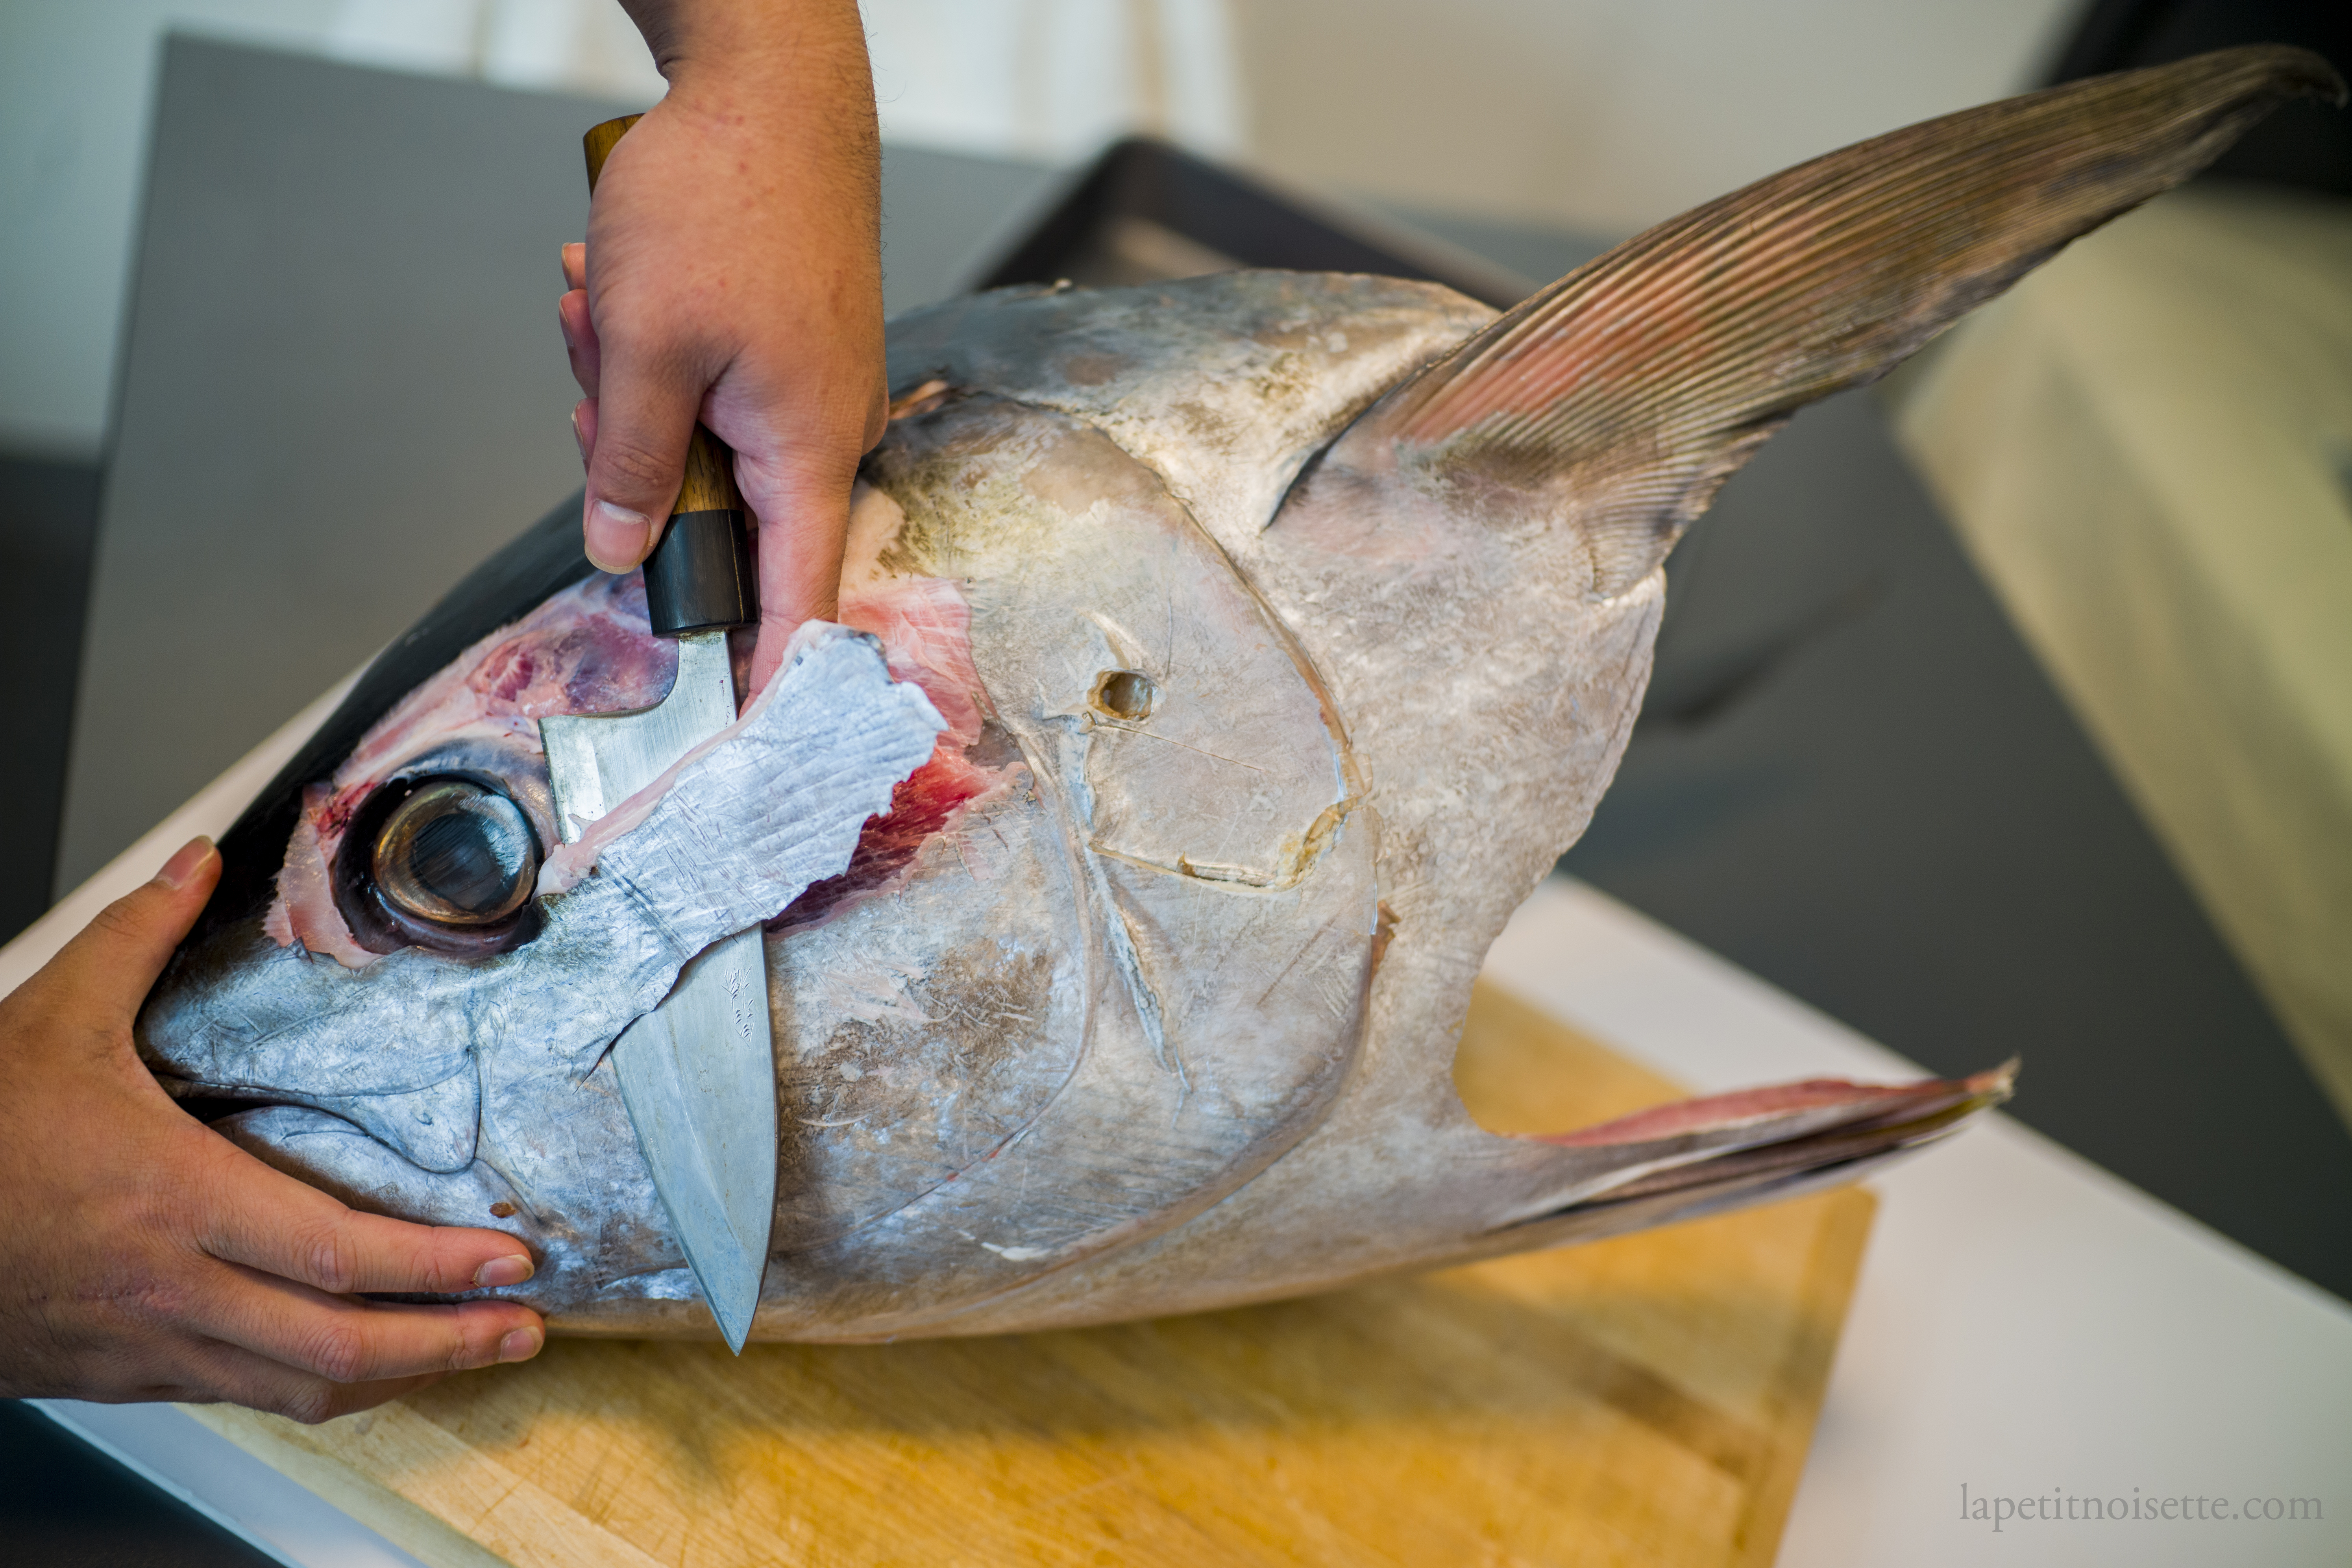
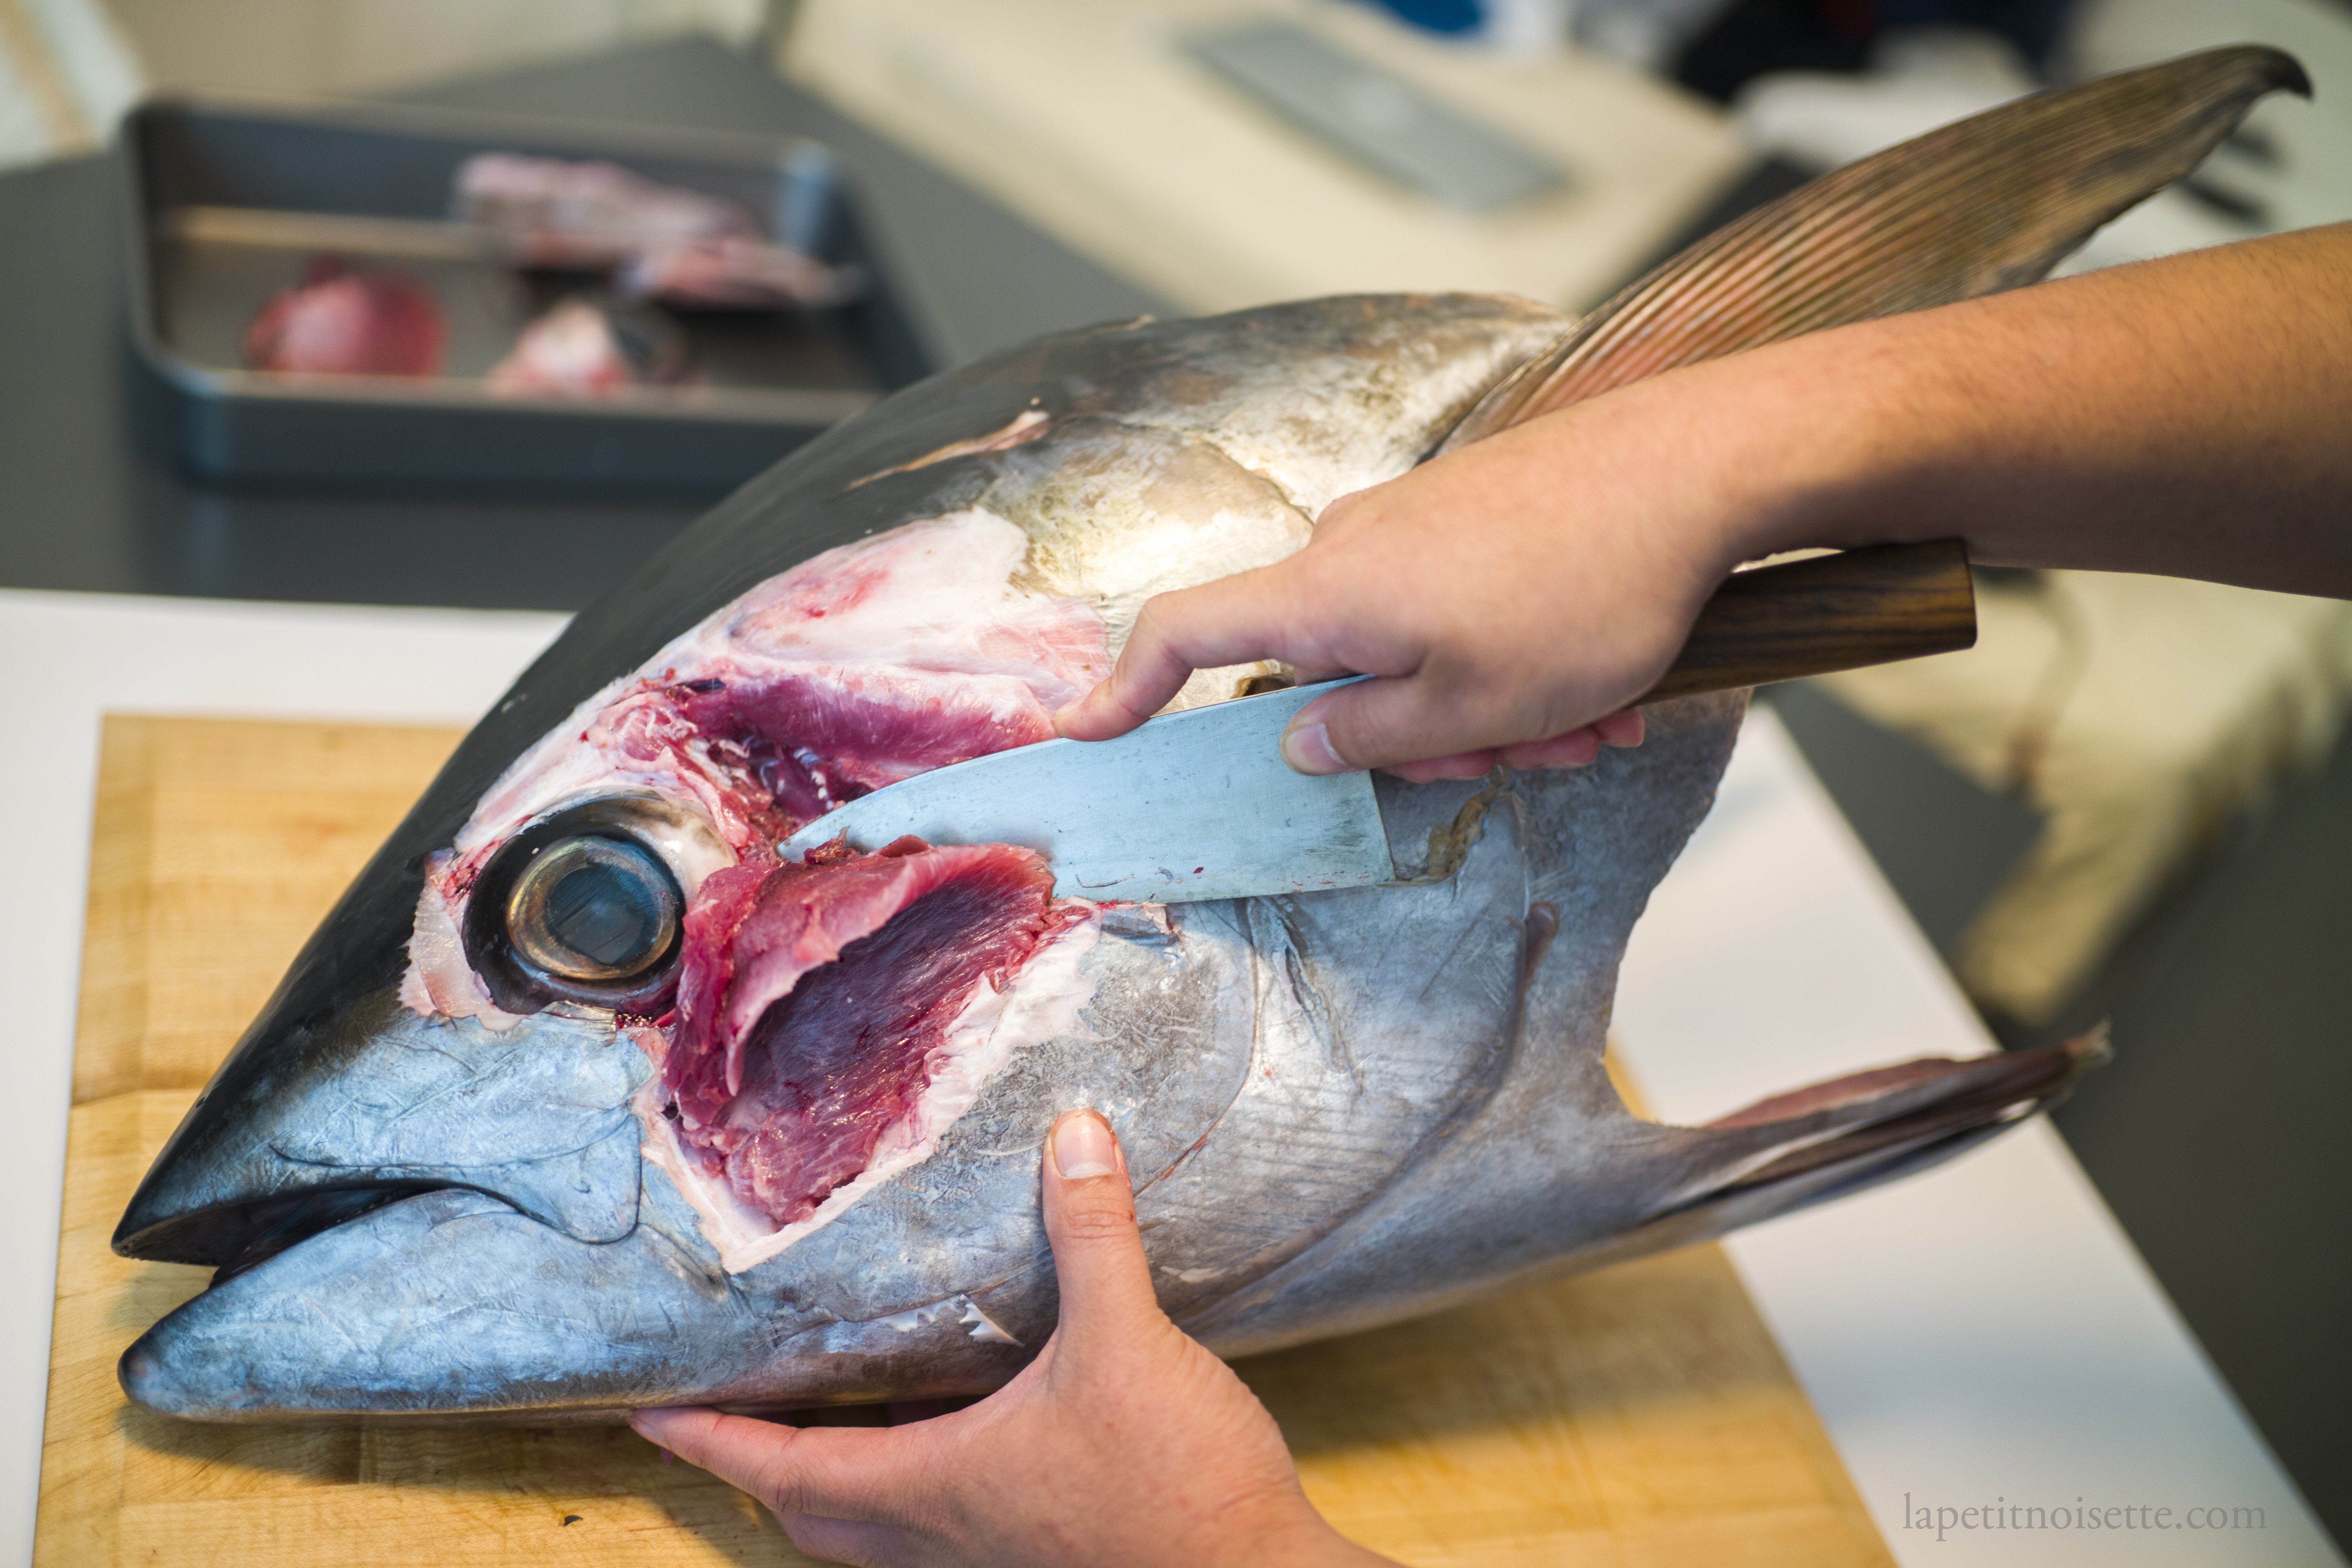
To start, tuna heads have a much thicker skin compared to other fish given their size, and you’d need to use your knife to scrape off the skin covering the cheeks. The skin will not come off in slices but needs to be sawed through in a rocking motion to get the best results.
Repeat until the entire cheek is exposed and then insert the blade of the knife between the cheek and the facial bones of the tuna. Here, you want to carve out the cheek as though you are filleting a fish or removing the breast meat from a chicken, by running the knife as close as possible to the bone to make sure as much of the flesh is removed as possible.
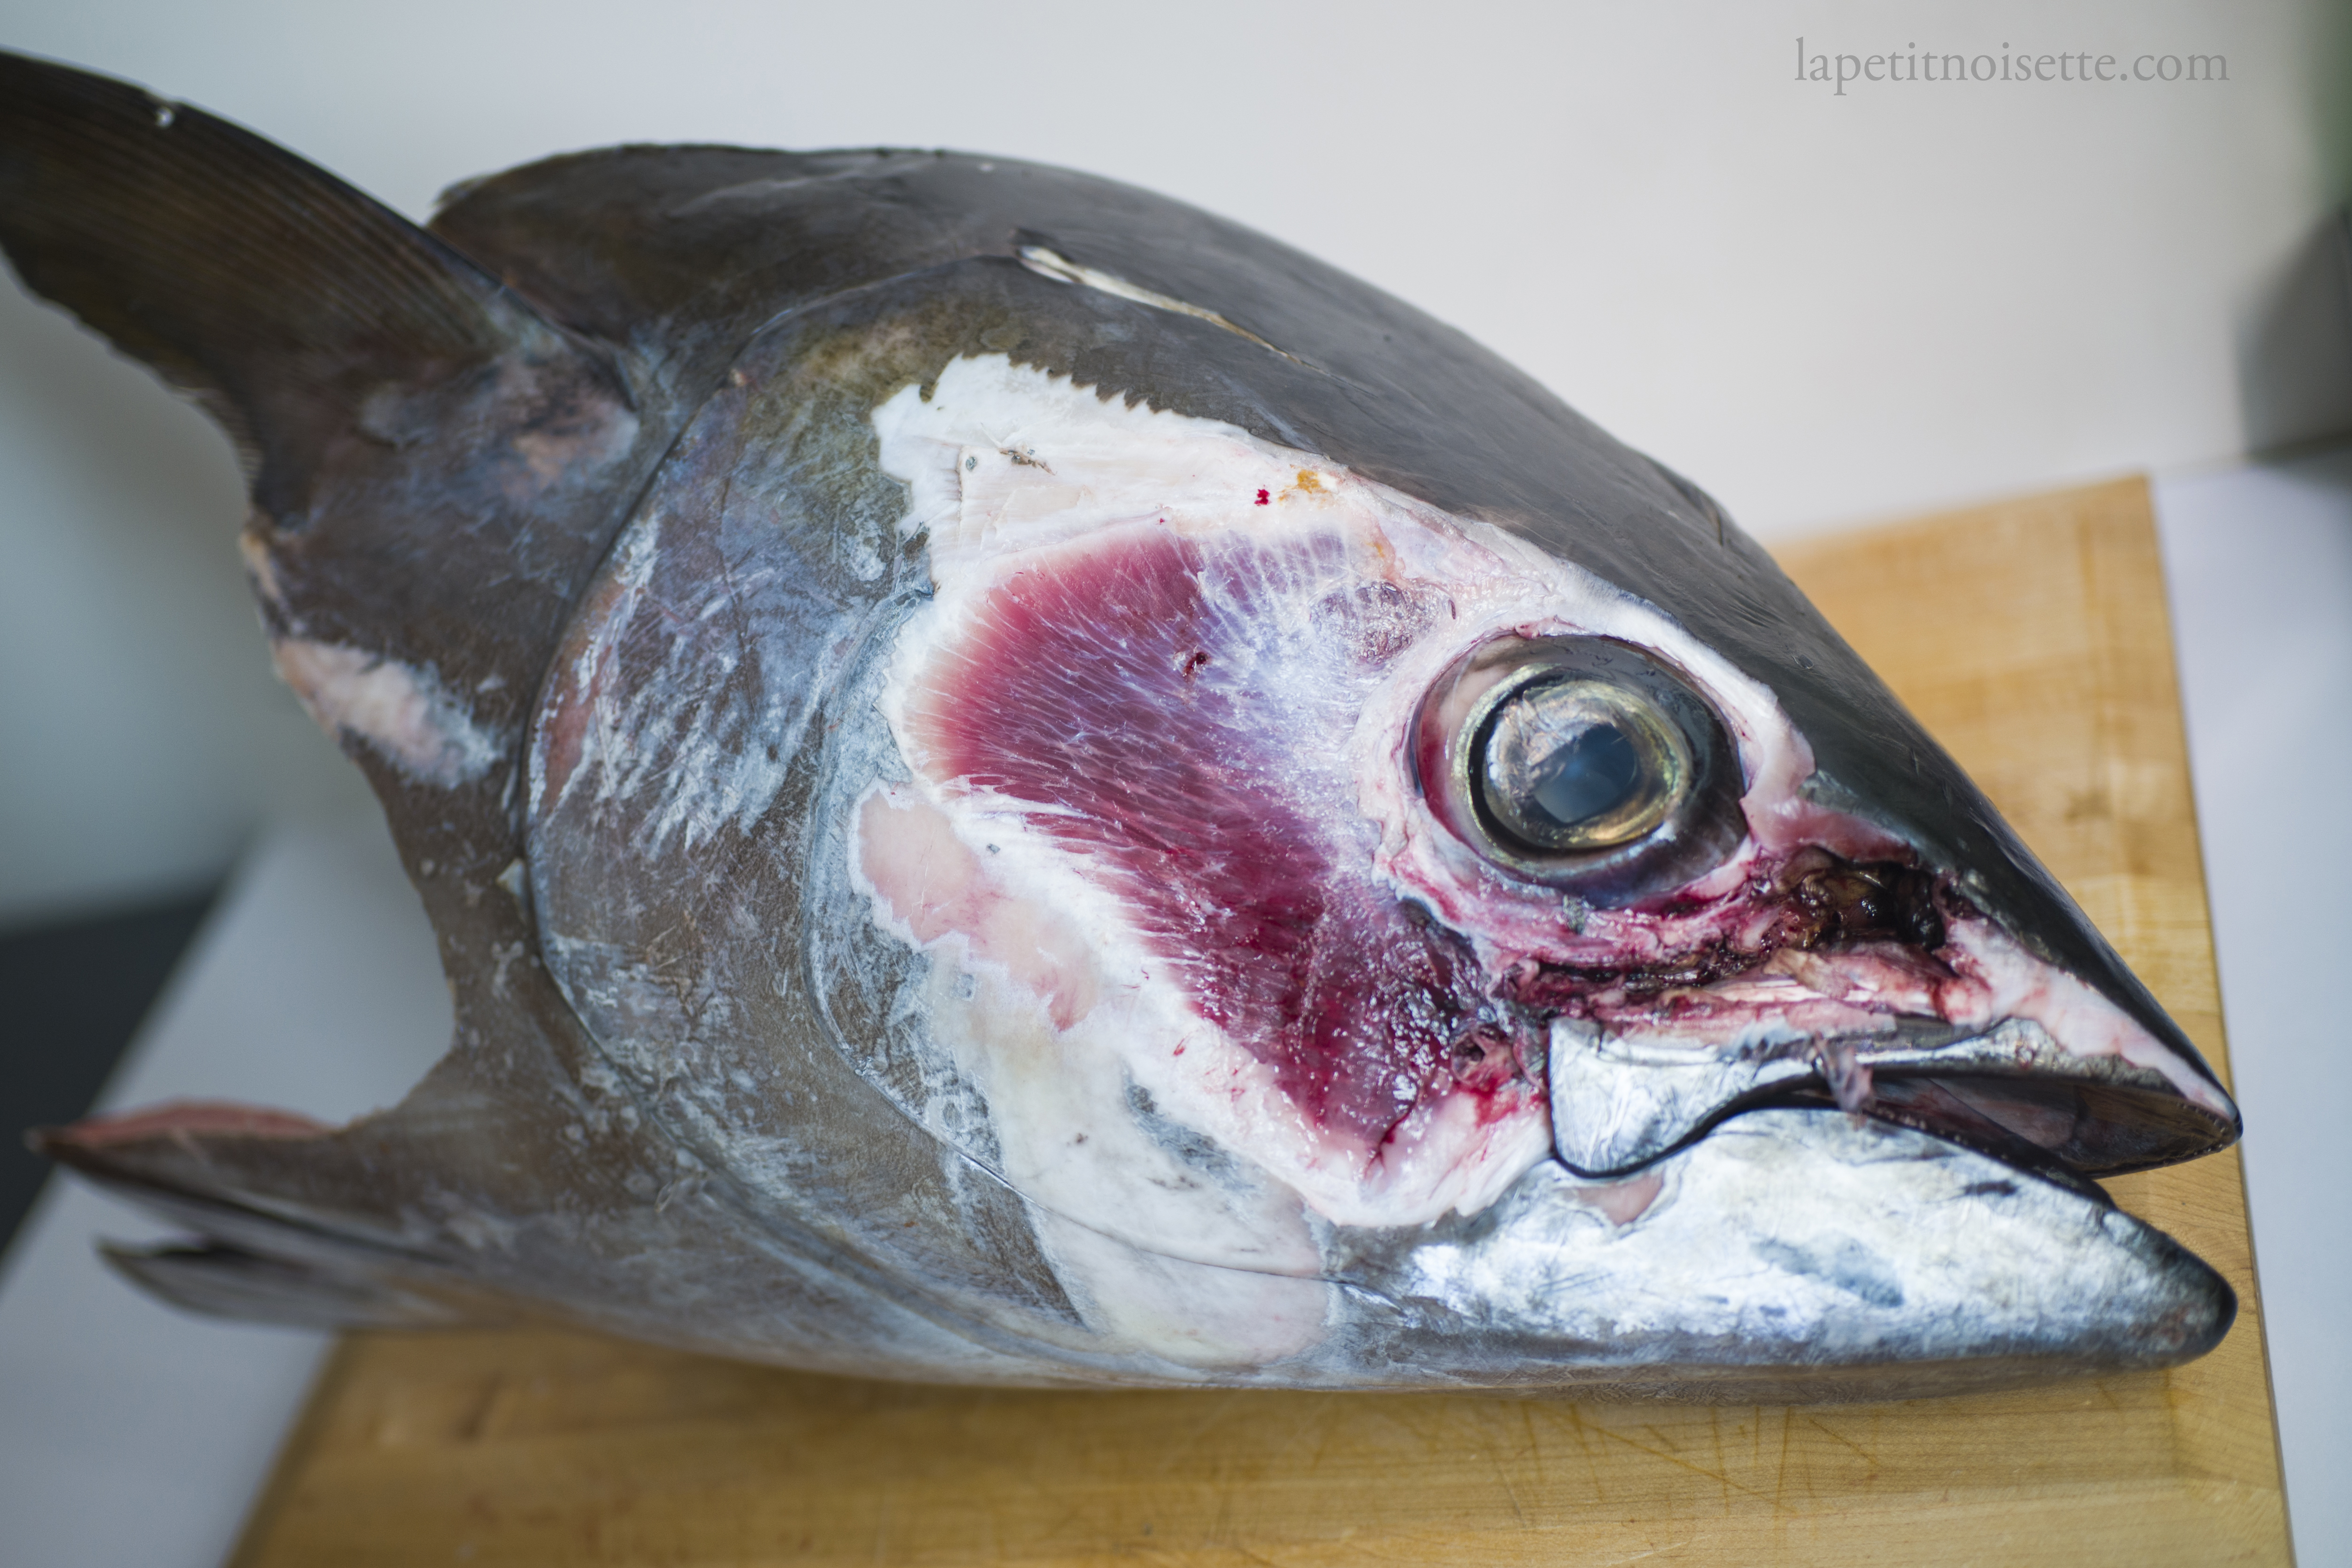
There is a slight curvature into the fish that holds the cheek but with some care you should be able to cleanly remove it.
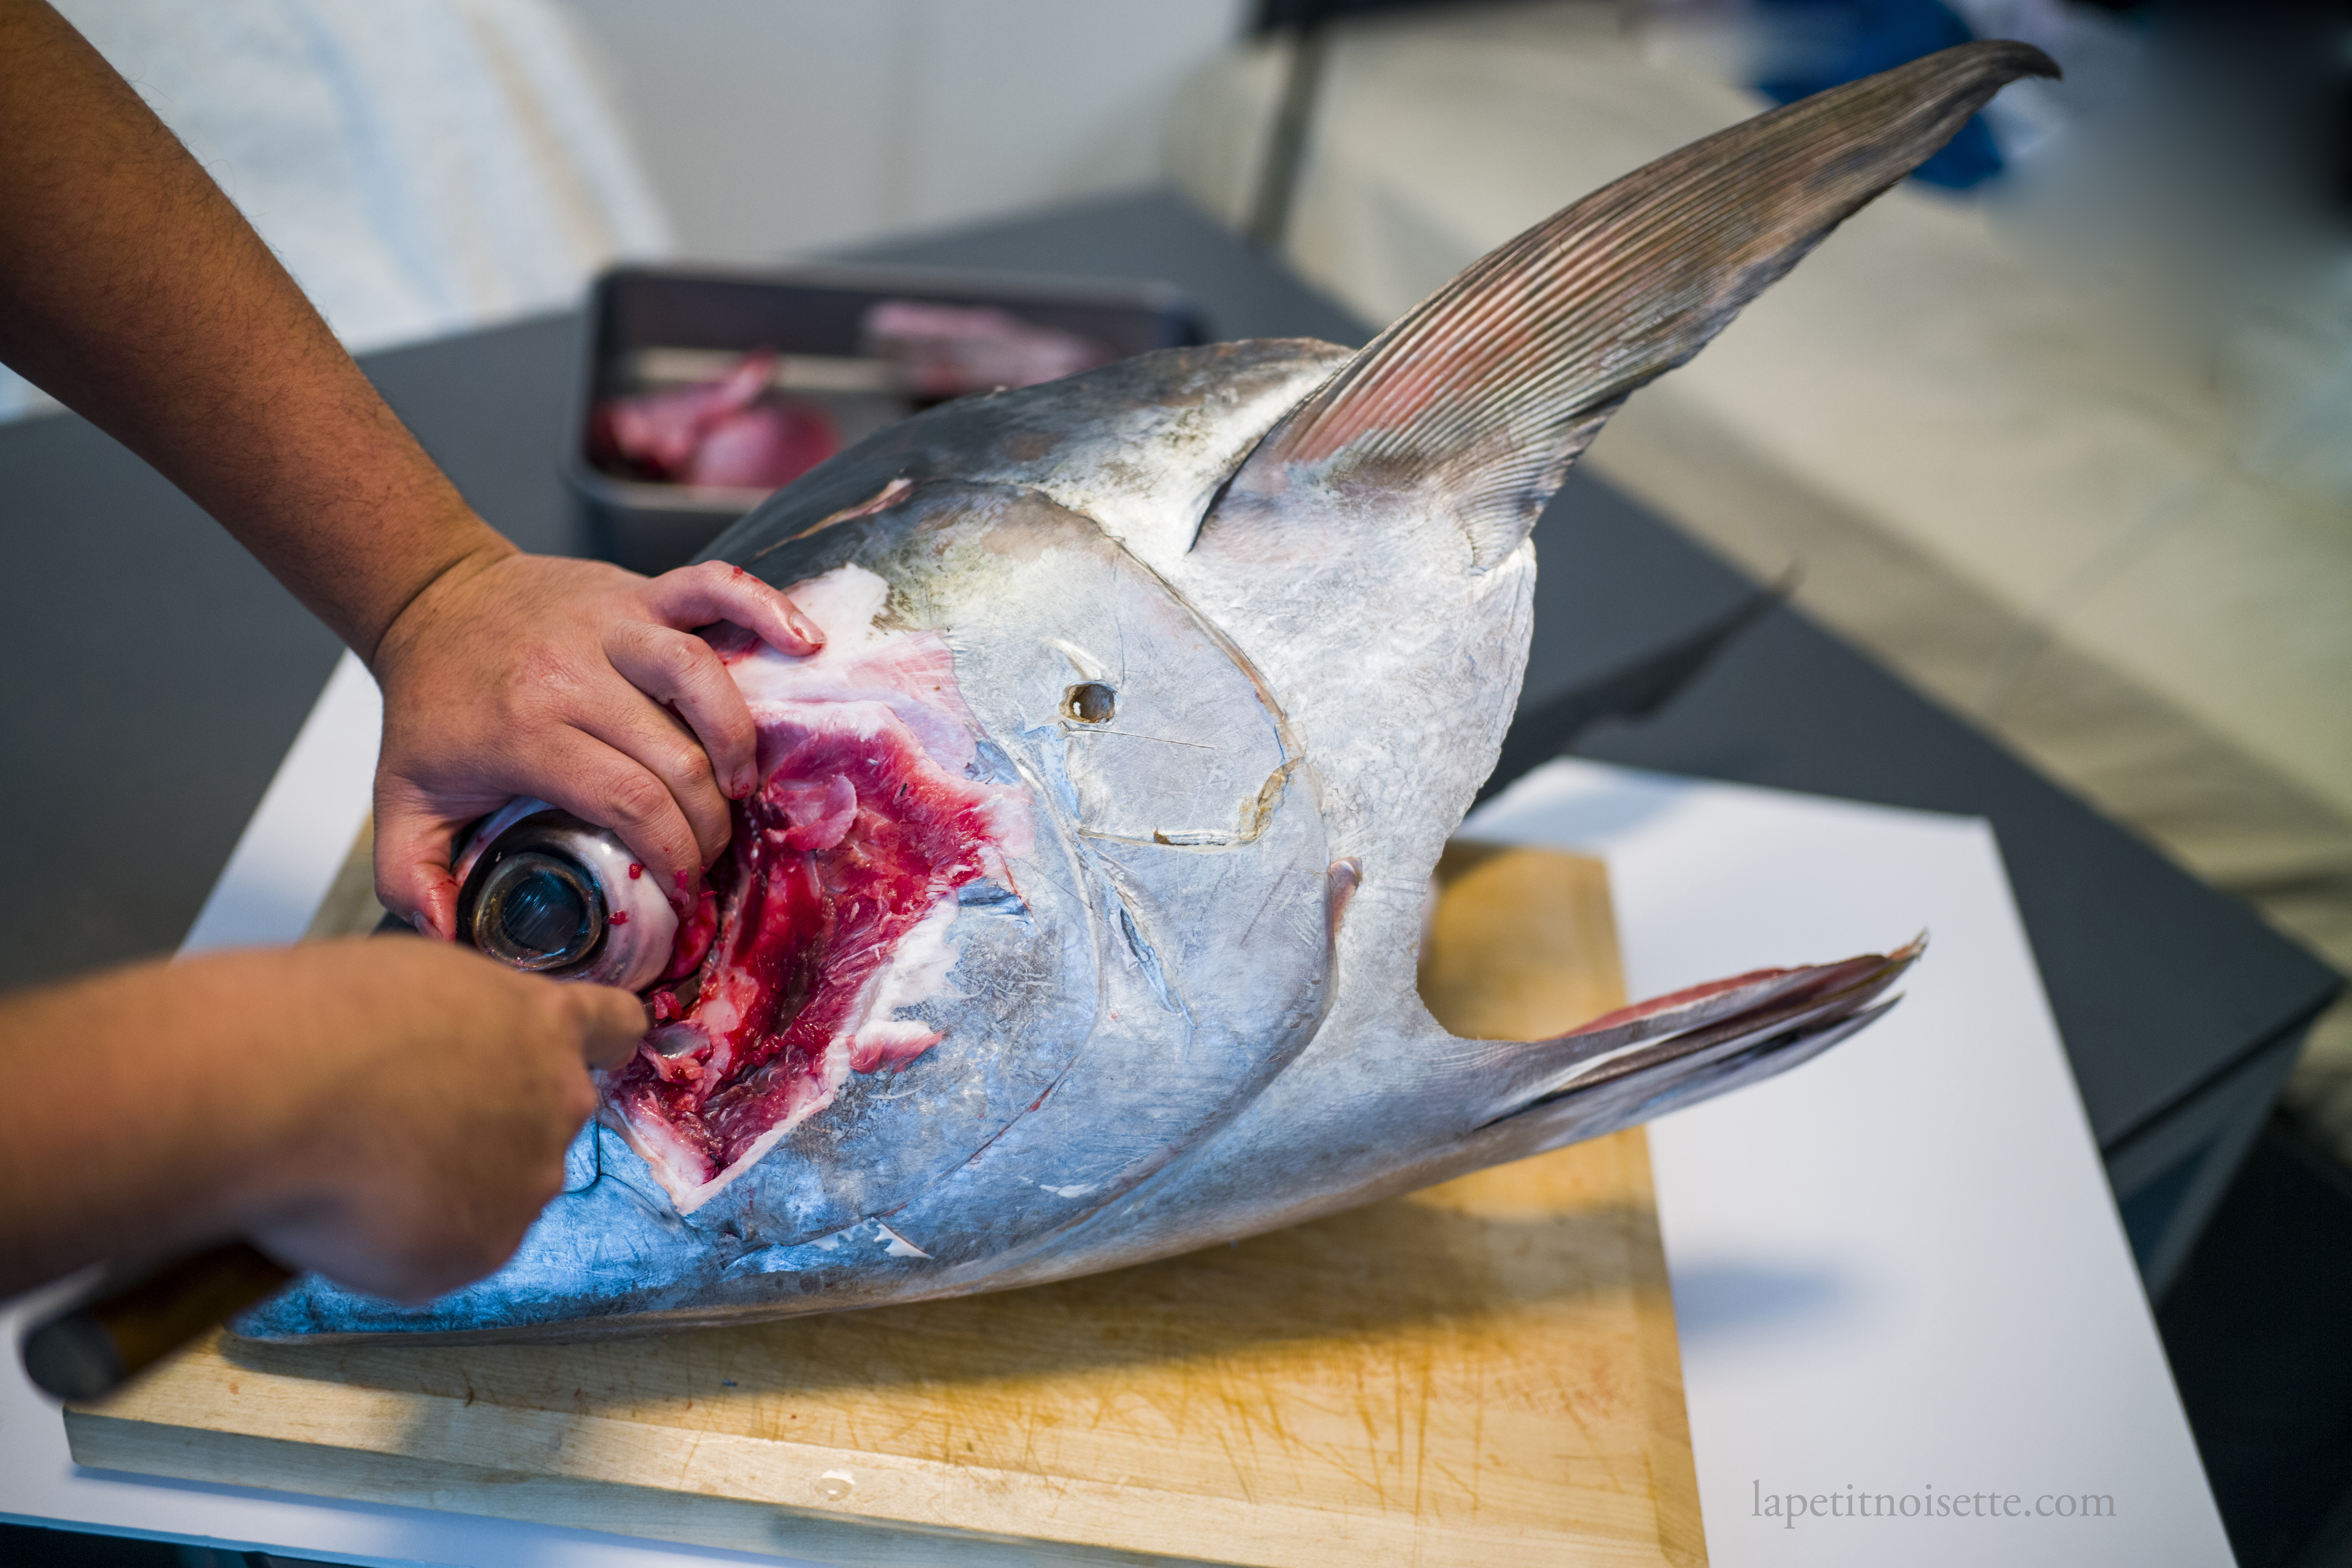
Once the cheek is removed, you’ll now have easier access to the eye. The goal here is to cut the eye at the ‘root’ or optical nerve, without puncturing the eye. You’d also want to carve out the eye with some of its remaining protective fat attached to it as it helps flavour any recipe you make with it.
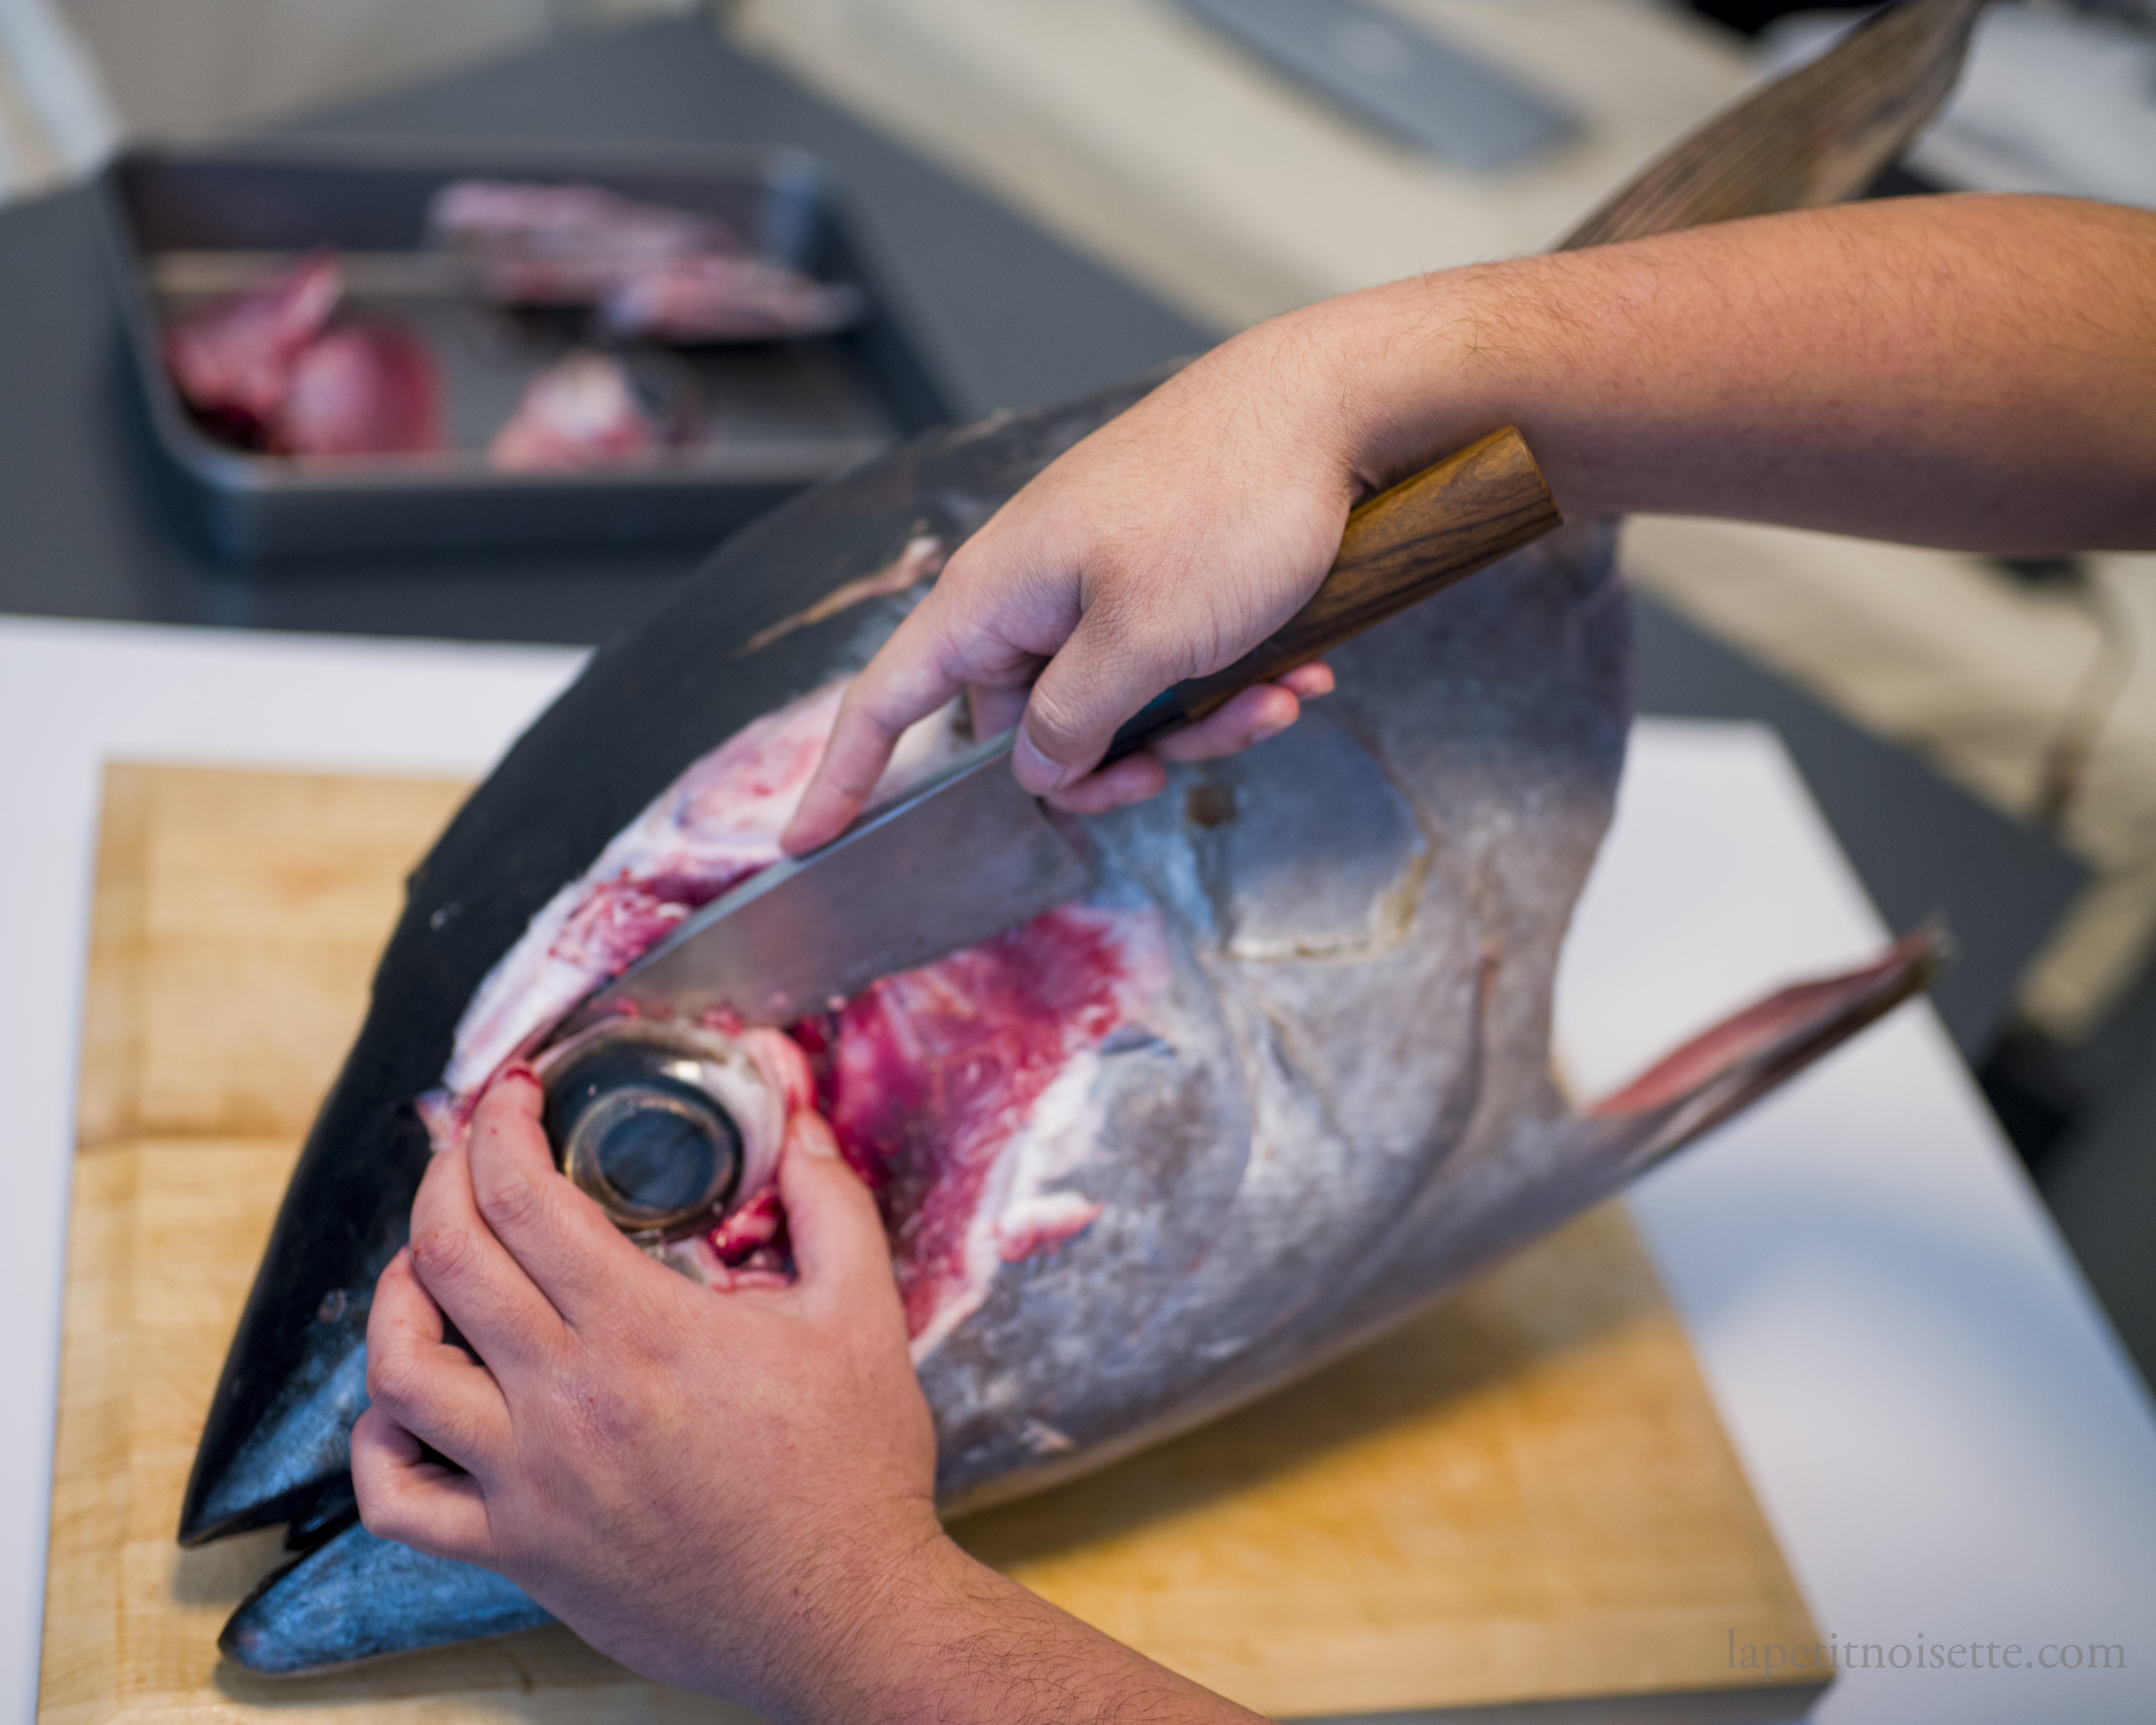
Run your knife around the eye without puncturing it, but being careful to cut deep under the eye as you can go. The eye is not as fragile as you think, and it helps it gently apply a pulling pressure on it when trying to cut it out.
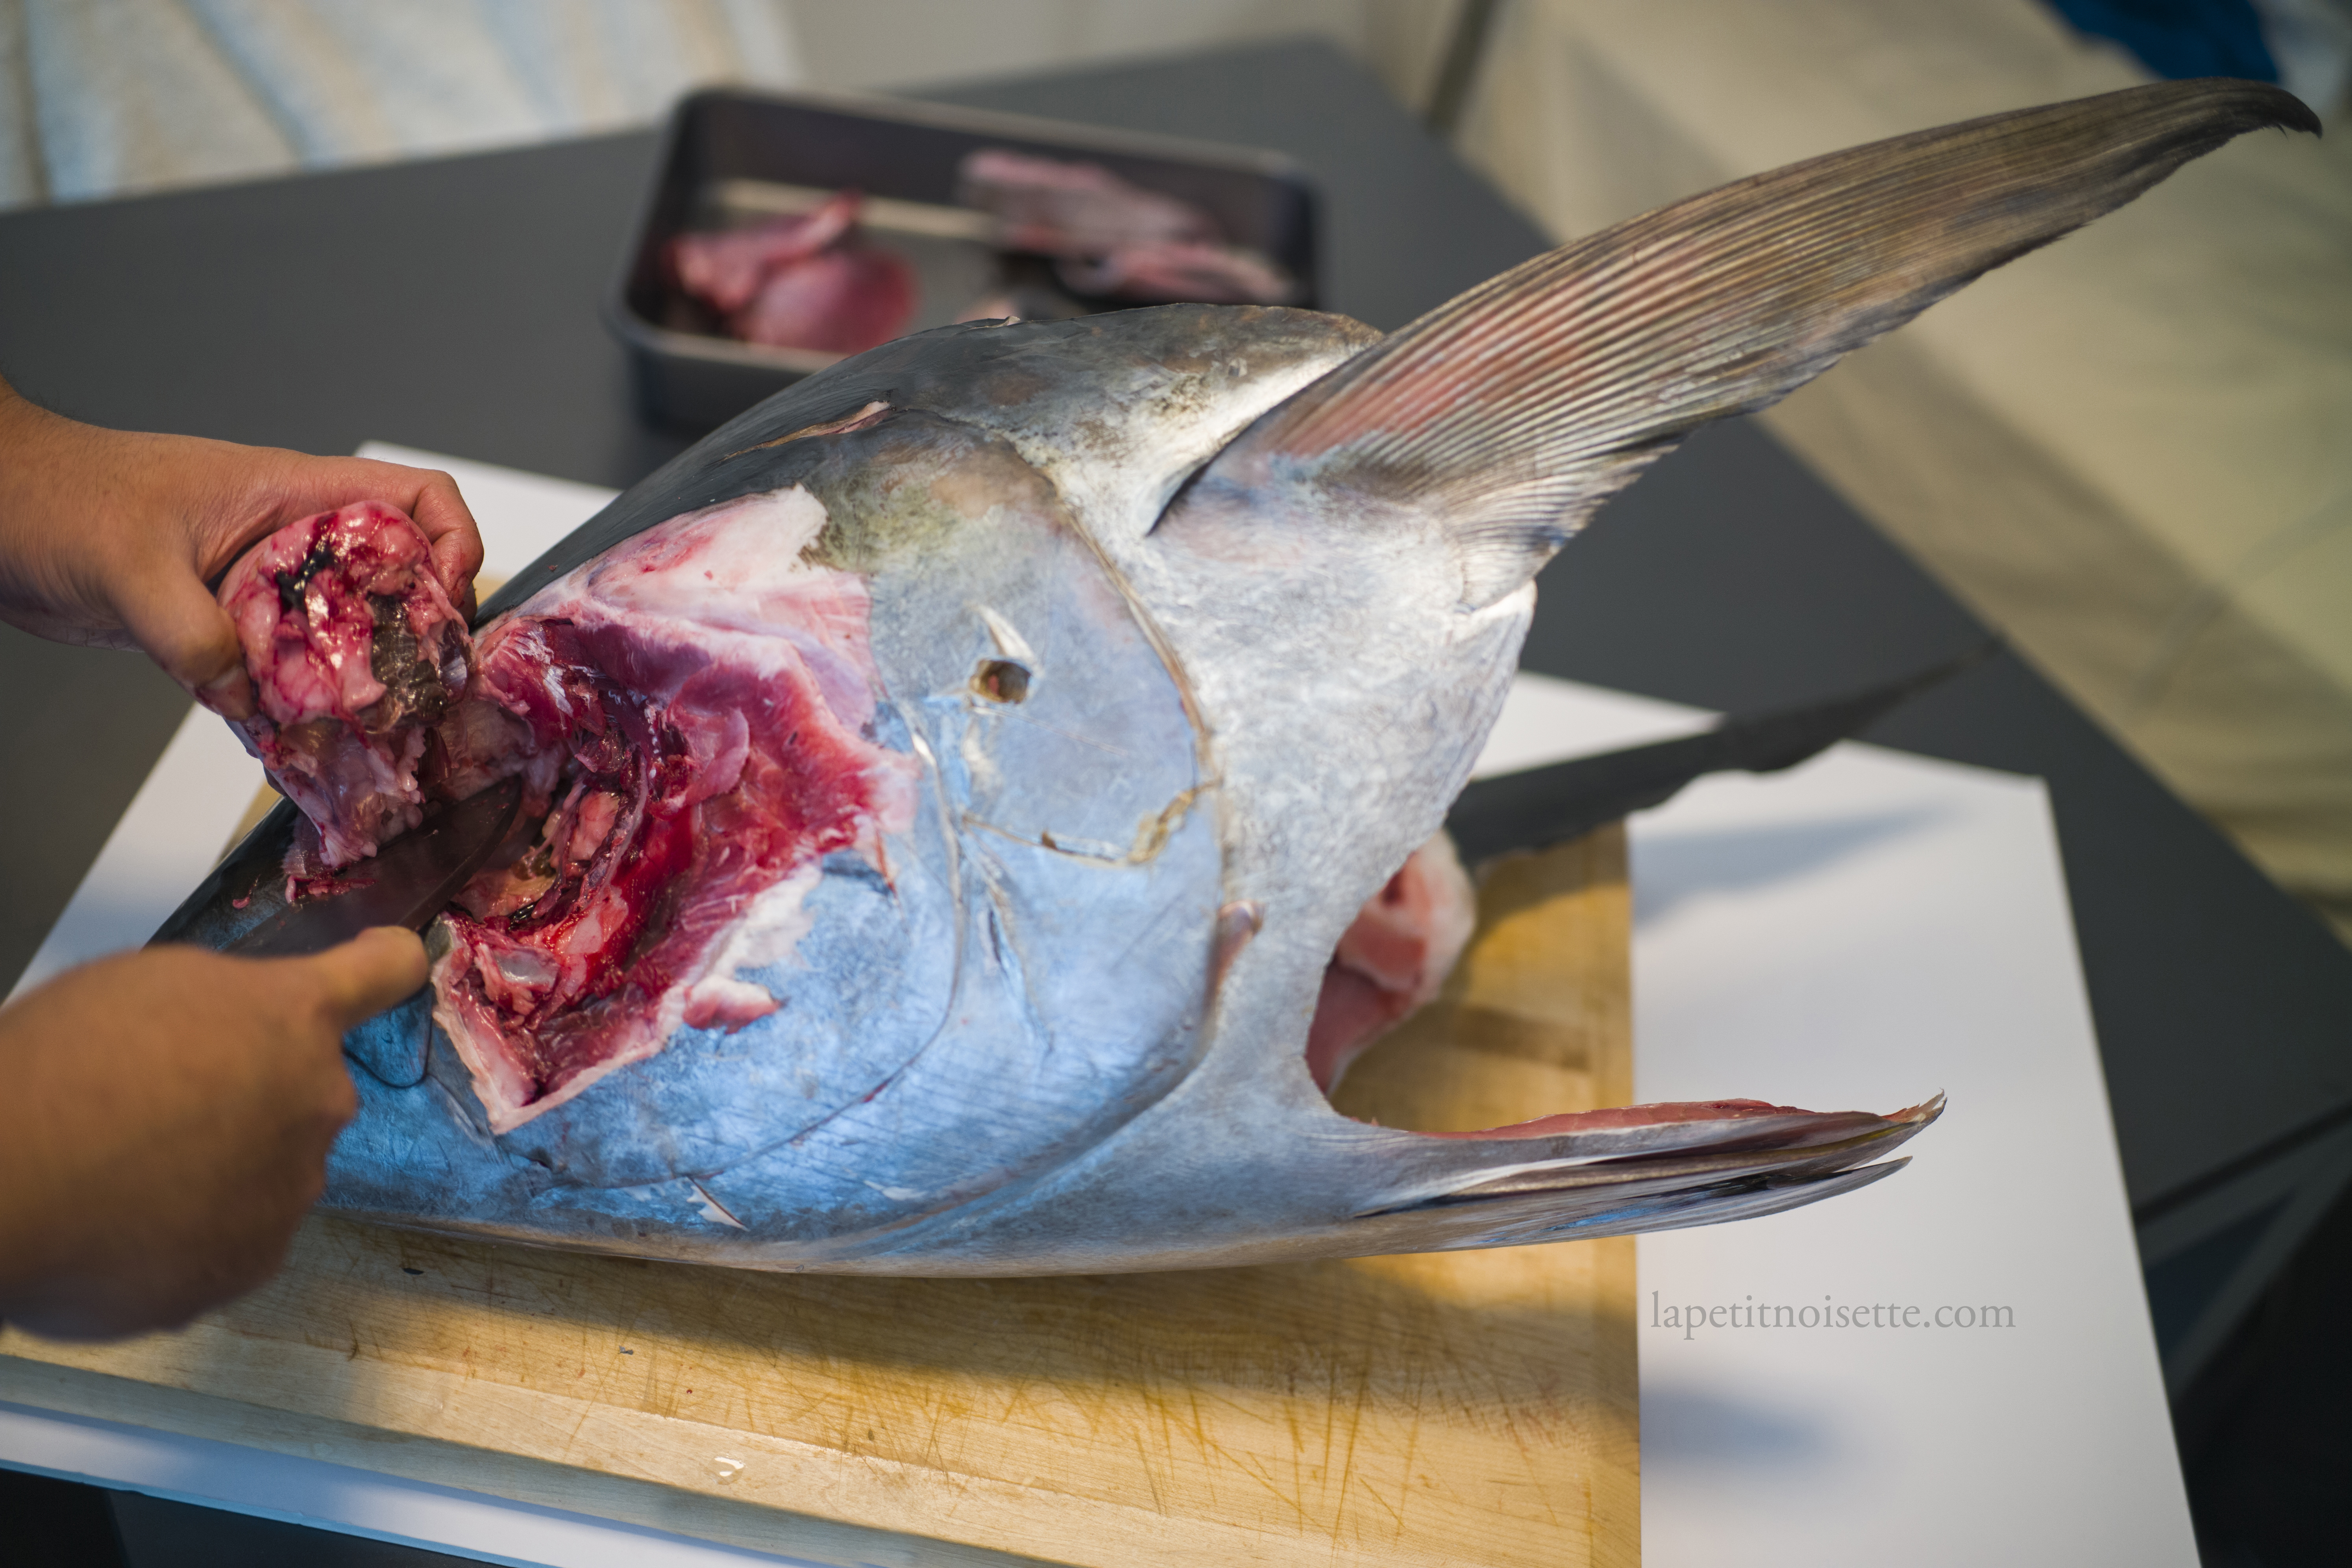
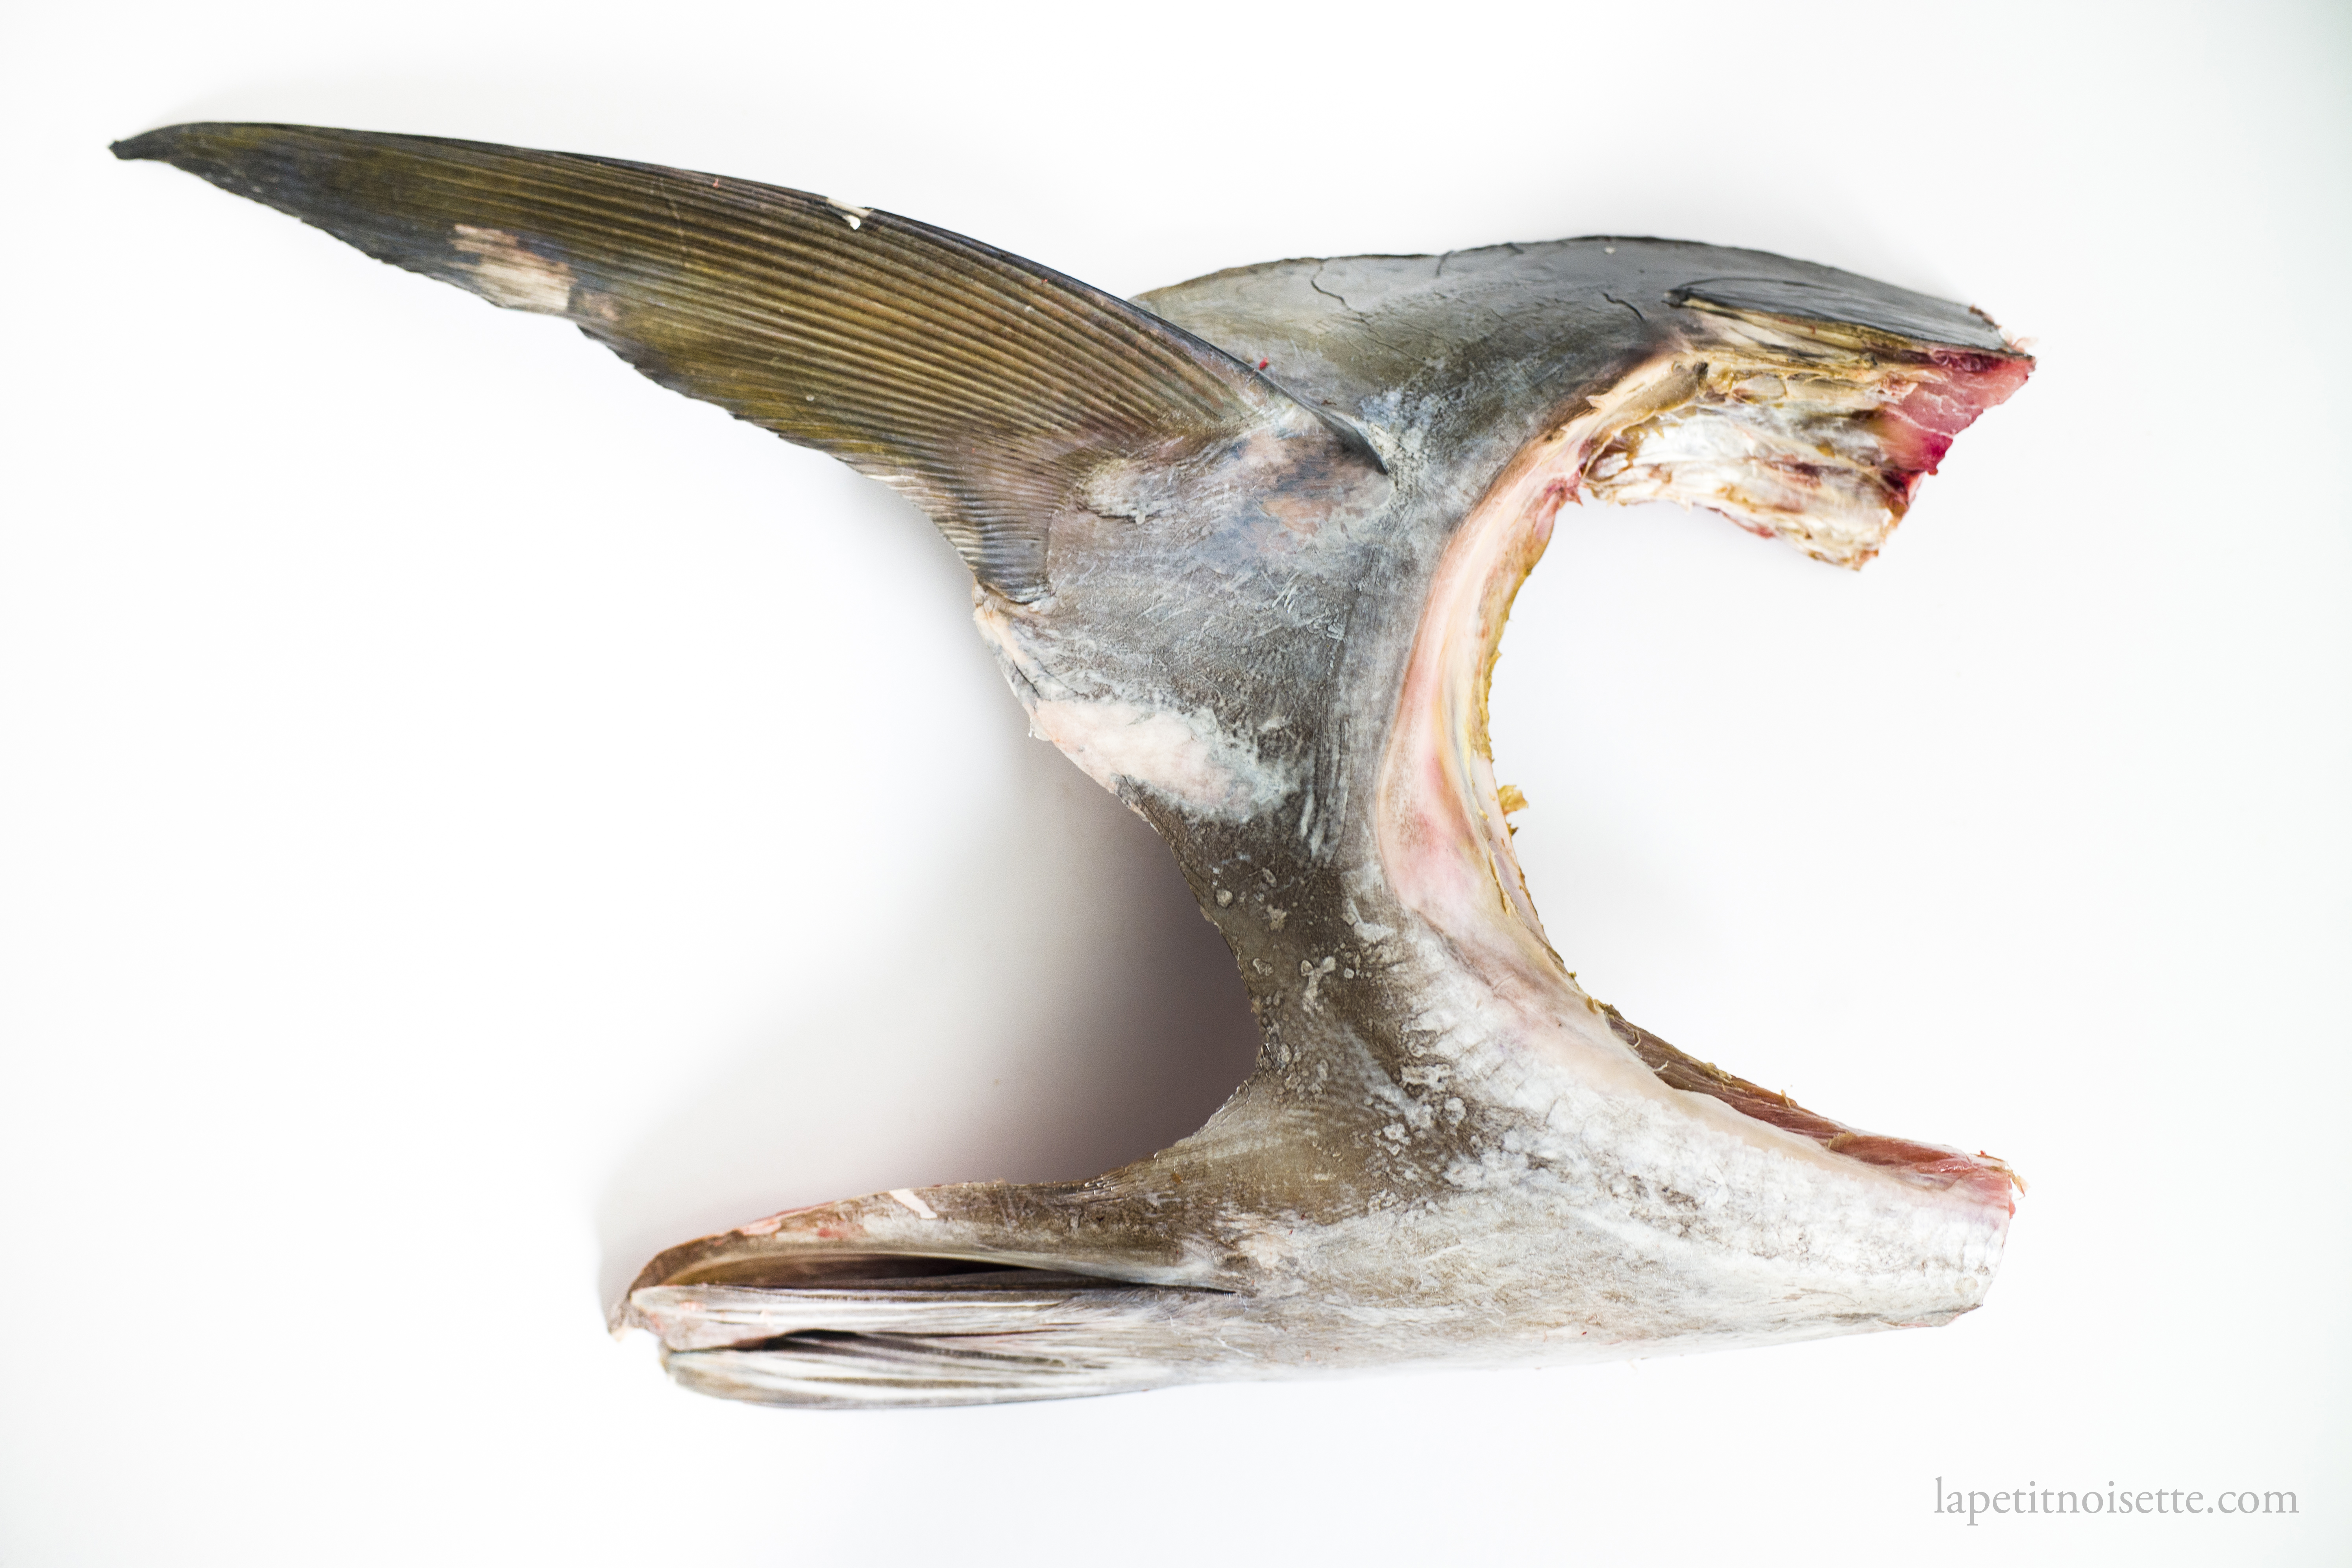
Removing a collar from a tuna head can be rather tricky due to its thickness, and most of the time the fishmonger will have cut it out for you. If not, it’s still possible to do yourself with a little work. At the top of the tuna head, use a sharp knife to cut through the thick flesh attaching the collar to the head. When you hit the connecting bone, you have a couple of options. Firstly, and this is my preferred method, you can cover the tuna head with a cloth and using the length of your arm, apply your entire body weight gently and steadily on the collar, which will bread the connecting bone and cartilage, which you can then finish the cut cleanly. The collar should be suspended quite high above the chopping board due to the sheer size of the head, which would give you the leverage to break it off. If not, you can use a bone saw to cut through the bone.
As the cartilage and bone are not as strong as animal bones however, a sharp bread knife is normally able to do the trick as well. If not, a chopping cleaver will make quick work removing the collar but just make sure you’re using a cleaver designed for chopping as some French, Chinese and Japanese cleavers are designed for slicing and will chip. The same techniques can be used for the bottom attachment point of the collar, which is usually weaker and thinner compared to the tip attachment point, especially if you break it as close to the end as possible where it tapers off for the gills to attach. For the bottom attachment, I simply saw it off with a bread knife rather than use my body weight as I find it more effective.
Repeat the above same steps with the other side of the tuna.