Scorpionfish are quite widely commonly found in the waters of Japan but are not a popular fish with high end restaurants. It’s the kind of fish you’d see at your local supermarket or fishmonger rather than at the larger wholesale market. Otherwise, it’s much more common to find these fish caught by amataur and hobbyist fishermen. The filleting technique for all scorpionfish, including both Kasago and Onikasago is the same, which is why the title for this article is for the generic Japanese scorpionfish. Today, we’re going to see how to fillet scorpionfish, but in particular the demon scorpionfish, or Onikasago (オニカサゴ/Scorpaena neglecta). You can find details on how to differentiate the two here.
What is Onikasago (オニカサゴ/Scorpaena neglecta)?
Unlike the common scorpionfish in Japan (Kasago/カサゴ), Onikasago is actually a luxury fish. Onikasago is the most sought after of all scorpionfish in Japan. It’s actually sometimes caught by the same fishermen who try to catch Kasago, and is more seldomly seen in markets. Just like Kasago, it is also venomous, but has various venomous barbs around it’s body that need to be removed. It’s actually these venomous fins that allow Onikasago fins to produce fin sake (ひれ酒) second only to pufferfish.
It is consumed as sashimi and sushi in Japan, but then again almost every single fish is. It’s liver is sometimes blanched and blended into the accompanying soy sauce for the sashimi. In my opinion, this fish shines through the most in cooked preparations, and is a personal favourite of mine alongside Managatsuo. Characteristics-wise, it has a richer and nicer flavour compared to Kasago, and is best used for making a wonderful stock for soup and stews. In fact, those of you familiar with French cuisine will know that Marseille’s legendary bouillabaisse soup uses the Red Rascasse scorpionfish (Scorpaena scrofa) as a key ingredient due to the amazing taste it contributes to the base stock. From the name, you can see that both the Red Rascasse and Izukasago are in the Scorpaena genus. The flesh of the scorpionfish also maintains it’s texture when boiled, which is crucial for fish used in soups and stews.
What is the difference between Onikasago and Izukasago?
Whilst the filleting technique shown here is applicable to all scorpionfish, let’s clear up some nomenclature issues. In Japanese, the name for the genus Scorpaenopsis is Onikasago (オニカサゴ属) and the name Onikasago is the “official” name for a fish species called Scorpaenopsis cirrhosa amongst the scientific community. However, in markets and local sellers, the name Onikasago actually refers to a fish species called Scorpaena neglecta. This is confusing because its ‘officially’ named Izukasago (イズカサゴ) amongst the scientific community but Onikasago locally. This fish is in the Scorpaena genus or Fusakasago (フサカサゴ属) in Japanese. So for this article, we’re referring to Scorpaena neglecta which is known as both Onikasago locally and Izukasago and is pictured here. Bear in mind again, the filleting technique shown here is applicable to all scorpionfish.
How to fillet Onikasago (オニカサゴ)
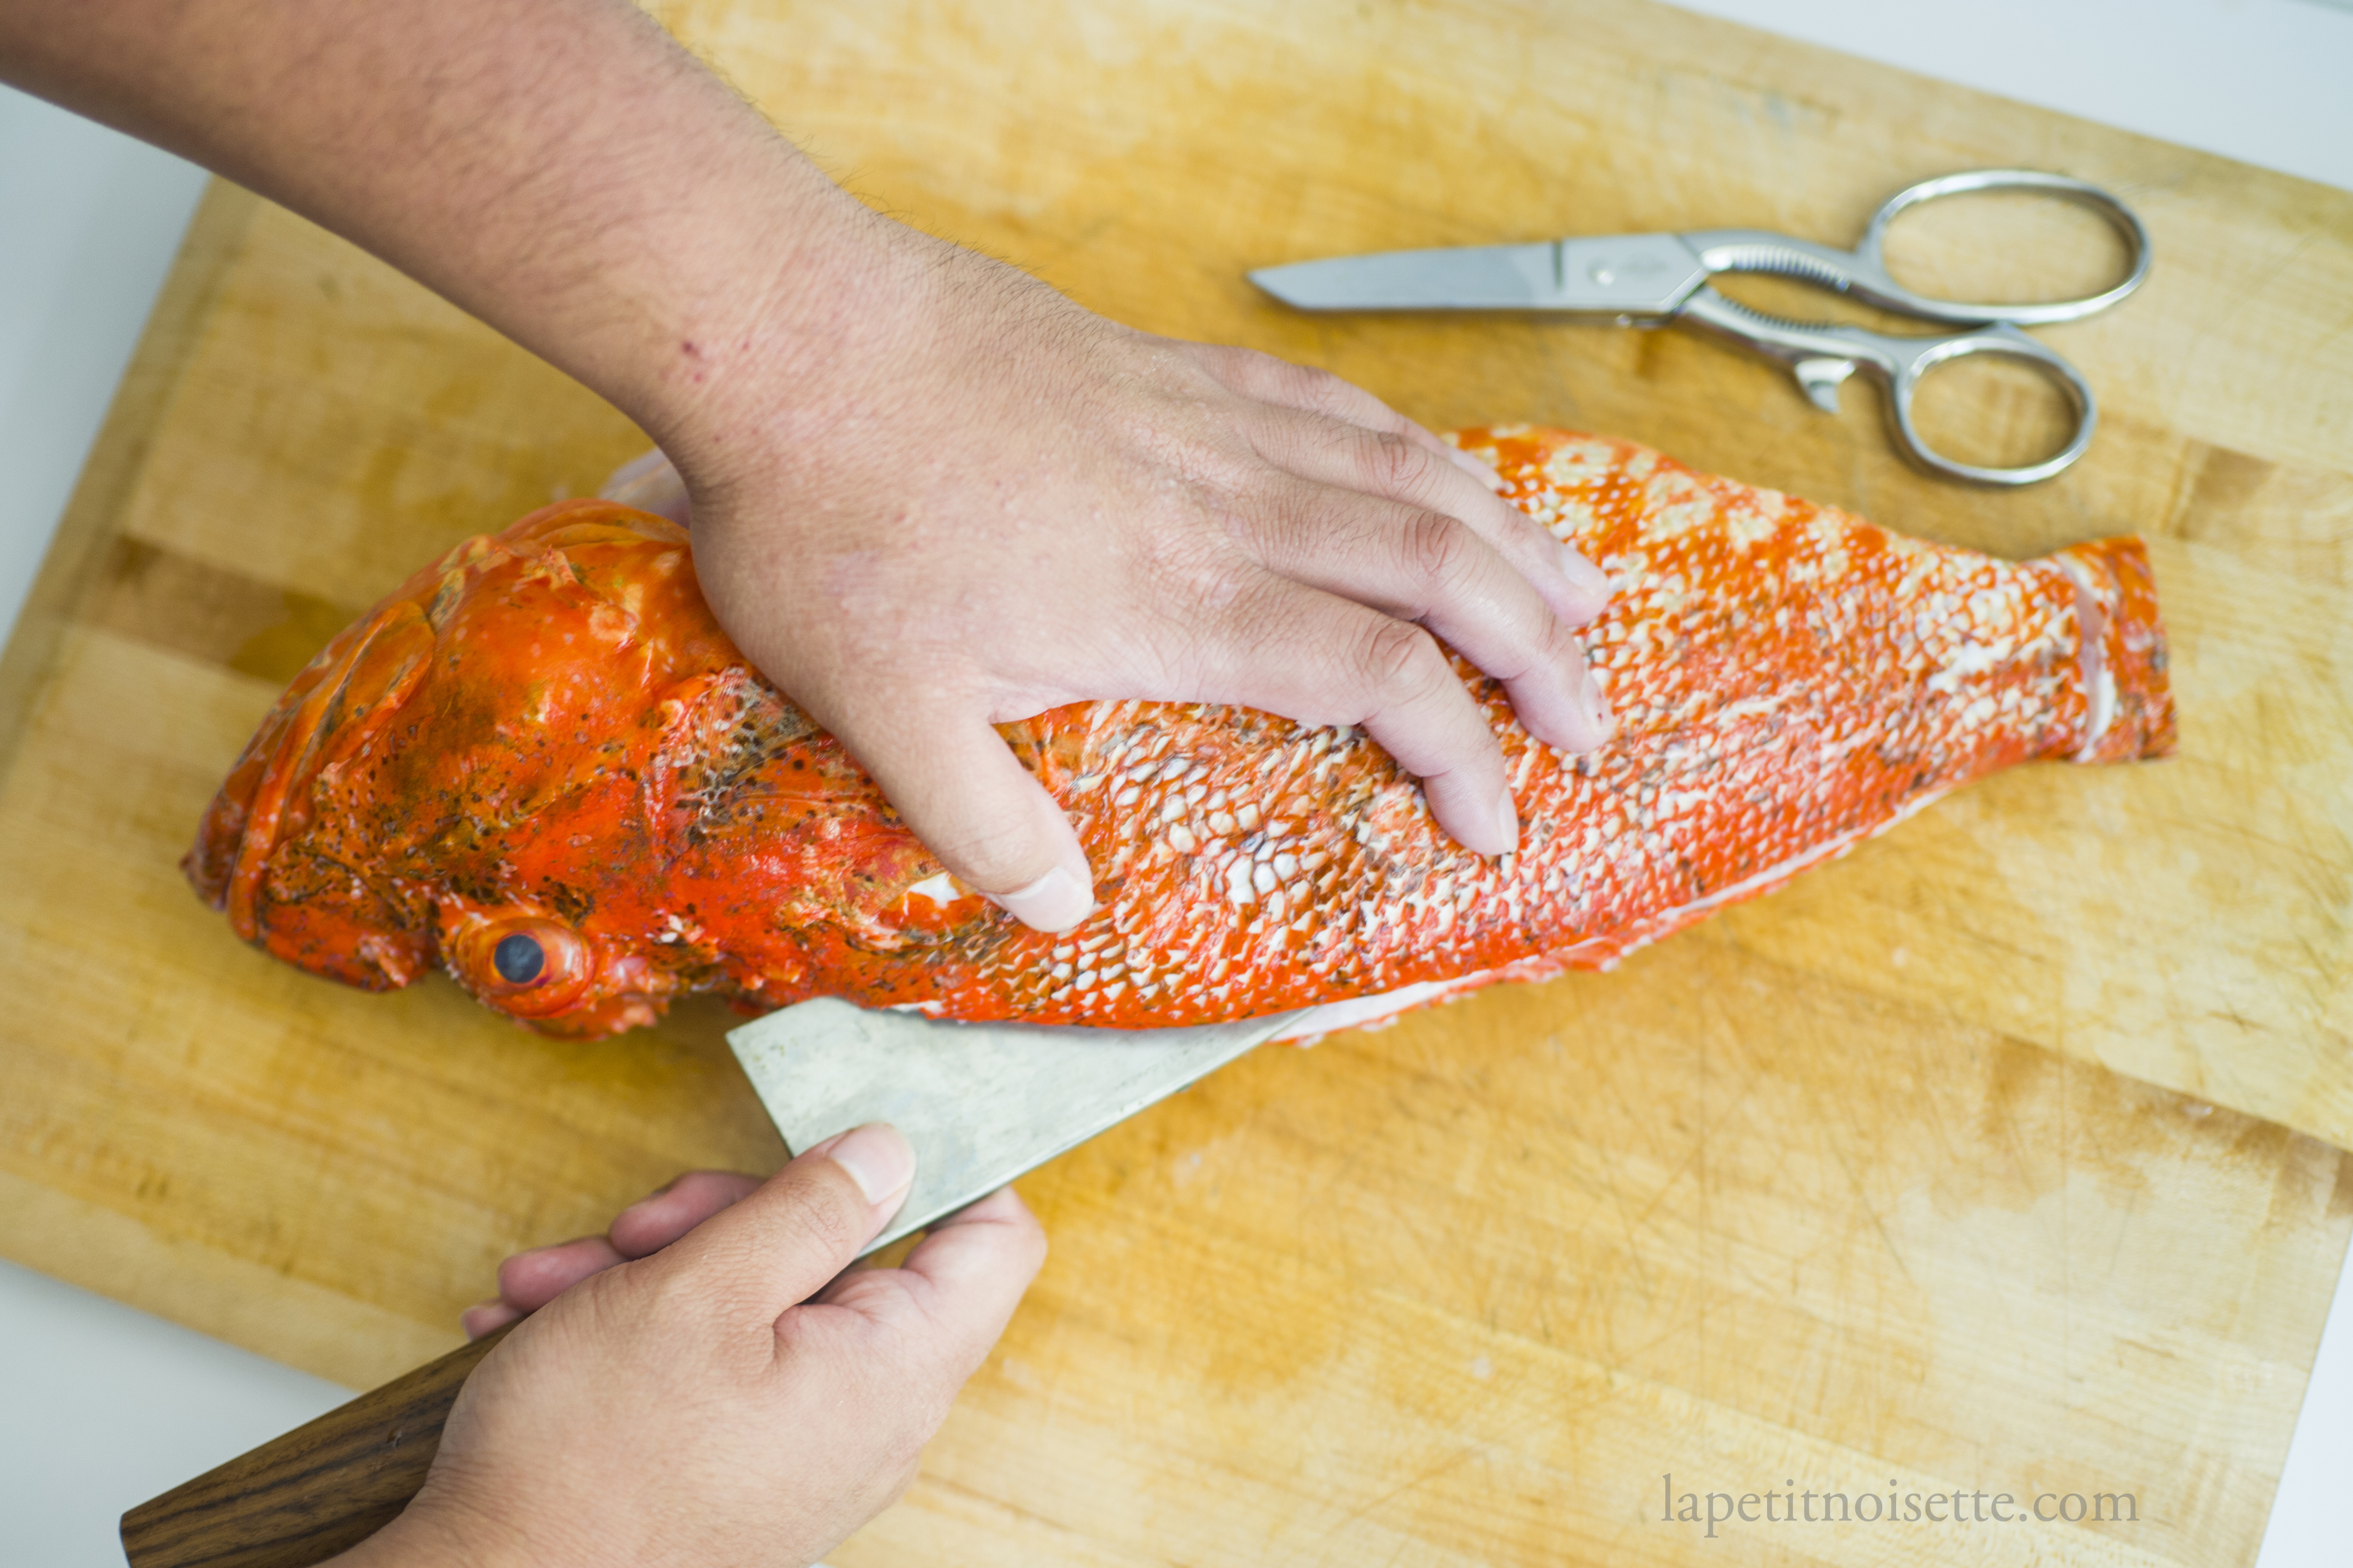
We first start preparing this fish by cutting off it’s various fins to prevent being pricked during the filleting process. Reserve the caudal (tail) fins and pectoral fins for hirezake. If the fish is large, the dorsal, pelvic and anal fins may also be used in hirezake. If you’re filleting the kasago, you can ignore this as it does not have the barbs you have to worry about.
The barbs you have to watch out for are located on both the fish’s dorsal fins, it’s anal and pelvic fin as well as on it’s gill flap. I personally recommend removing the barbs by cutting the fin at the root instead of cutting off the tips as it’s less messy and allows the integrity of the fin to be preserved. Grip the fish using a towel to prevent slipping and use a sharp pair of kitchen scissors to cut off the fins. For the barb on the gill flap, it’s the easiest to cut with a pair of piers, otherwise just try and be careful when using scissors. Some people prefer to leave on the tail and pectoral fins so that the fish is easier to handle and then cut them off later.
Once all the barbs have been removed, start by descaling the fish. We descale the fish using a urokotori (鱗取り), a traditional Japanese fish scaler. Run the scaler against the direction of scale growth to most efficiently remove them. Otherwise, use the back of a knife to scale the fish. Wash away the scales and slime with cold water. Whilst descaling, we run a small stream of cold water onto the fish from the tap to prevent any scales from flying about.
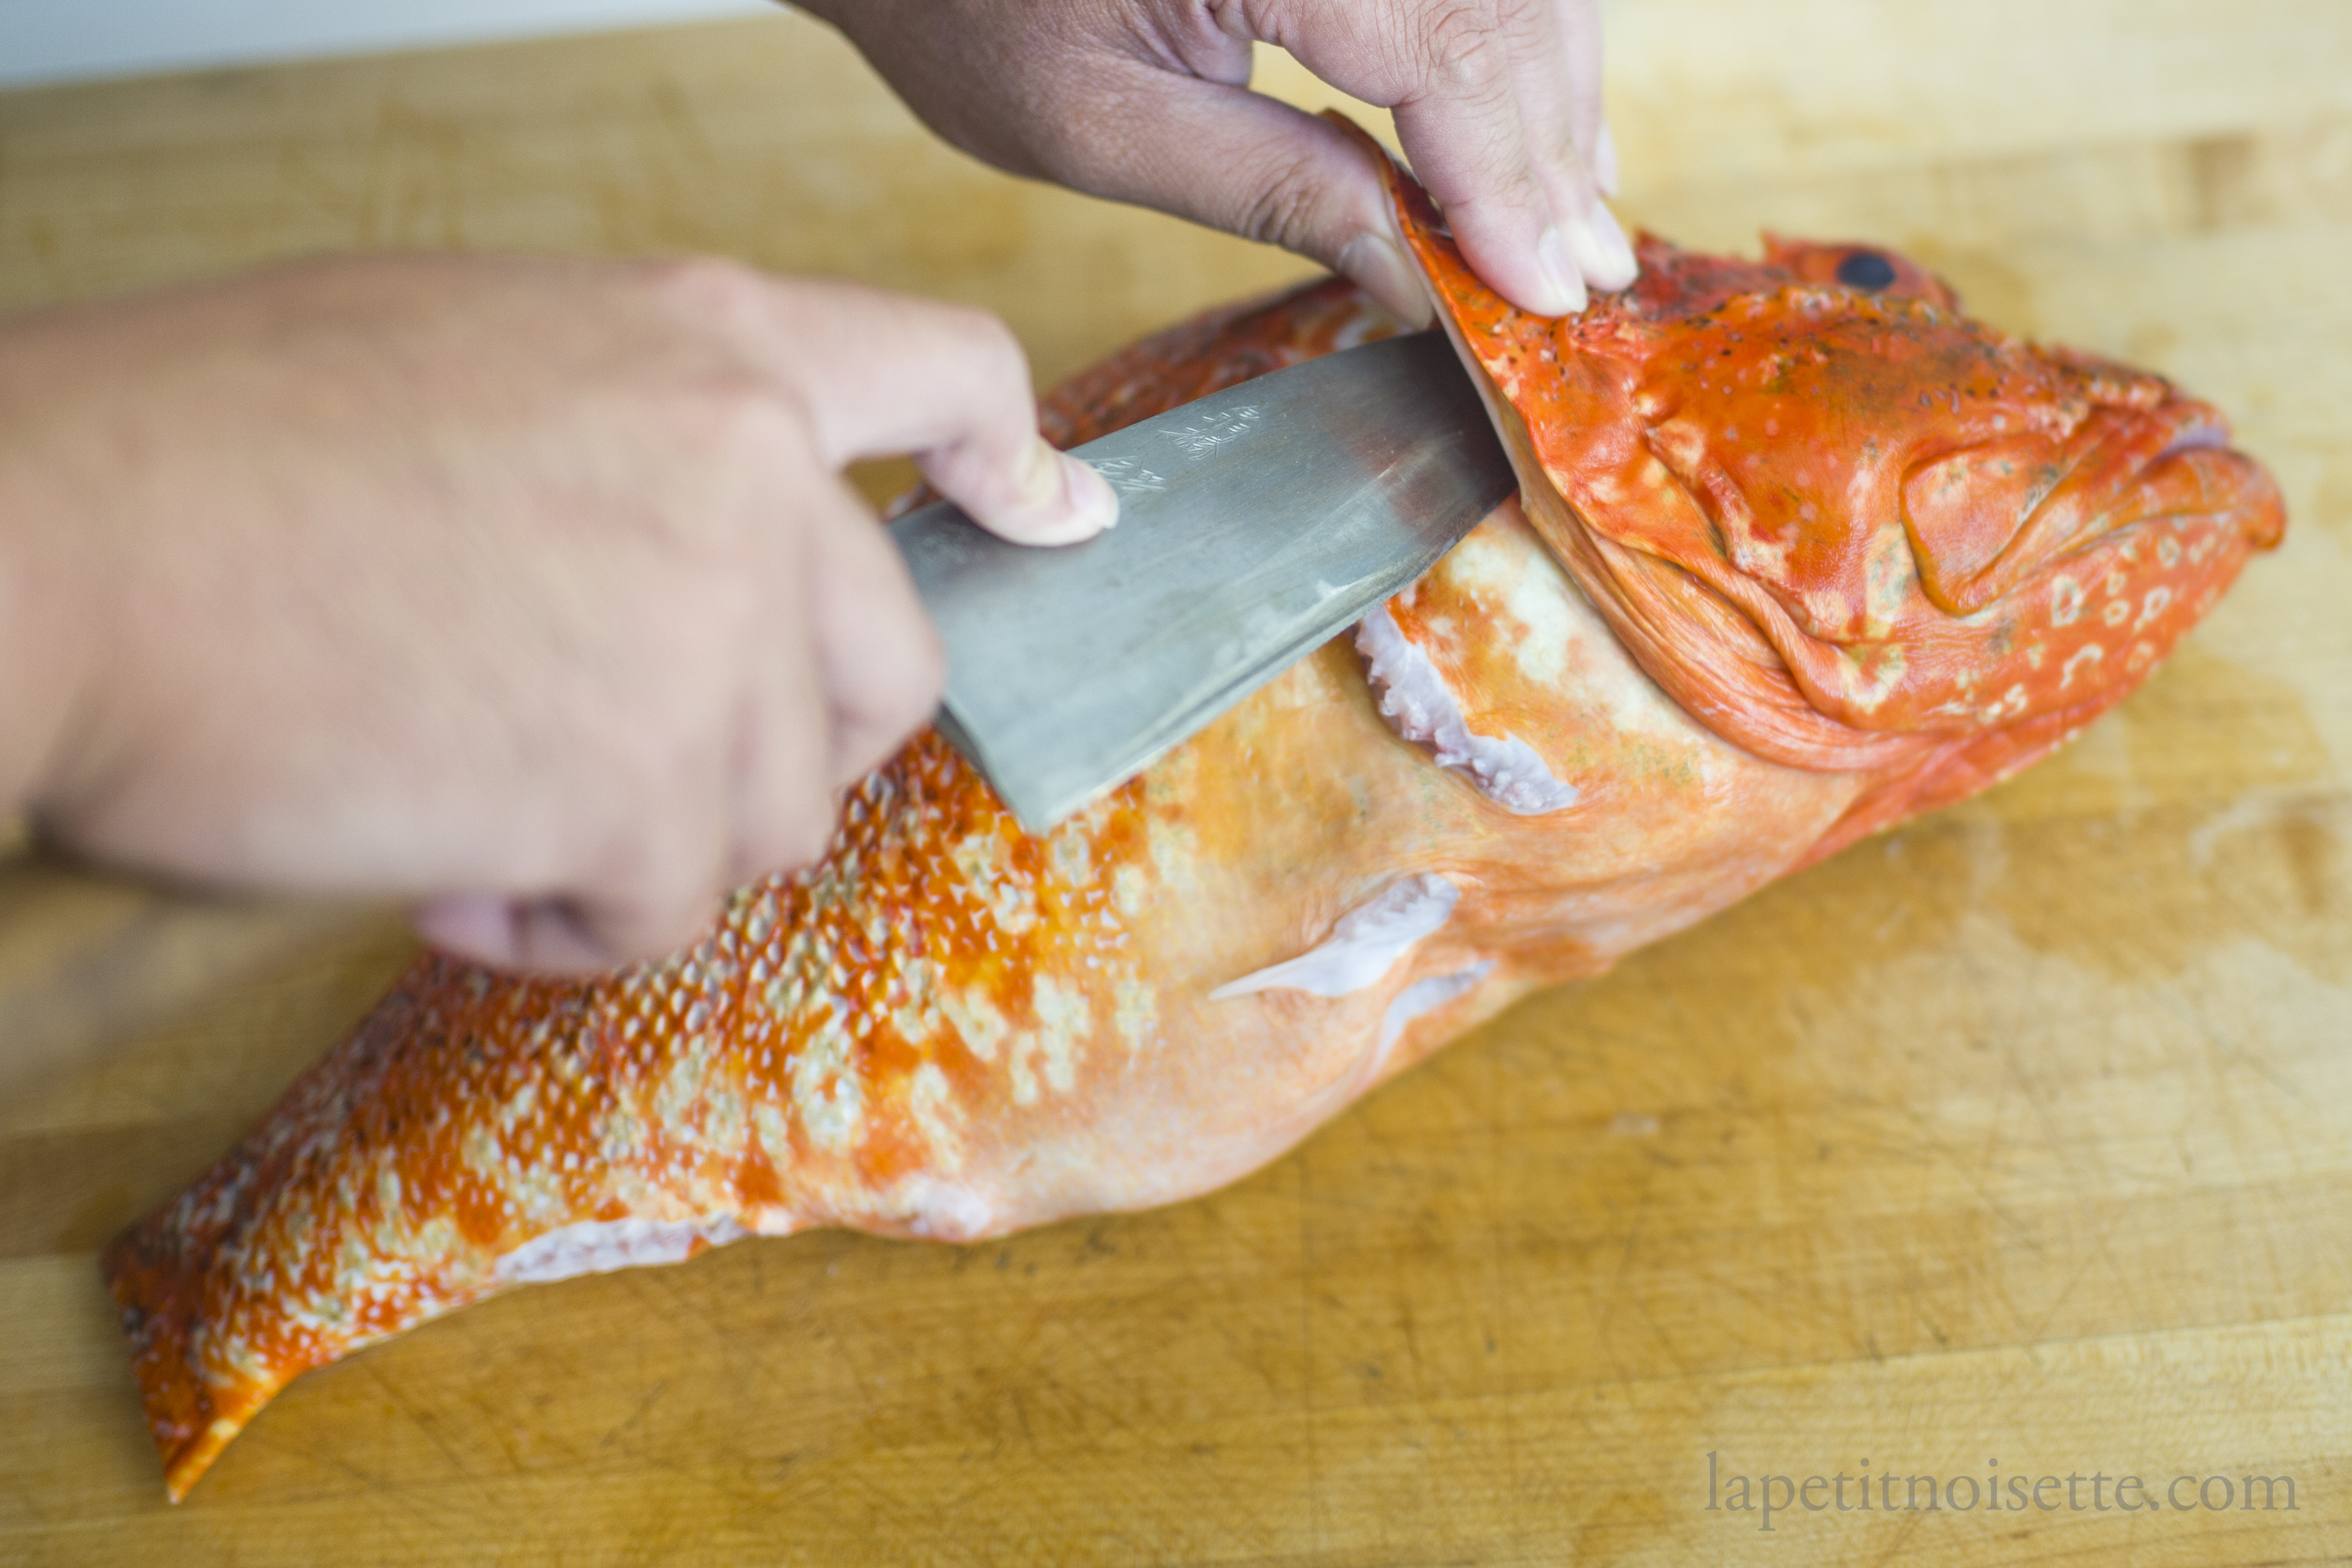
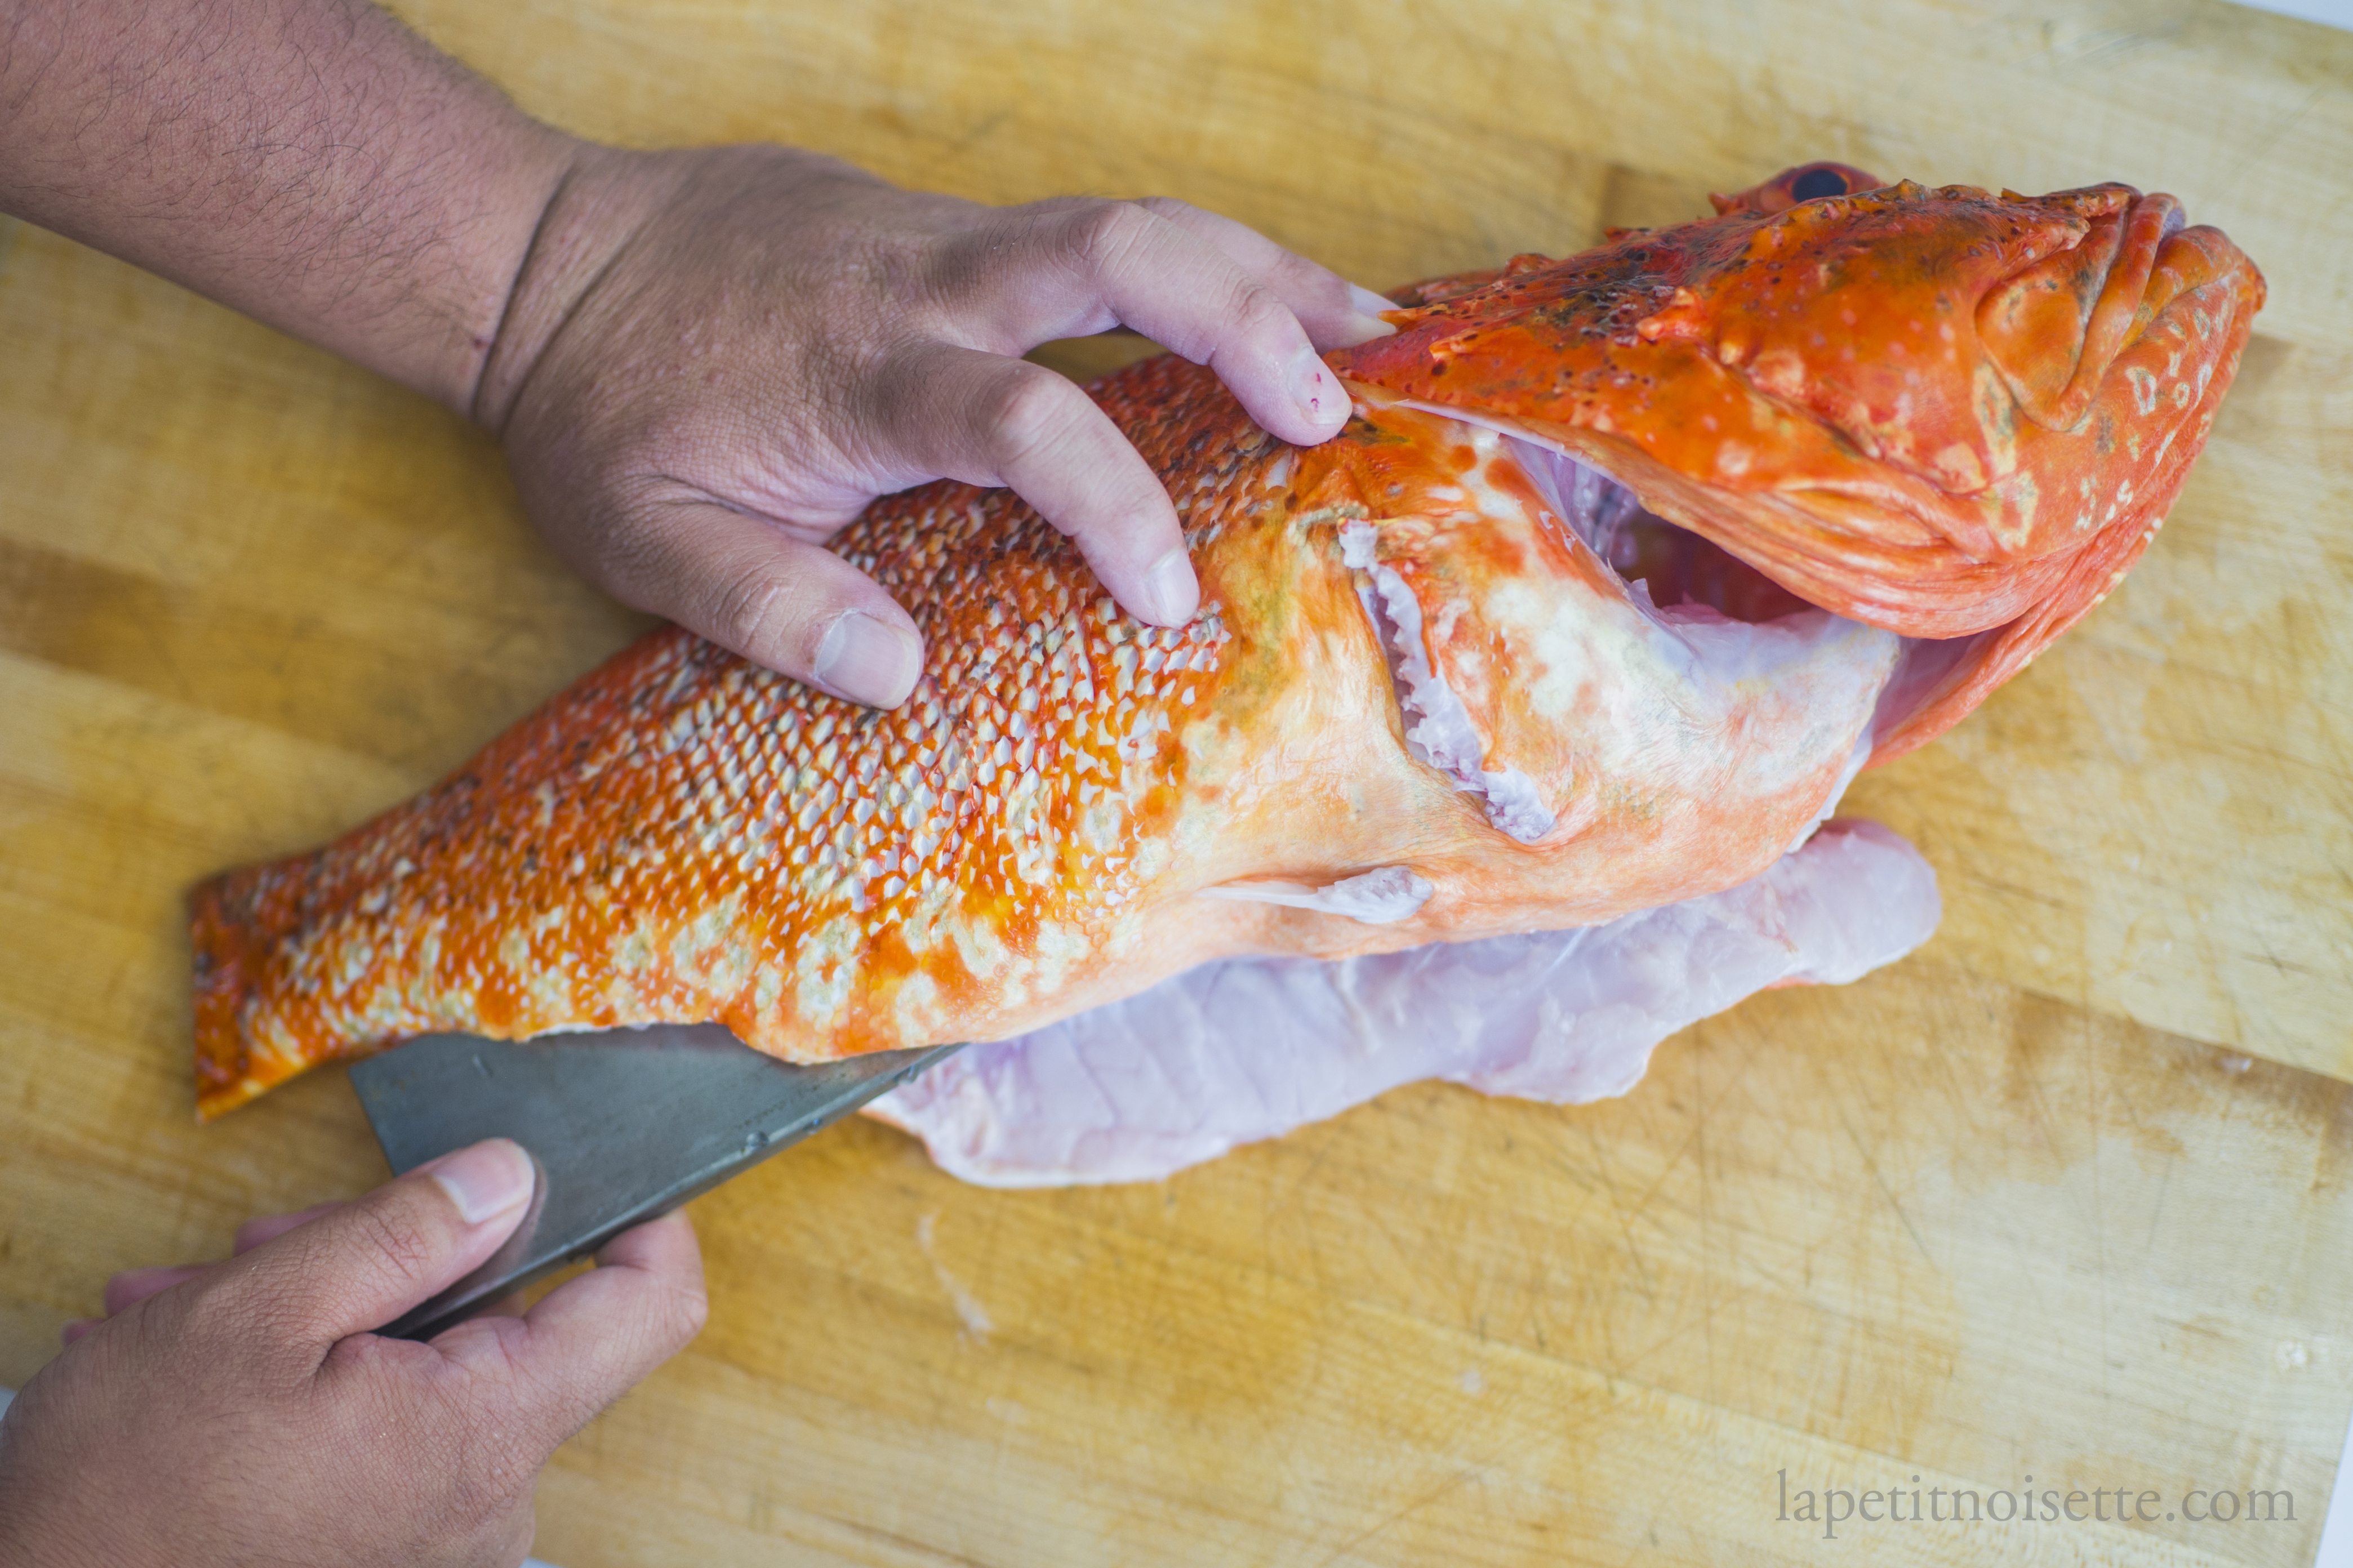
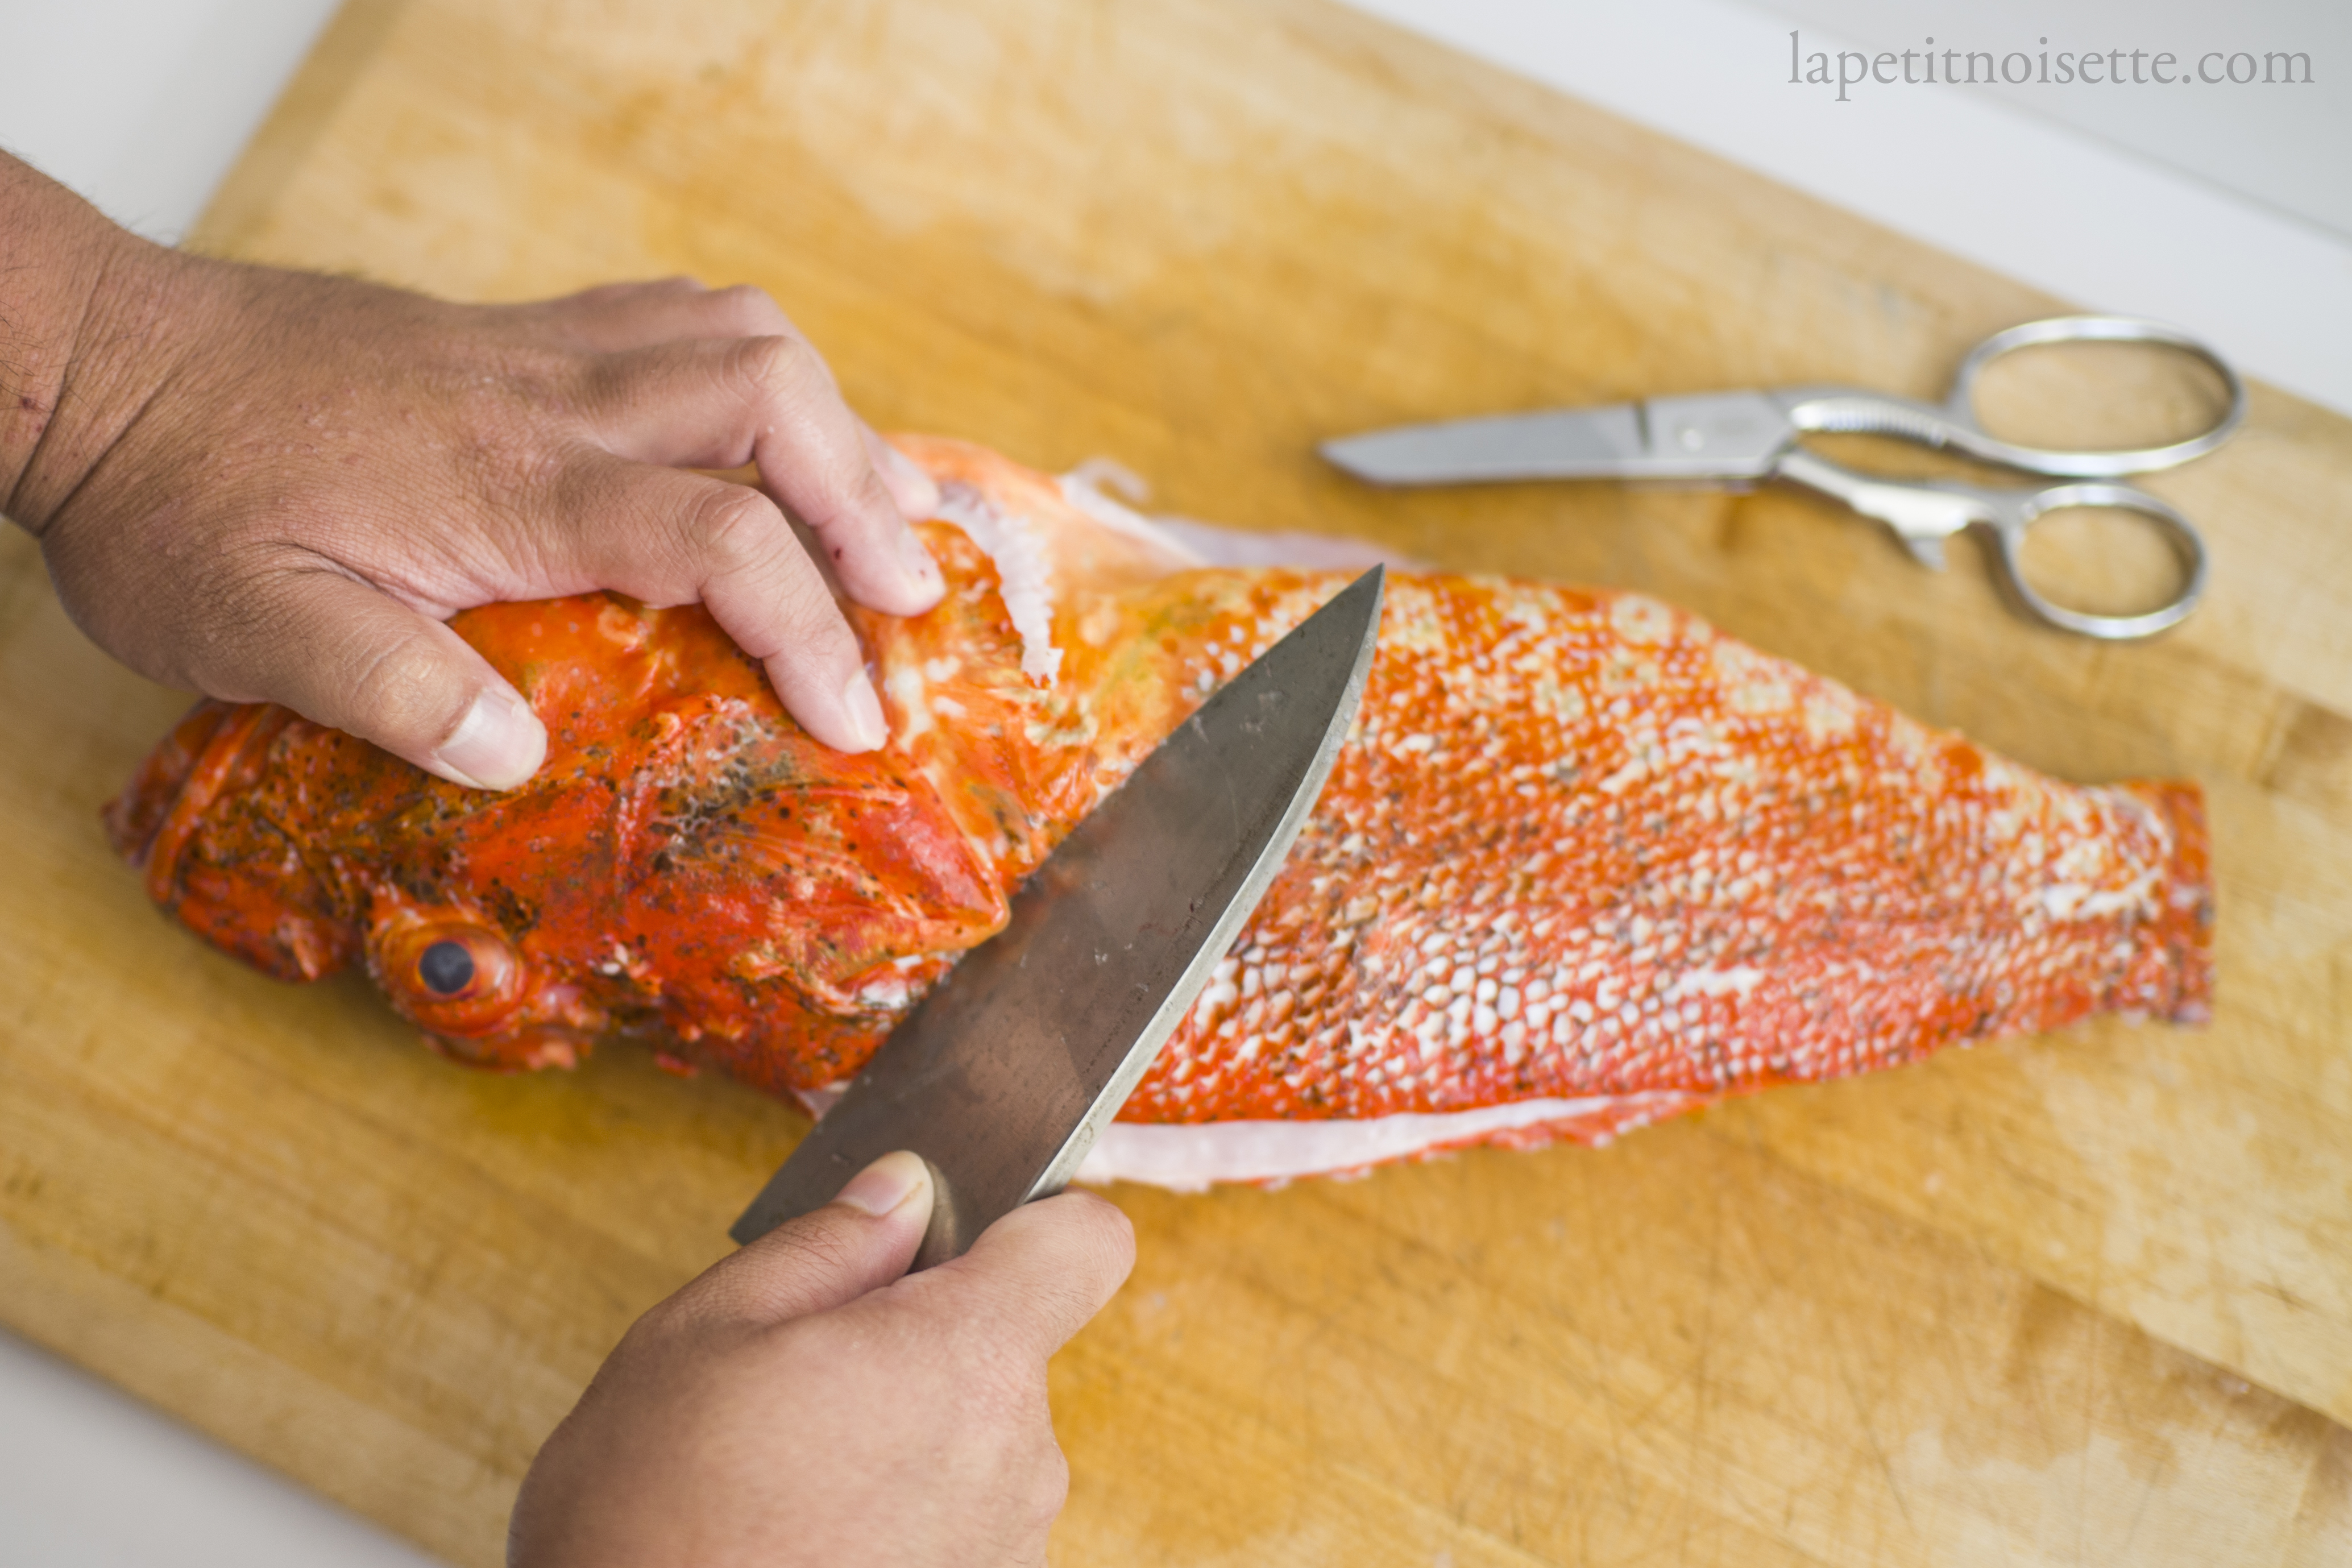
Next, we cut the gills of the fish by opening the gill flap and inserting the tip of the knife into the gill cavity and cutting away at the two ends of the gills connecting the arches.
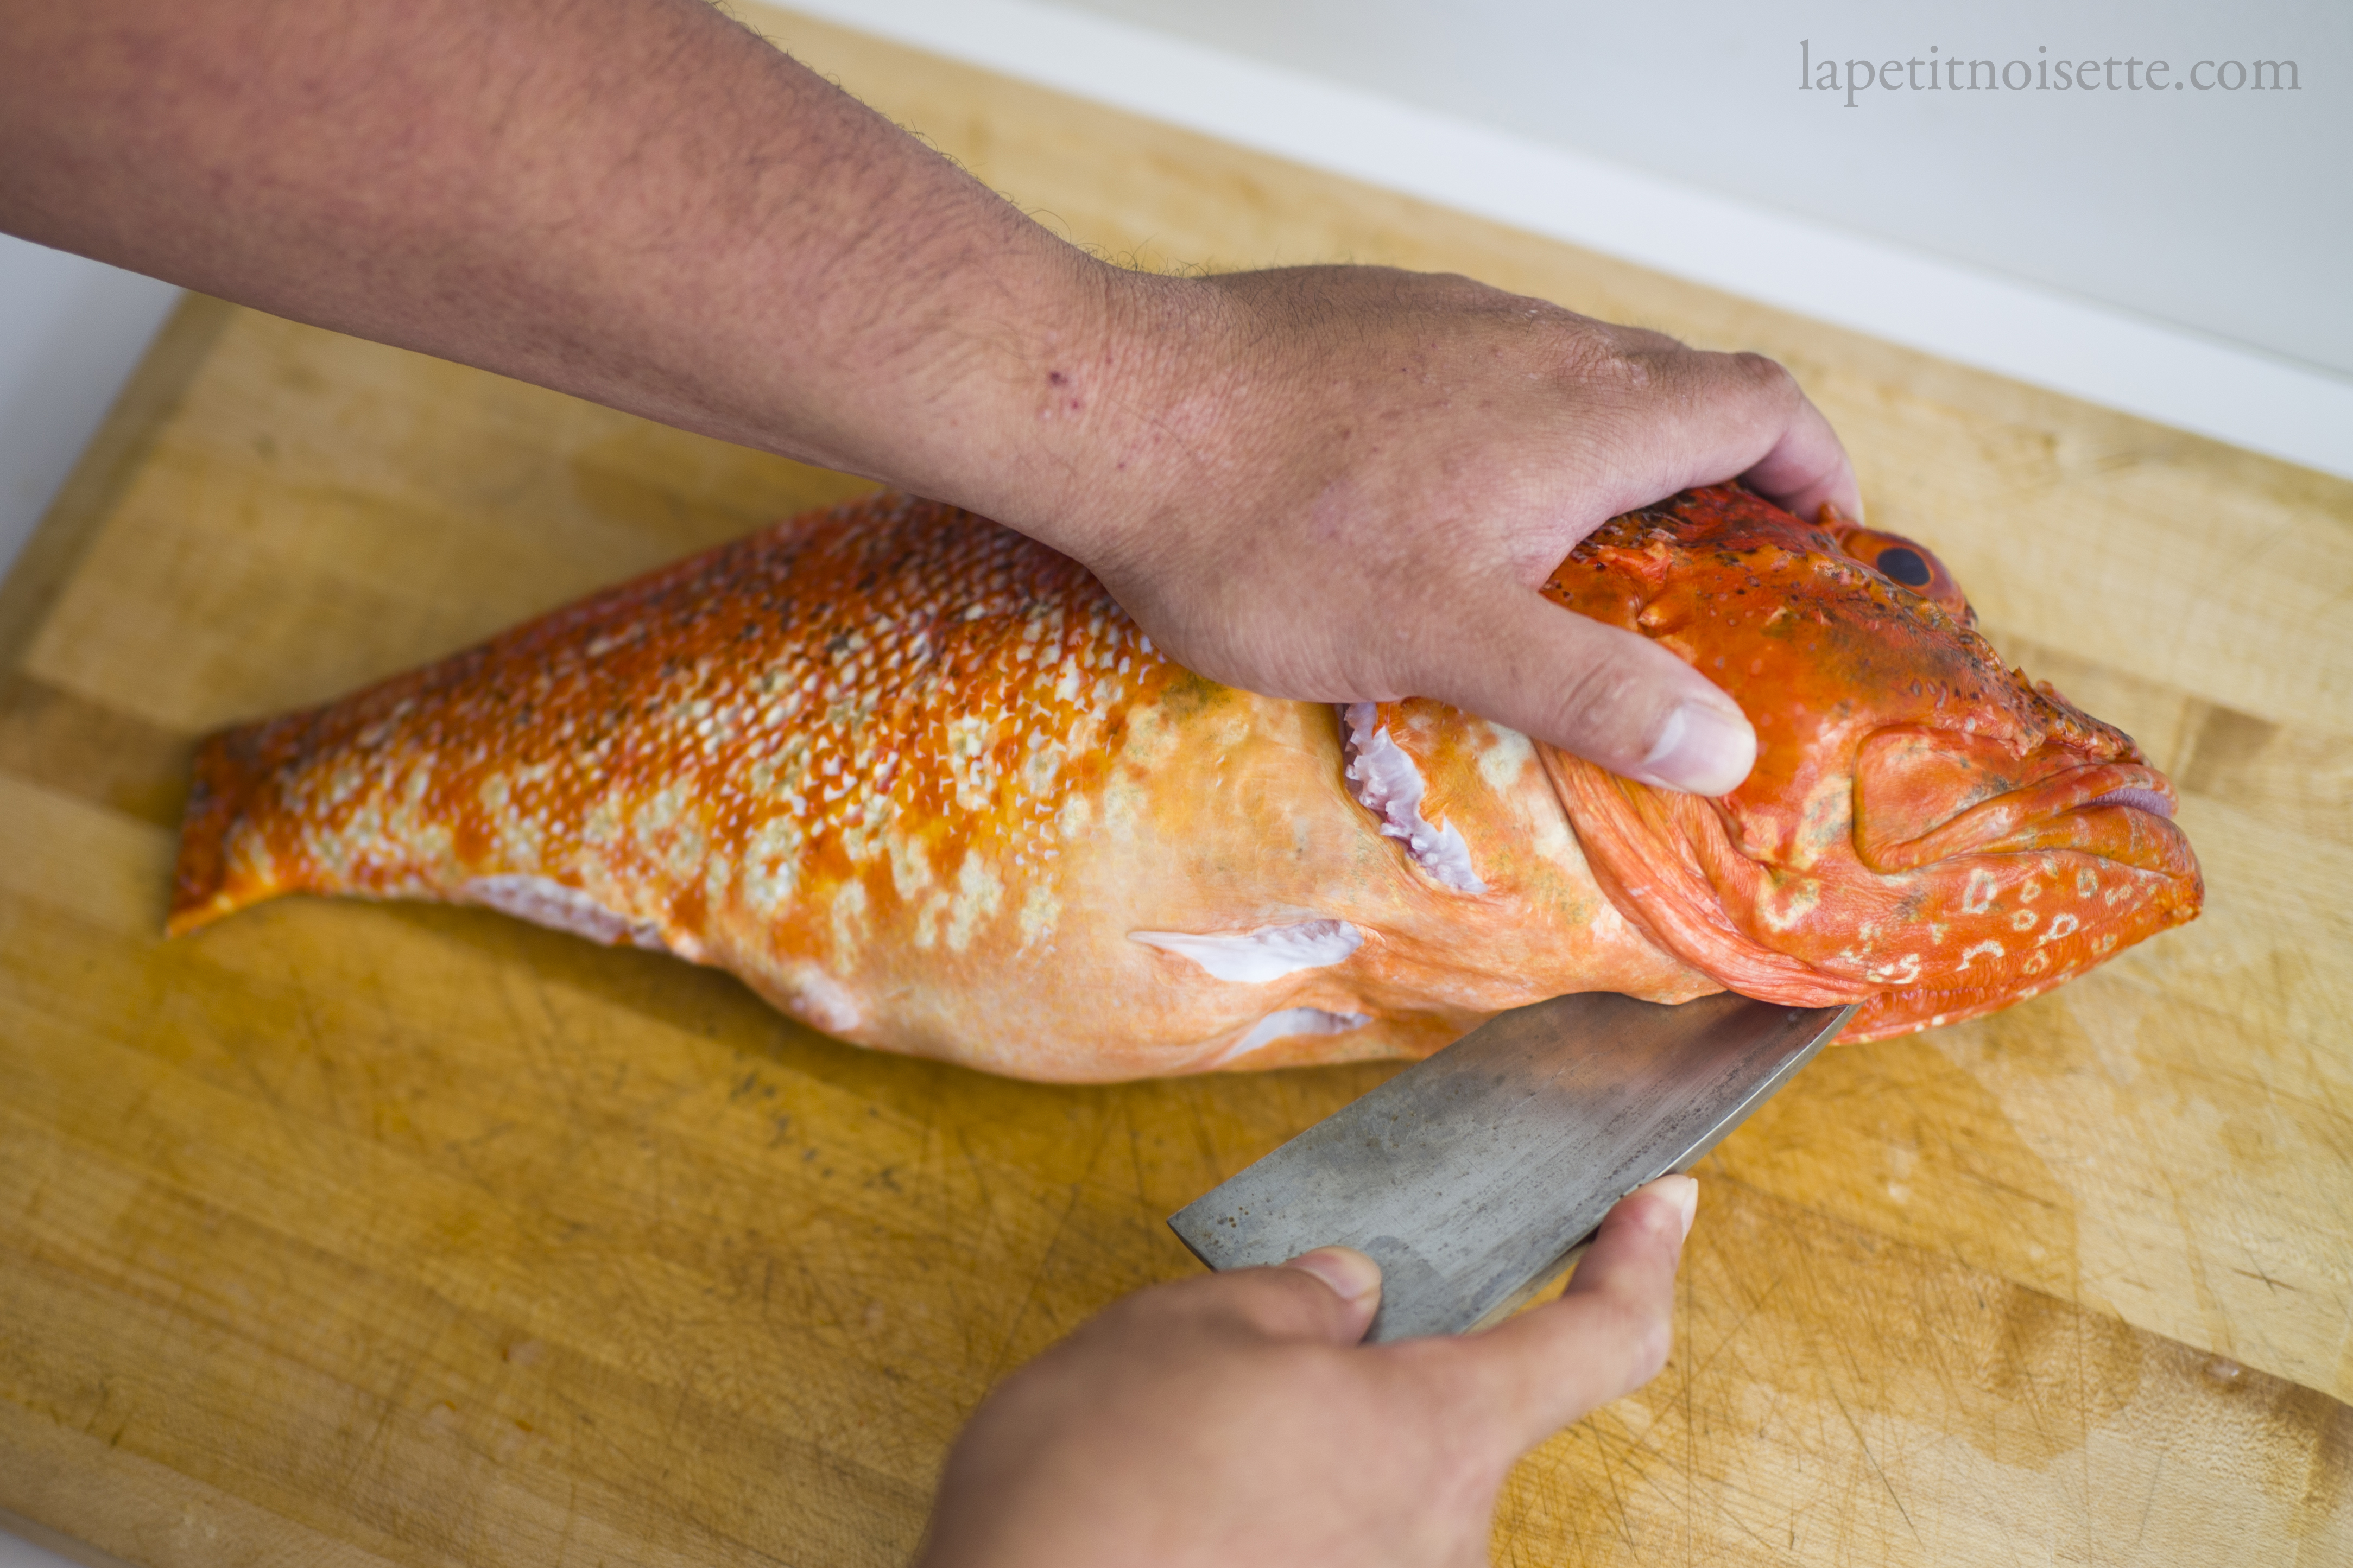
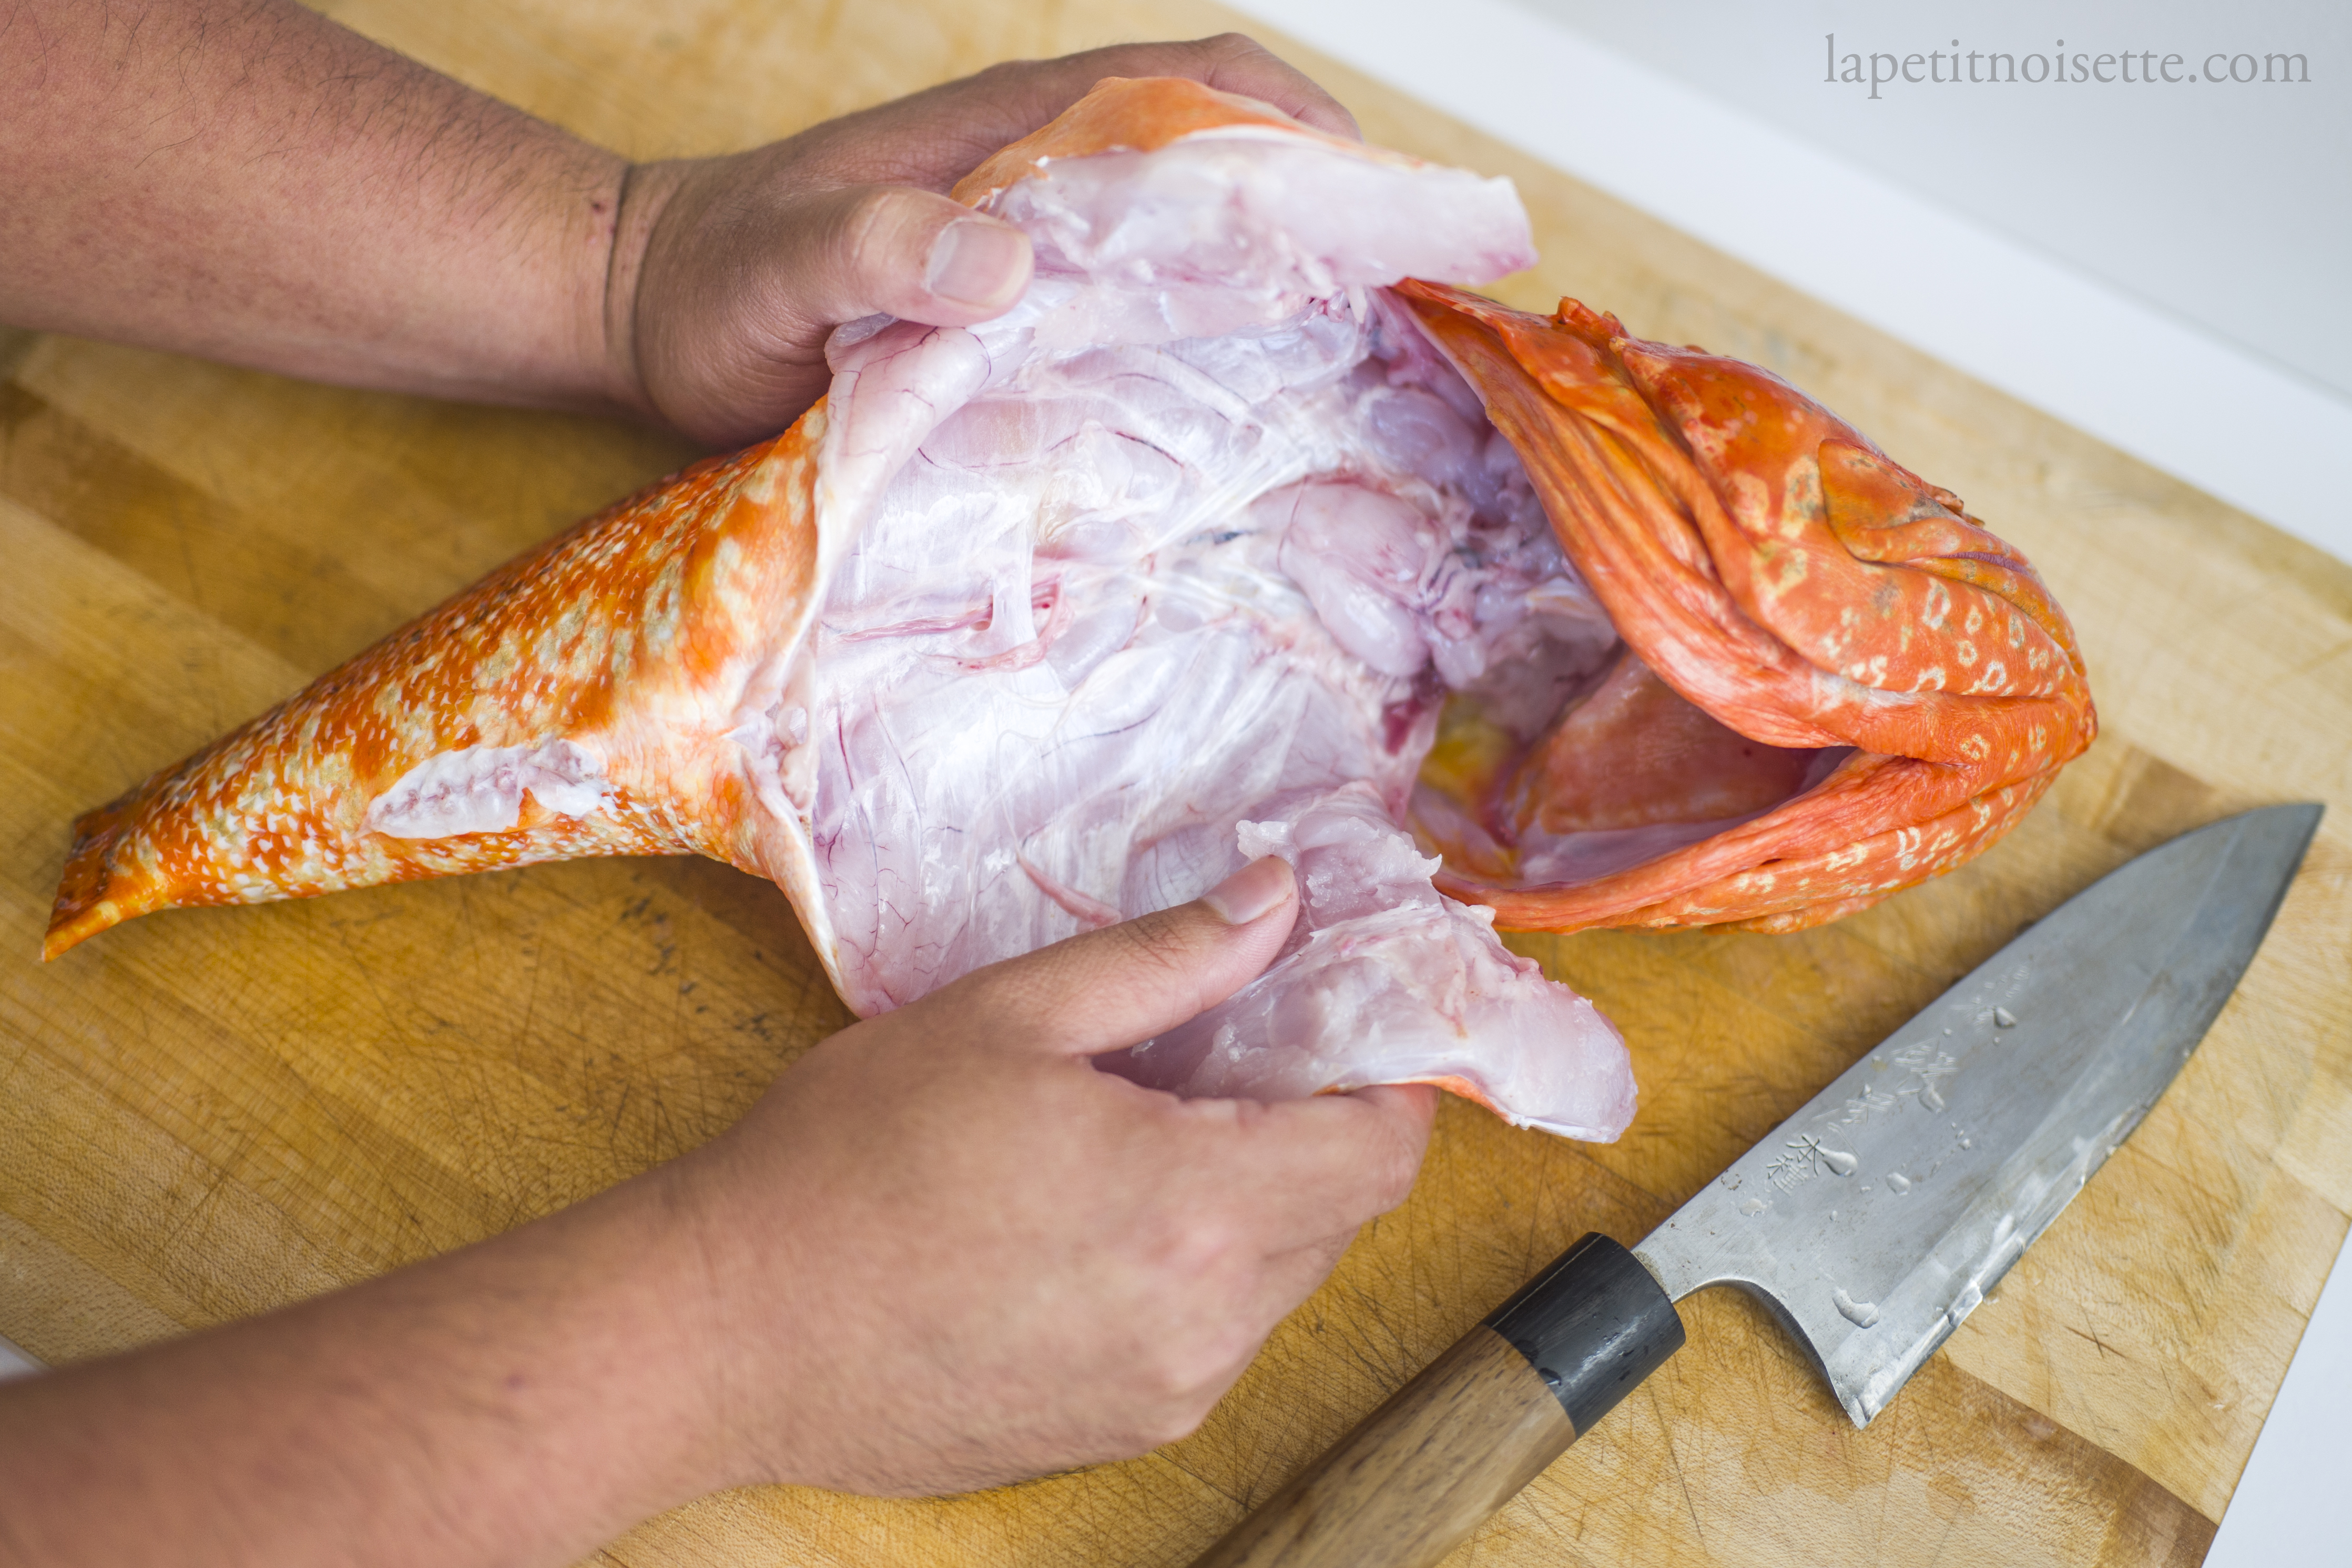
Next, break the bone connecting the collar of the fish to the head of the fish, allowing you to open the fish. Make a cut down the belly of the fish starting from just below the head all the way to the anus. The cut runs through the pelvic fins, separating them into right and left pelvic fins. The flesh in between the pelvic fin is tough and will require some force. This is why the sharpness of the knife is important. Be careful not to cut yourself.
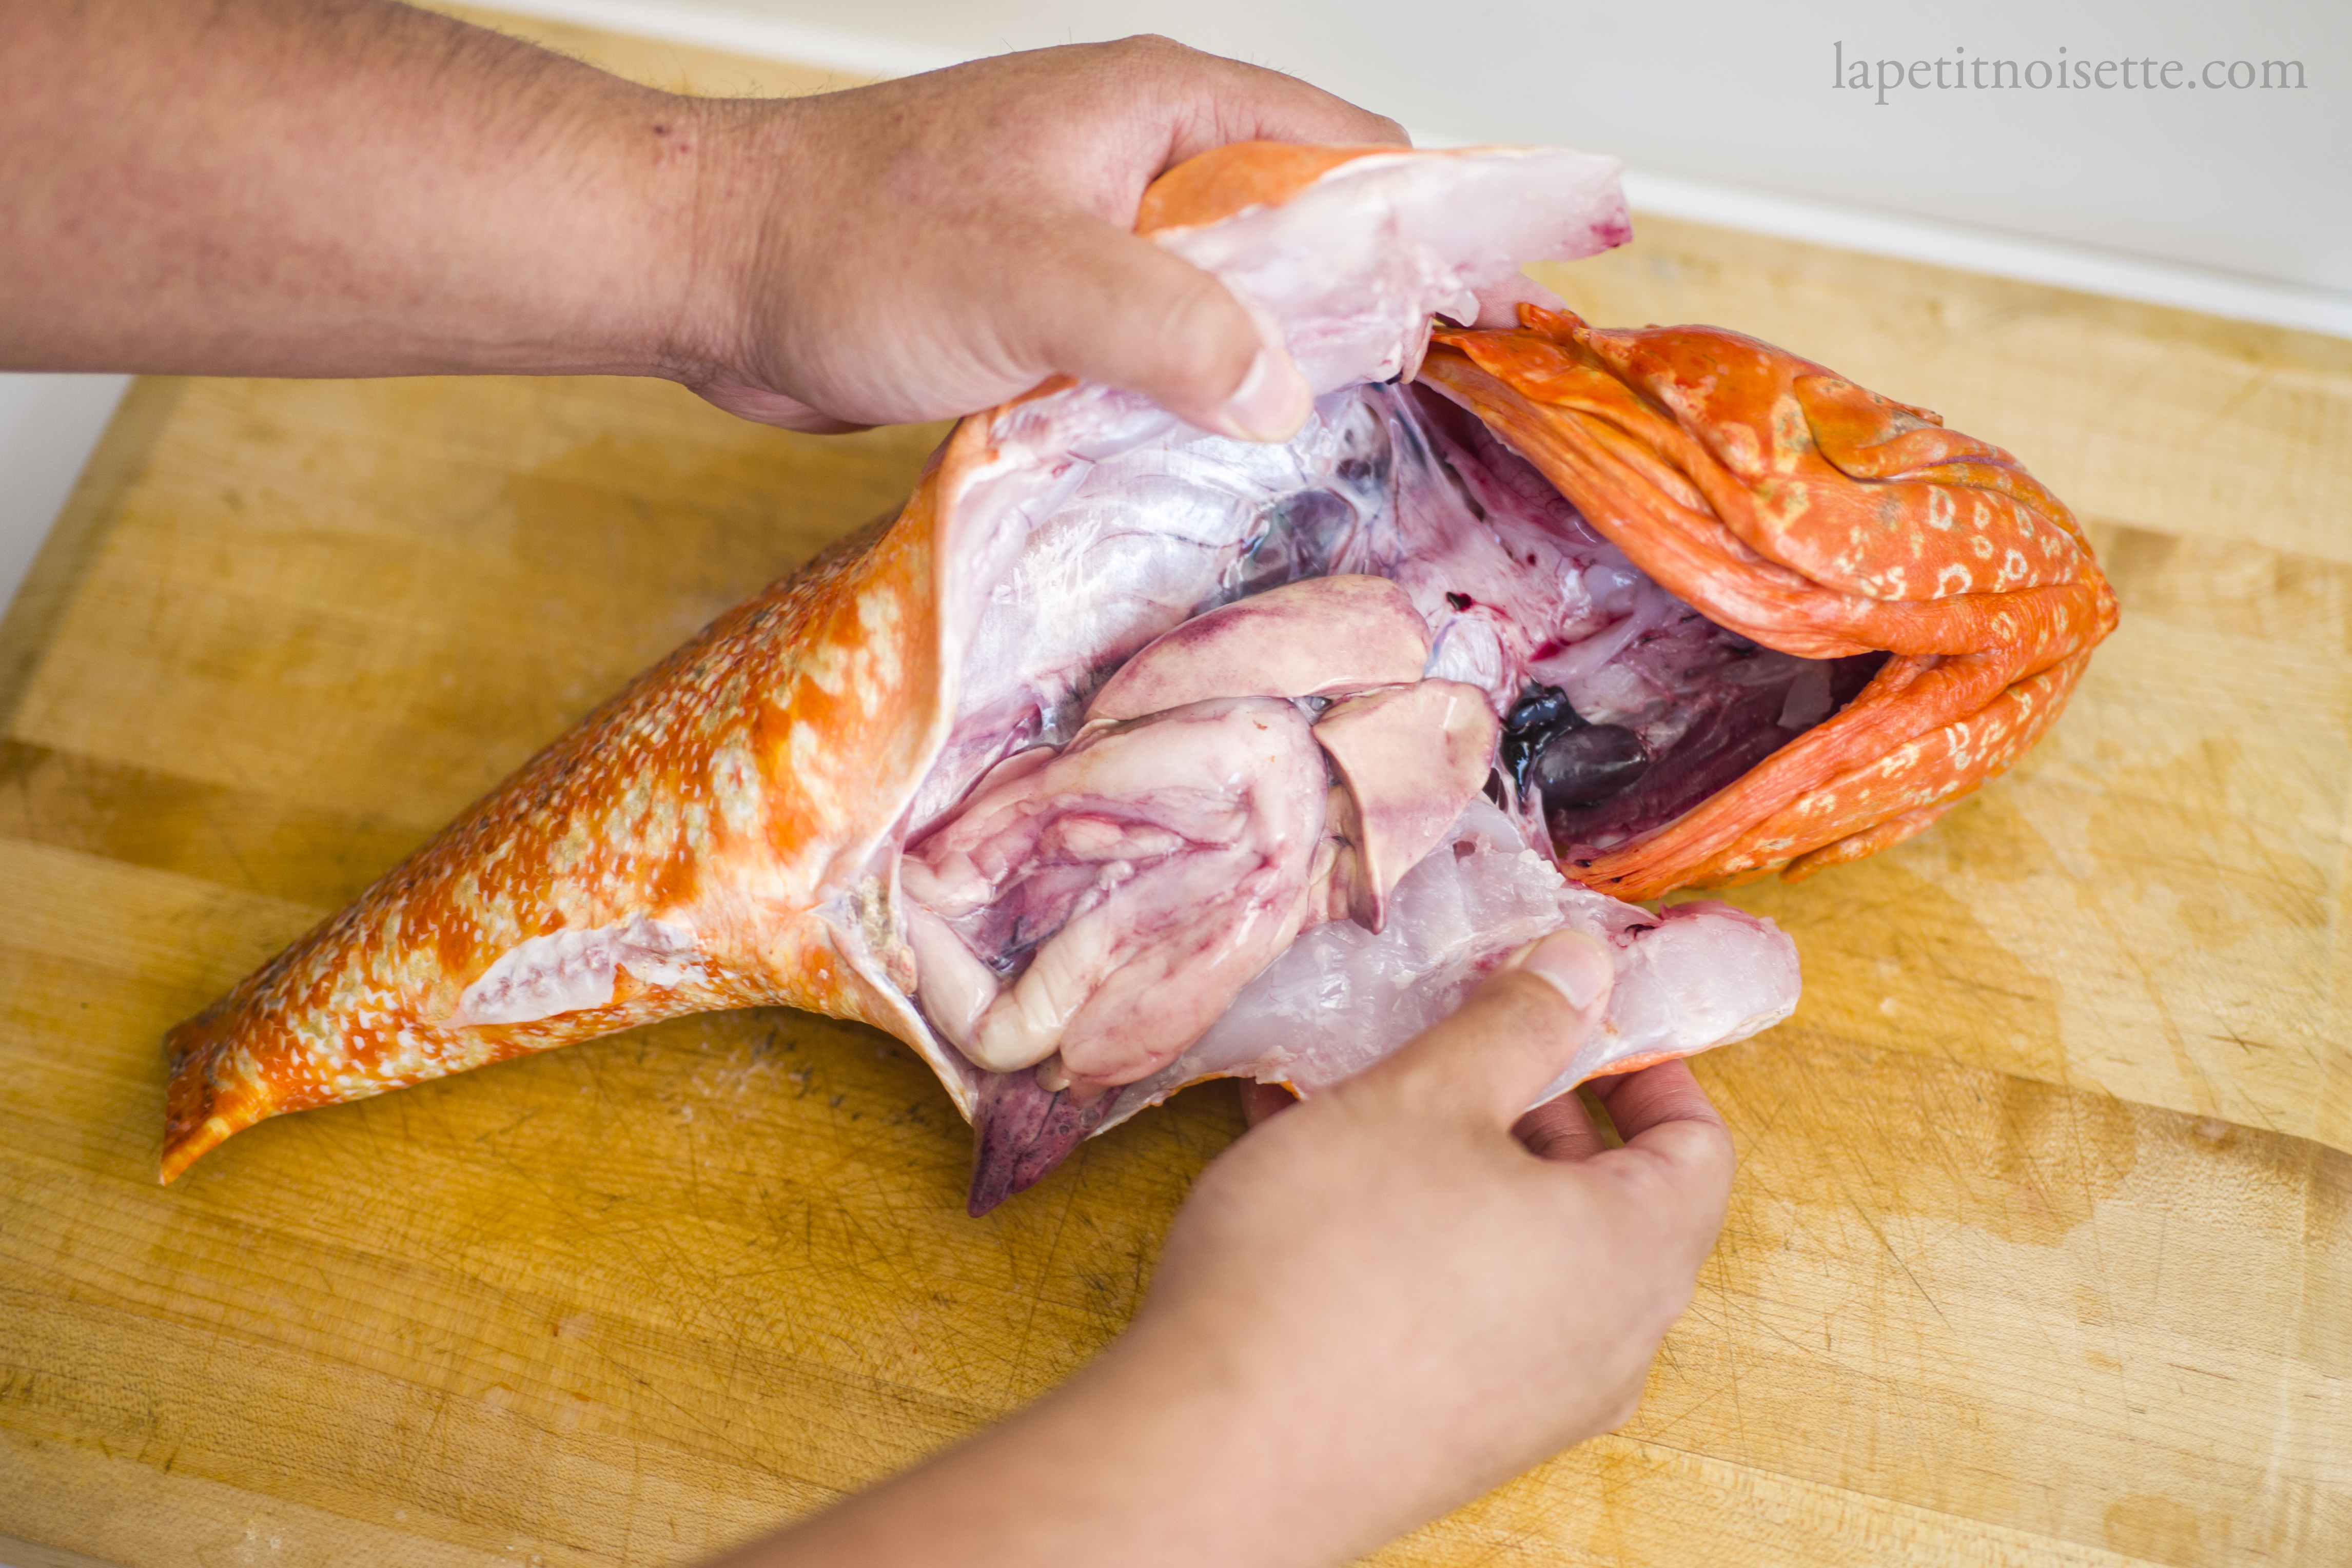
Open up the entire fish cavity and pull away the innards and gills, cutting away the point at which the gills are attached to the fish.
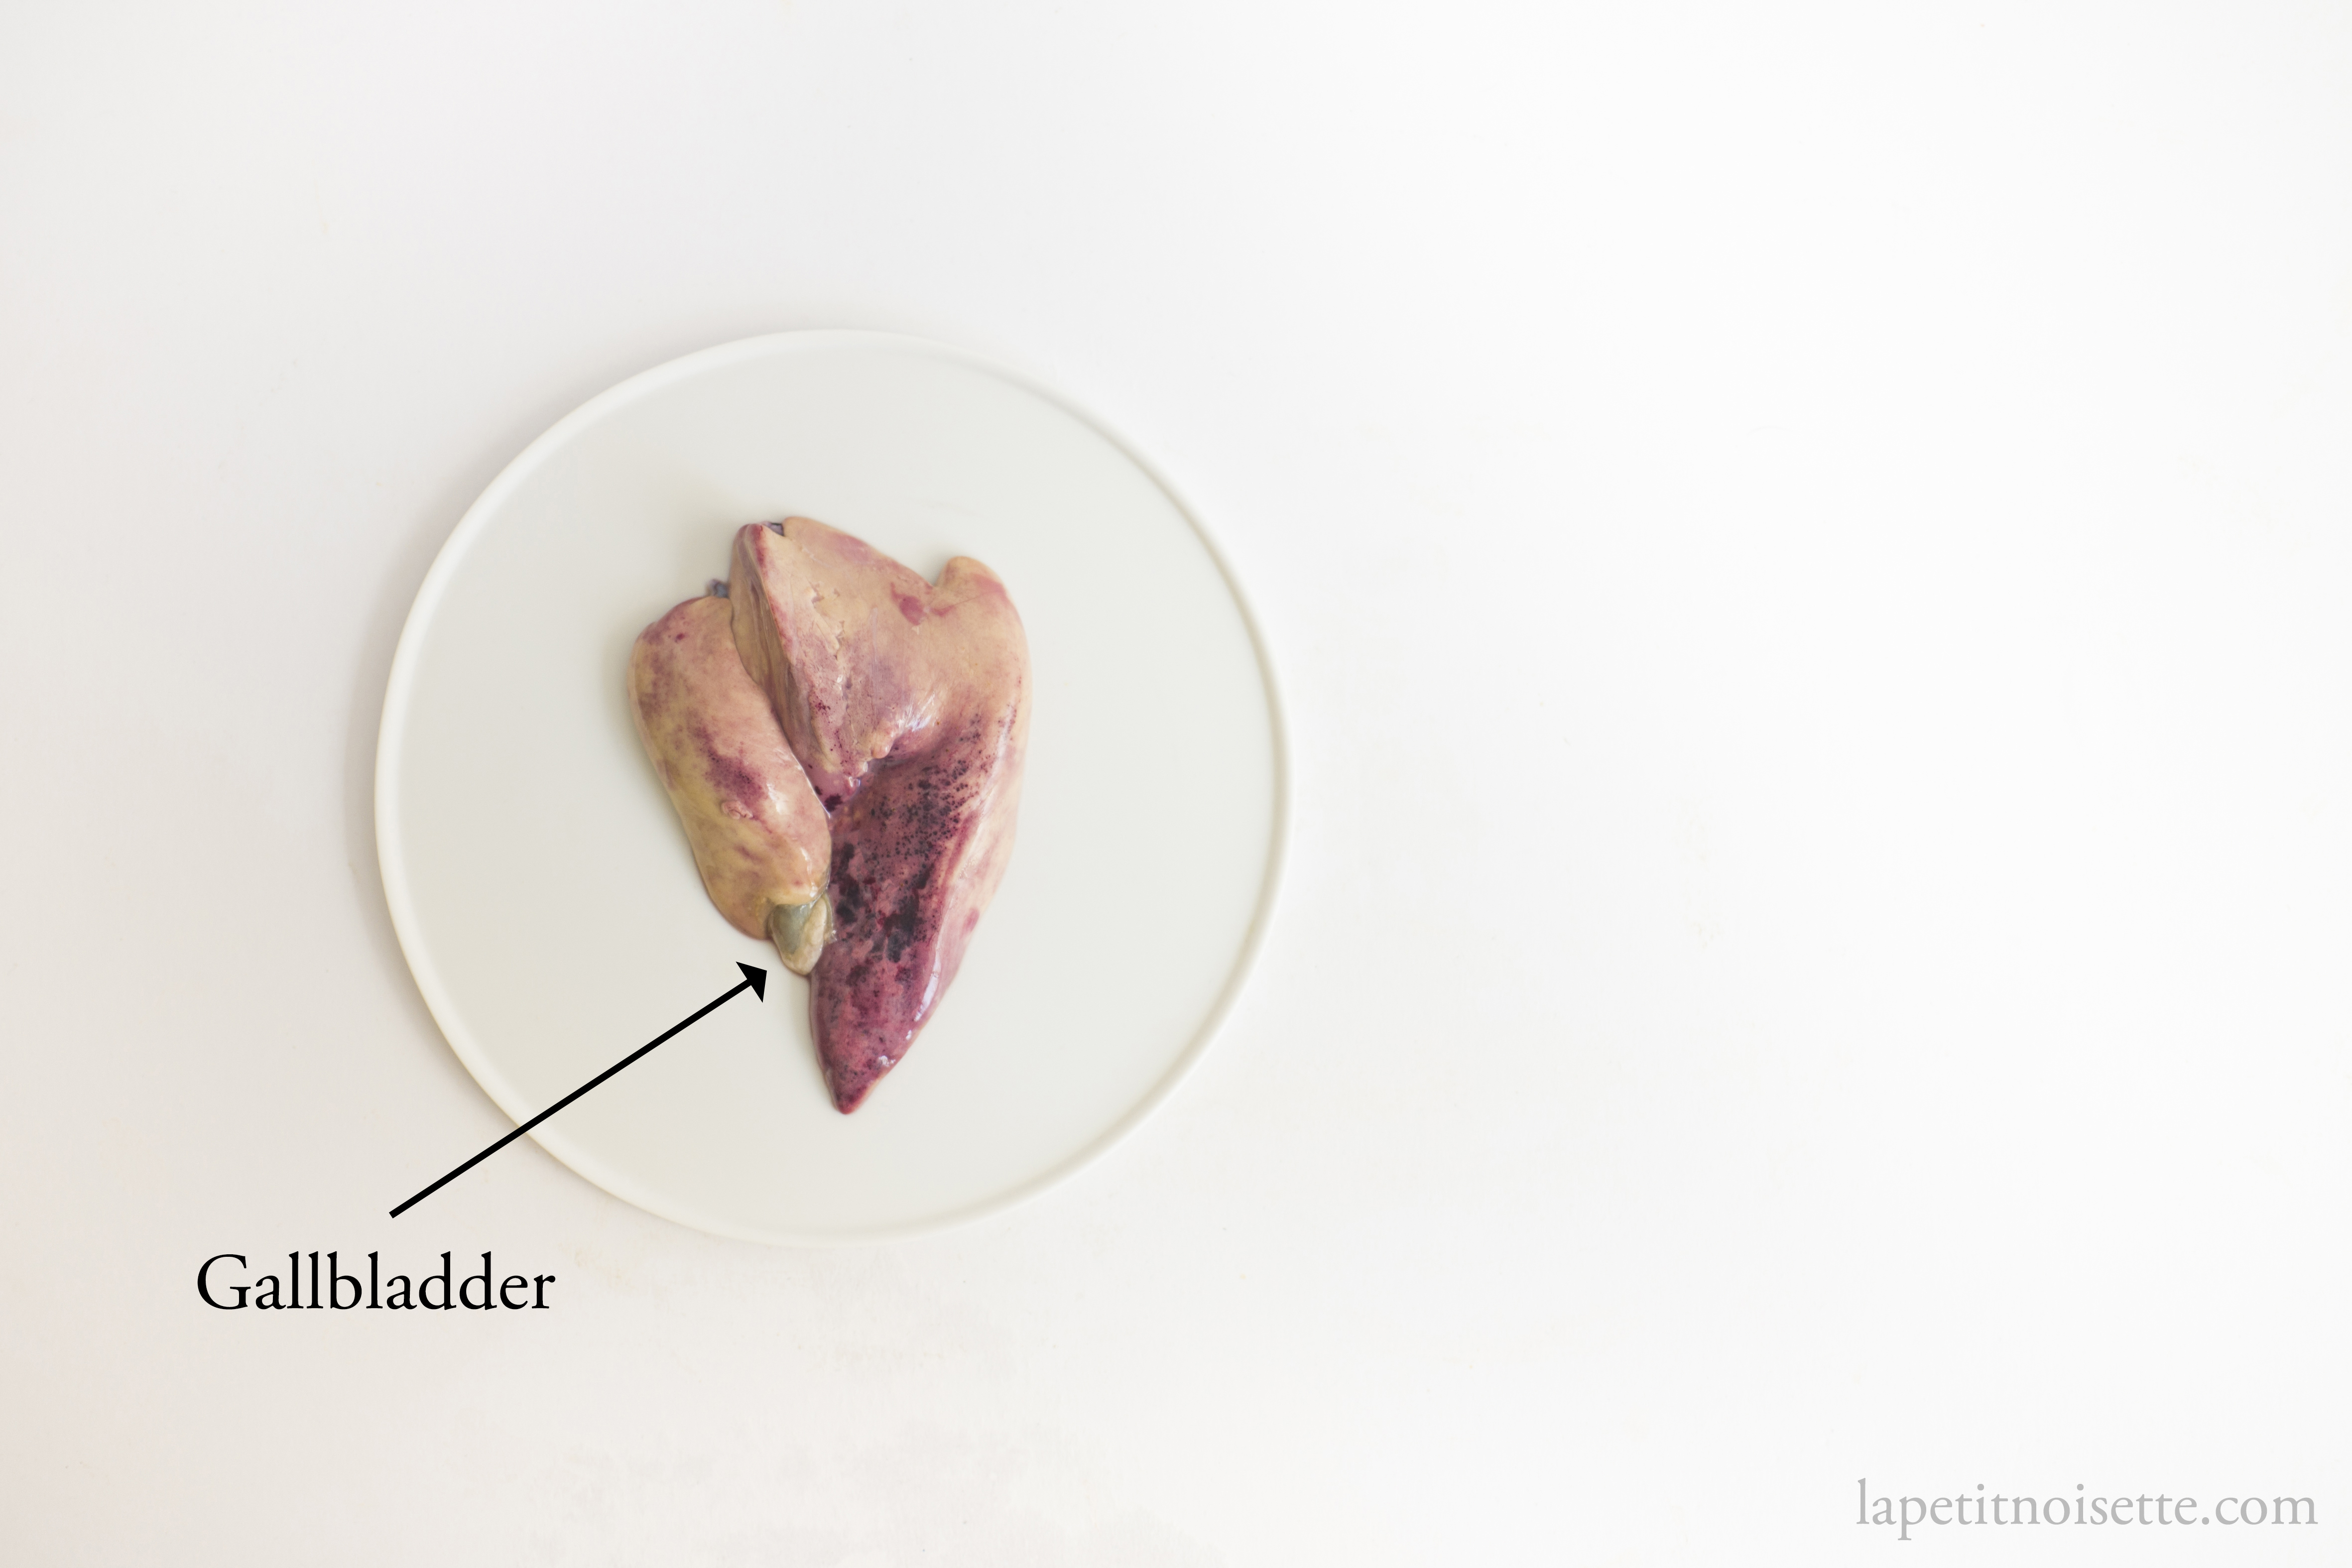
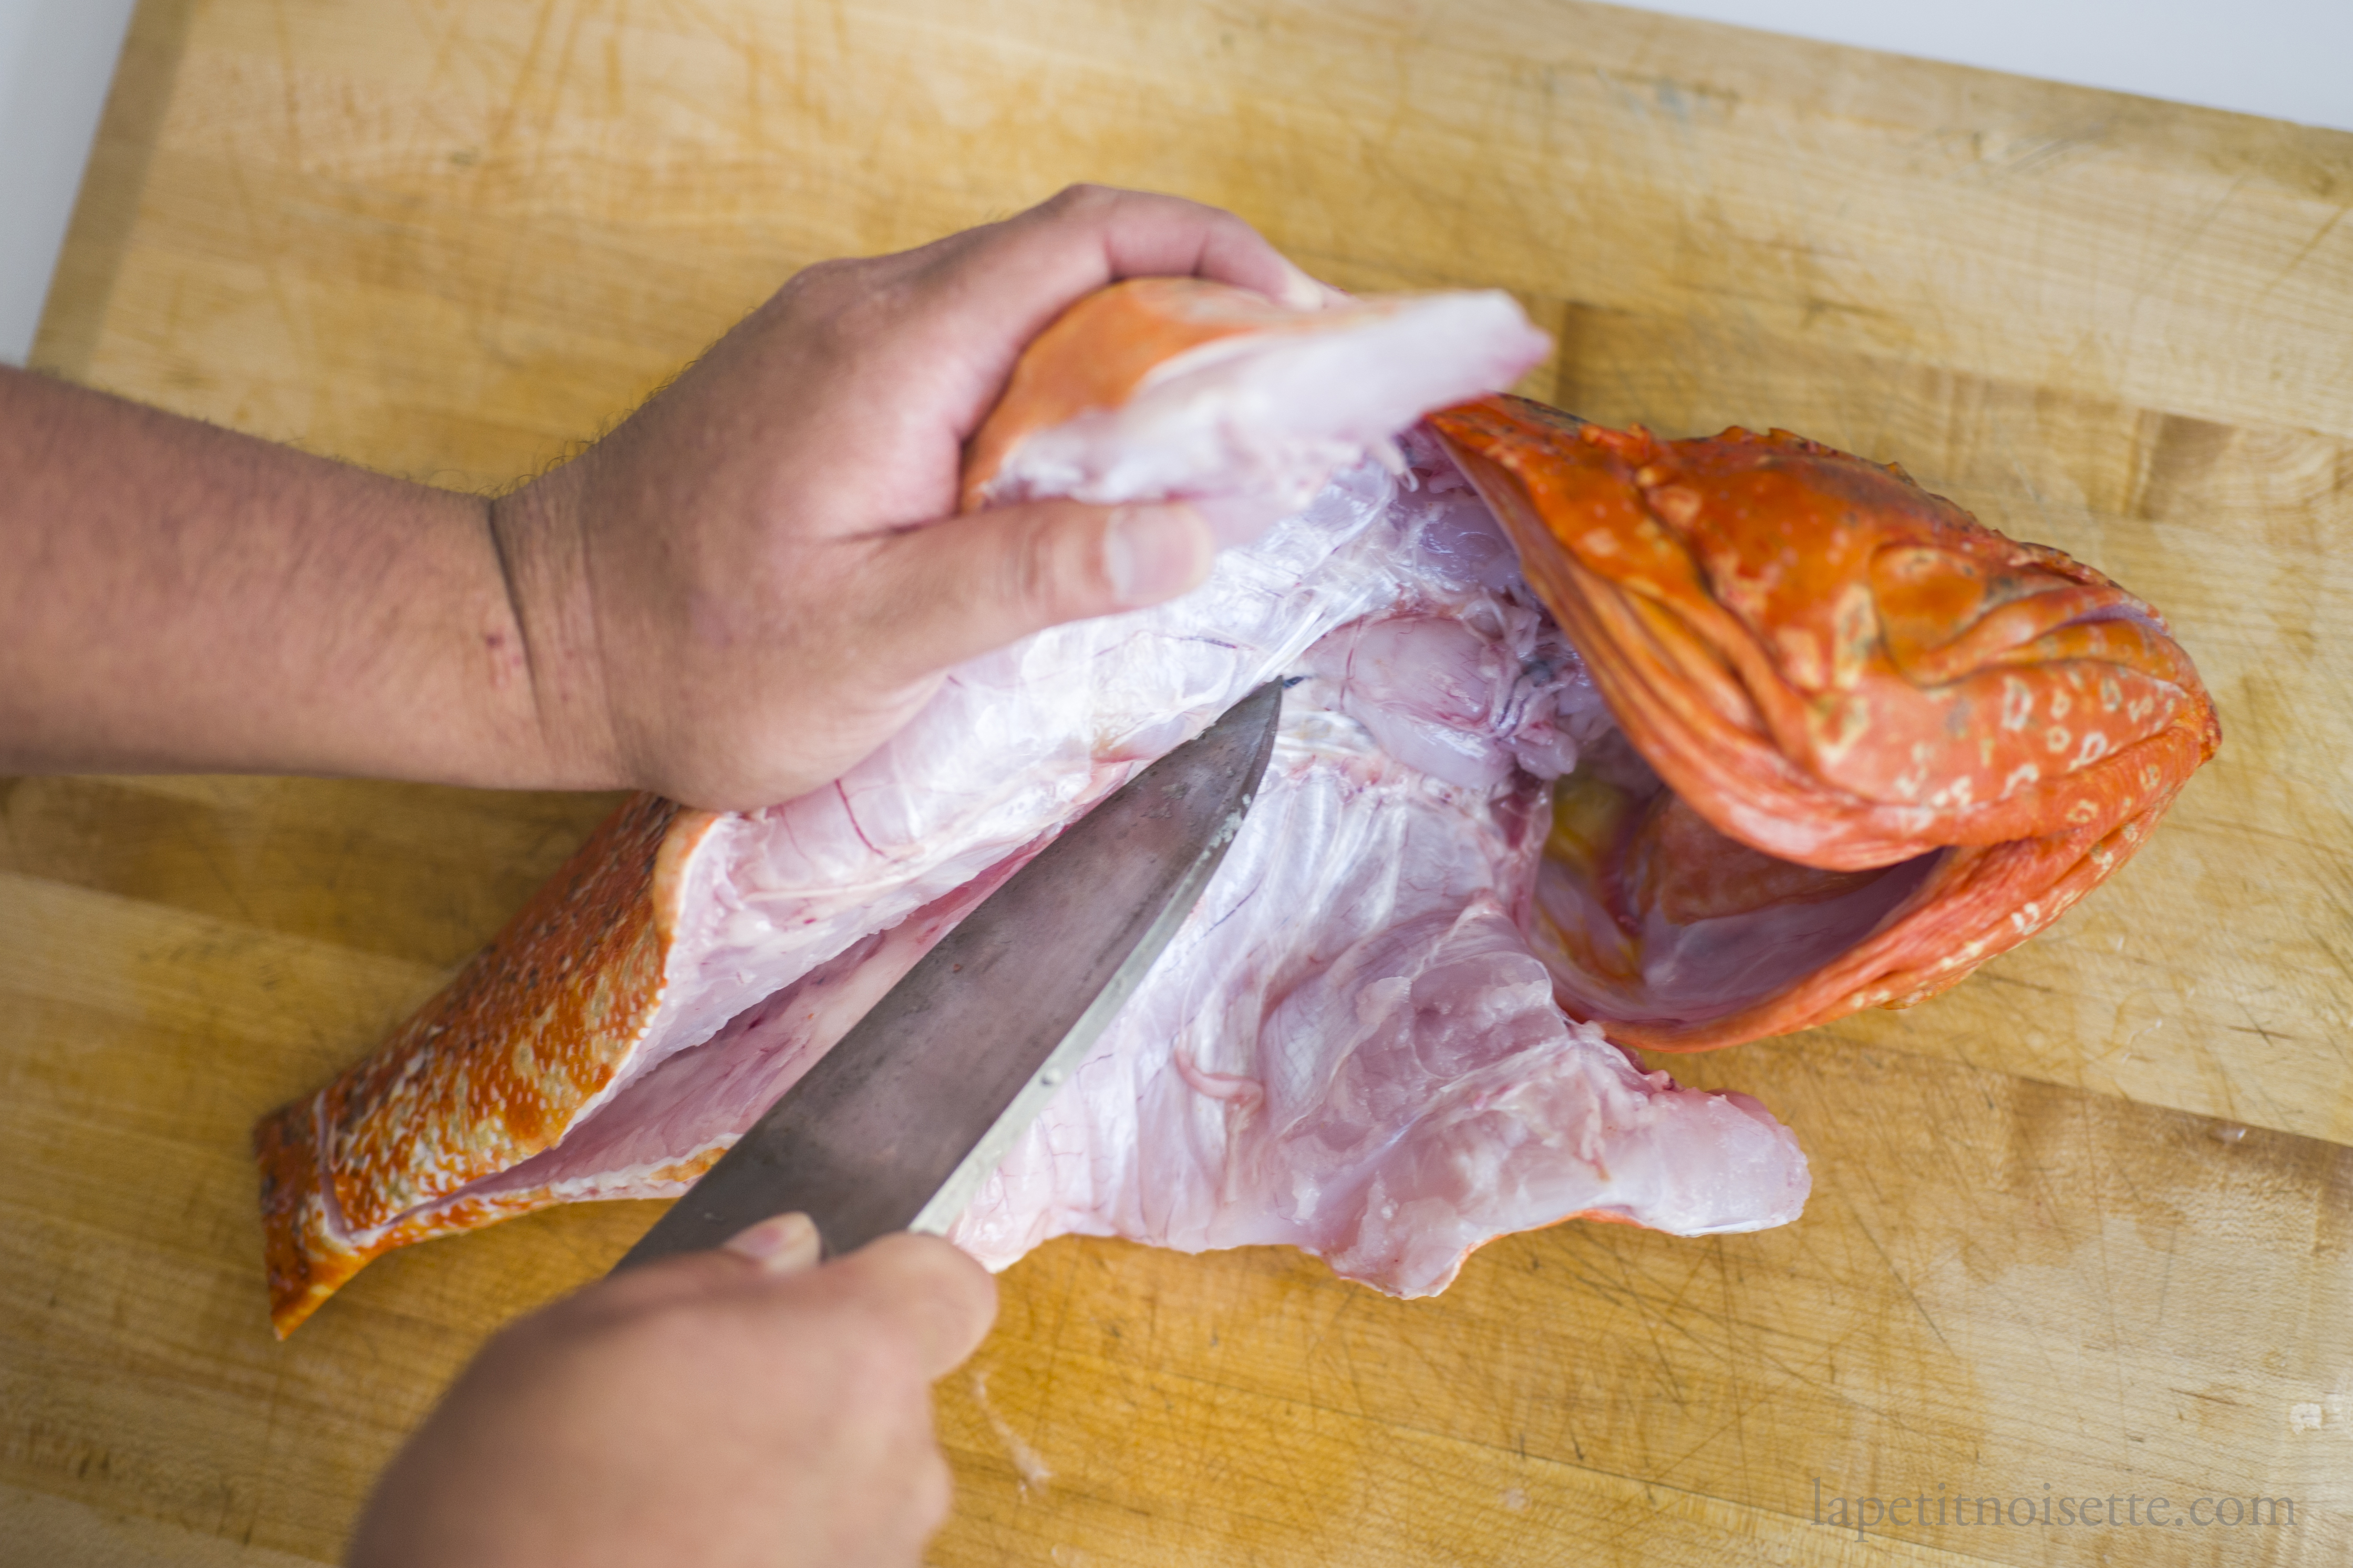
Reserve the liver and stomach from the fish which can be eaten. Be careful not to break the gallbladder attached to the liver as it’ll impart a bitter taste to the liver.
Rinse the cavity with cold water and clean thoroughly. Wash the chopping board and wipe dry.
Beneath the internal organs of the fish is a bloodline that runs under the spine of the fish. Cut open the bloodline by running the knife through it all the way. Whilst under a light stream of cold water, wash the cavity and remove the blood from the bloodline using a sponge or toothbrush.
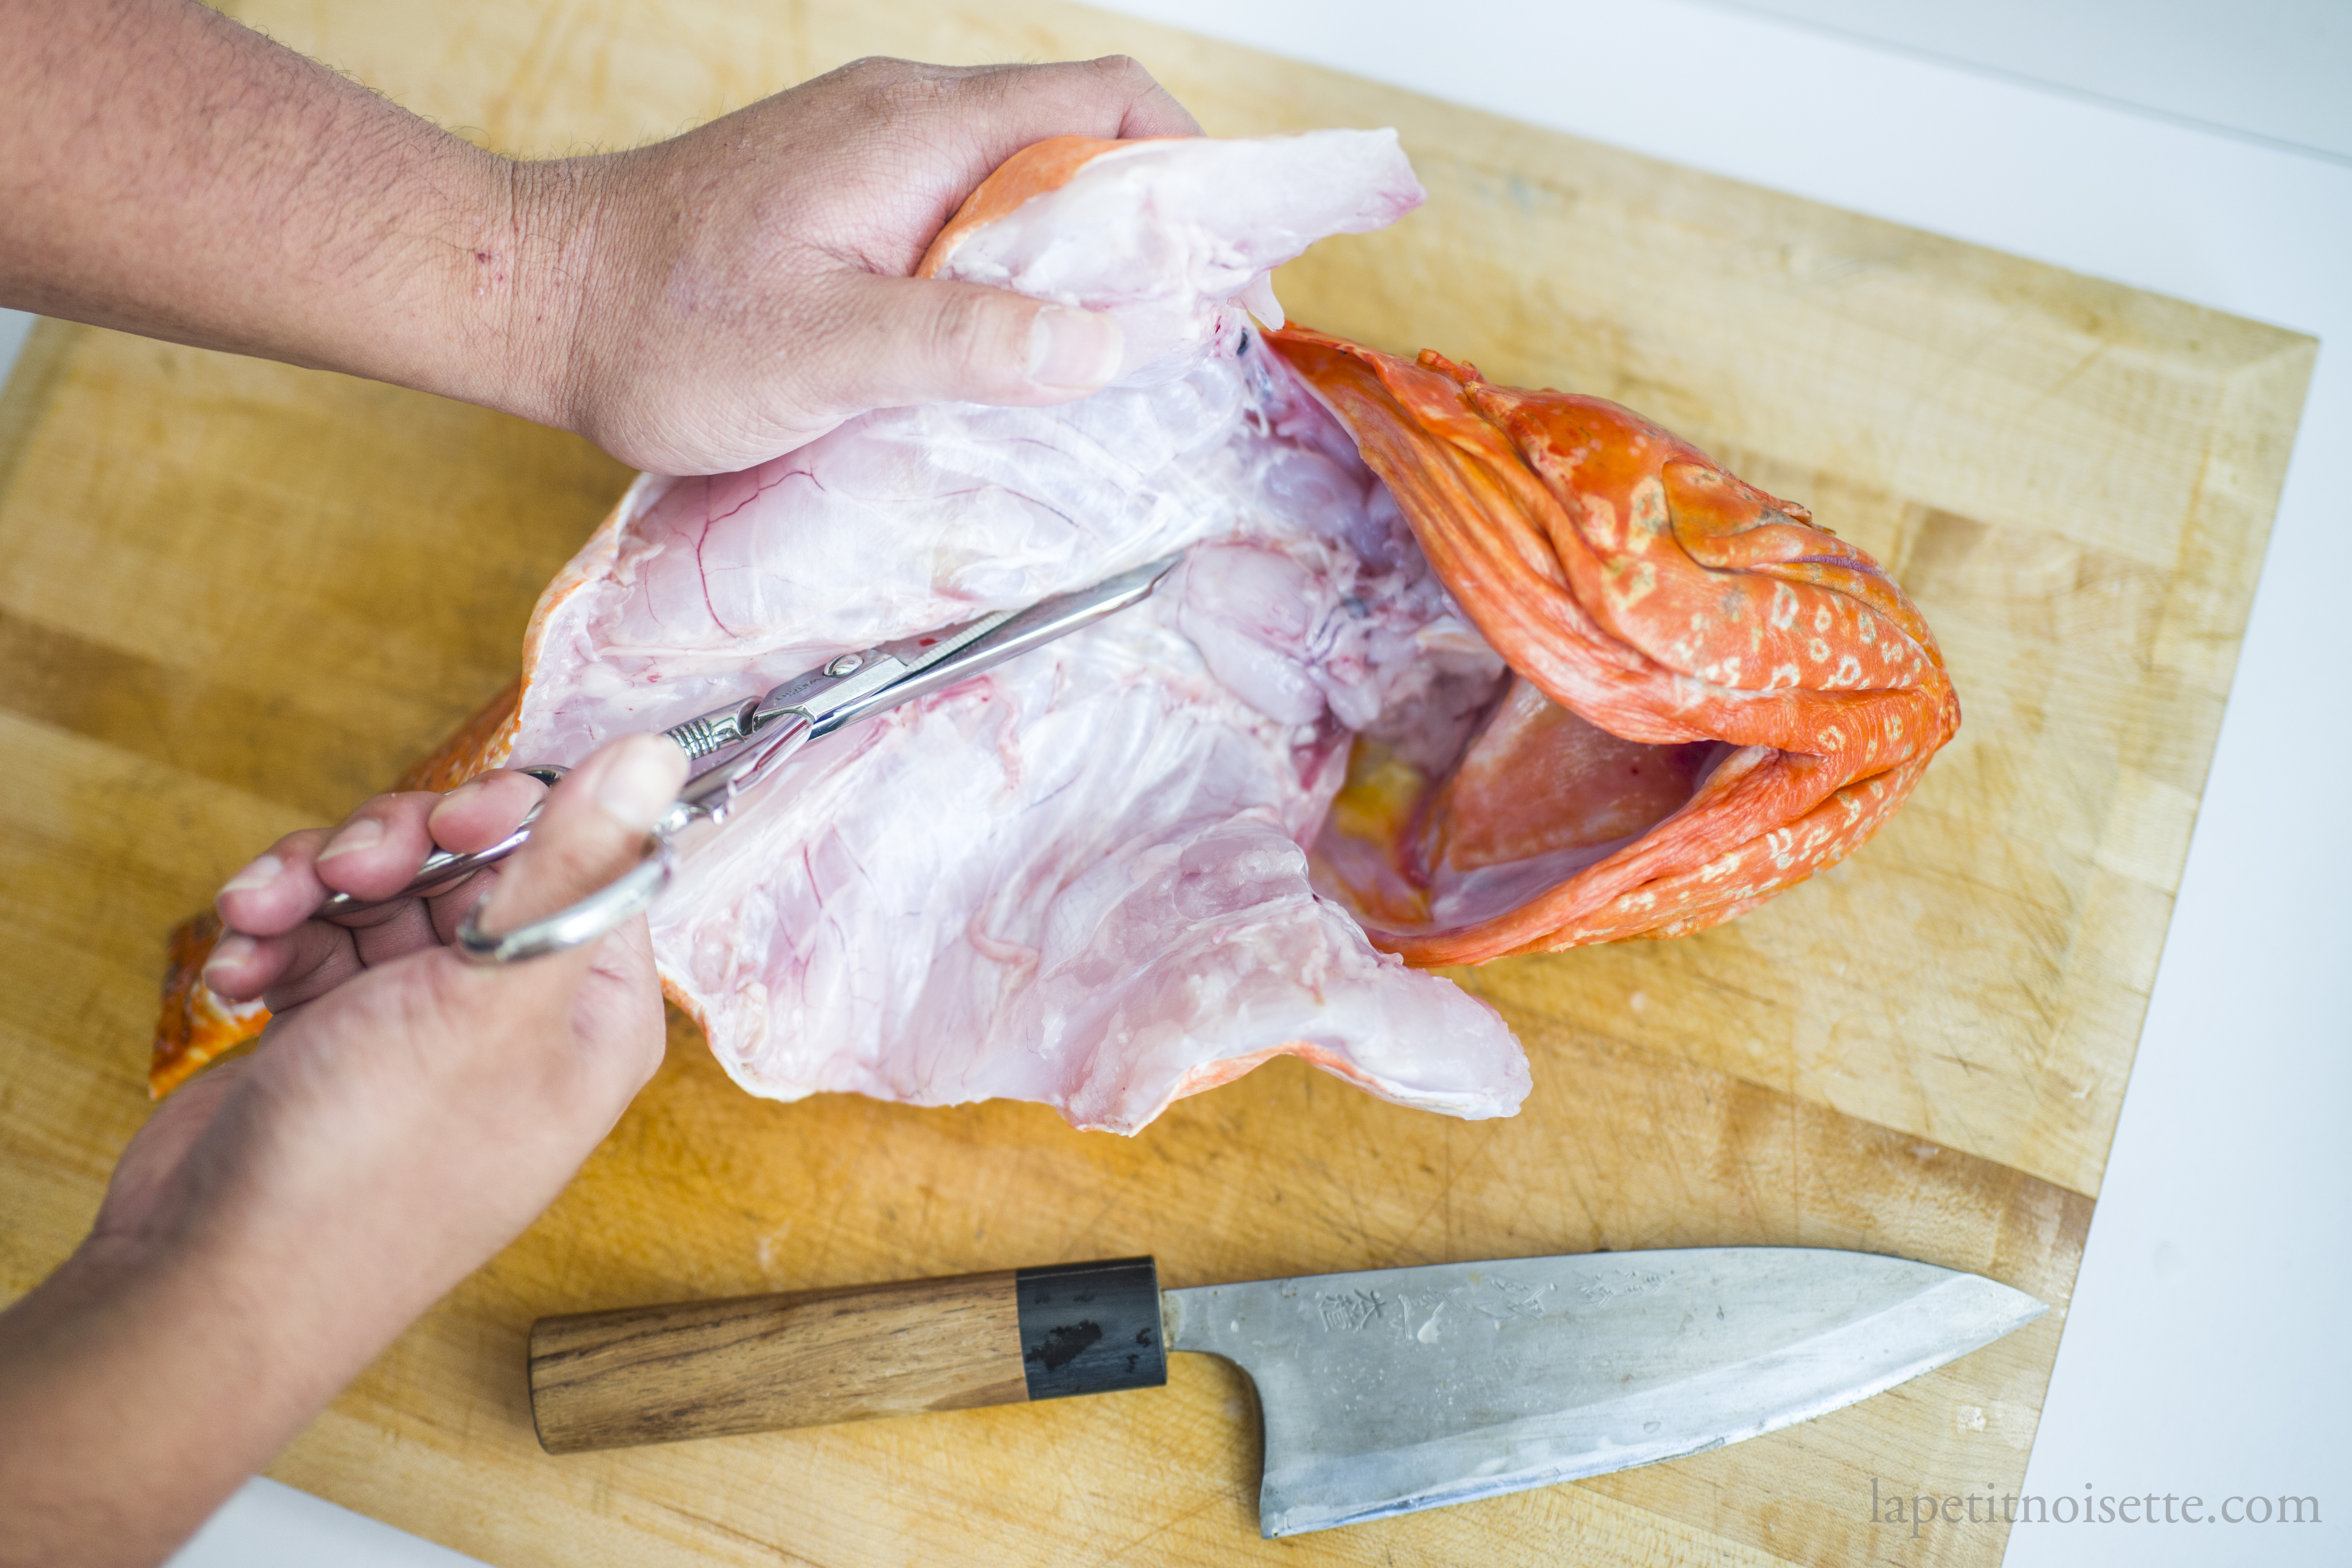
Next, open the internal cavity of the fish, inserting the tip of the knife and breaking the rib bones, separating them from the backbone as shown above. If you don’t have a thick knife to break the rib bones, use a strong pair of kitchen scissors instead as shown below.
Next, cut the flesh starting from the end of the belly cavity all the way down to the tail, angling the blade towards the bone.
Turn the fish around and place the knife above the dorsal fin. Use your other hand to support the fish. In long cutting motions, separate the flesh from the spine of the fish, angling your blade downwards so that you can feel your blade running along the spine, minimising waste. if the long cutting motions prevents the flesh from being damaged too much from multiple cuts. Cut as close to the spine as possible to prevent flesh from being left on the bone.
Continue the cutting motion until the entire fillet is separated from the fish. Make an incision at the tail of the fish and cut off the flesh attaching the fillet to the head and tail. Repeat with the otherside of the fish to obtain a second fillet.
Place a fillet skin side down. Flip your knife so that it is facing upwards and gently separate the rib bones from the flesh just where it meets the pin bones.

Turn your knife back and place the knife under the rib cage, cutting as to gently separate the rib cage from the flesh, angling the knife upwards towards the ribcage to reduce waste. Don’t worry about cutting yourself as the rib cage should be protecting your fingers.
To remove the pin bones, pull the pin bones using a pair of tweezers in the direction towards the head. Pulling the pin bones towards the tail is easier but will damage the flesh. Dip the tweezers in water to clean them occasionally. Repeat until you can not feel any more pin bones. Remember to use a firm grip as not to break the pin bones, leaving bone fragments inside the fish. It is better to pull the pin bones slowly and steadily, rather than quickly.
To finish preparing the Onikasago, repeat for the other fillet.
Generously salt a colander and place the fillets on a colander. Salt the flesh of the fish as well.
Allow to rest for 20 to 25 minutes depending on the size. During that time, remove the pin bones of the fish. After salting, wash off the salt and place the fillets skin side down on a chopping board.
Remove the skin off the fillets by making a small cut underneath the tail of the fillet between the flesh and skin. Start by cutting into the flesh and stopping just at the skin. When the blade just touches the skin, use a back and forth motion on the skin to gently separate the fresh from the skin whilst angling the blade until it is flat. The blade should remain still whilst you only move the skin.
Continue the cutting motion until all the skin has been removed from the flesh. If the skin breaks halfway, don’t worry and start from the other end of the fillet. Using a paper towel to grip the skin of the fish allows you to have a more stable hold on the fillet, making it easier to cut.
The fish is now ready to be eaten as sashimi. Reserve the bones and head of the fish for amazing fish stock. The head is particularly good when used in miso soup. The liver and stomach are also particularly good for eating. Blanch the liver in water with a little added cooking sake for 3 minutes before mashing together with soy sauce for a dipping sauce. More information here.